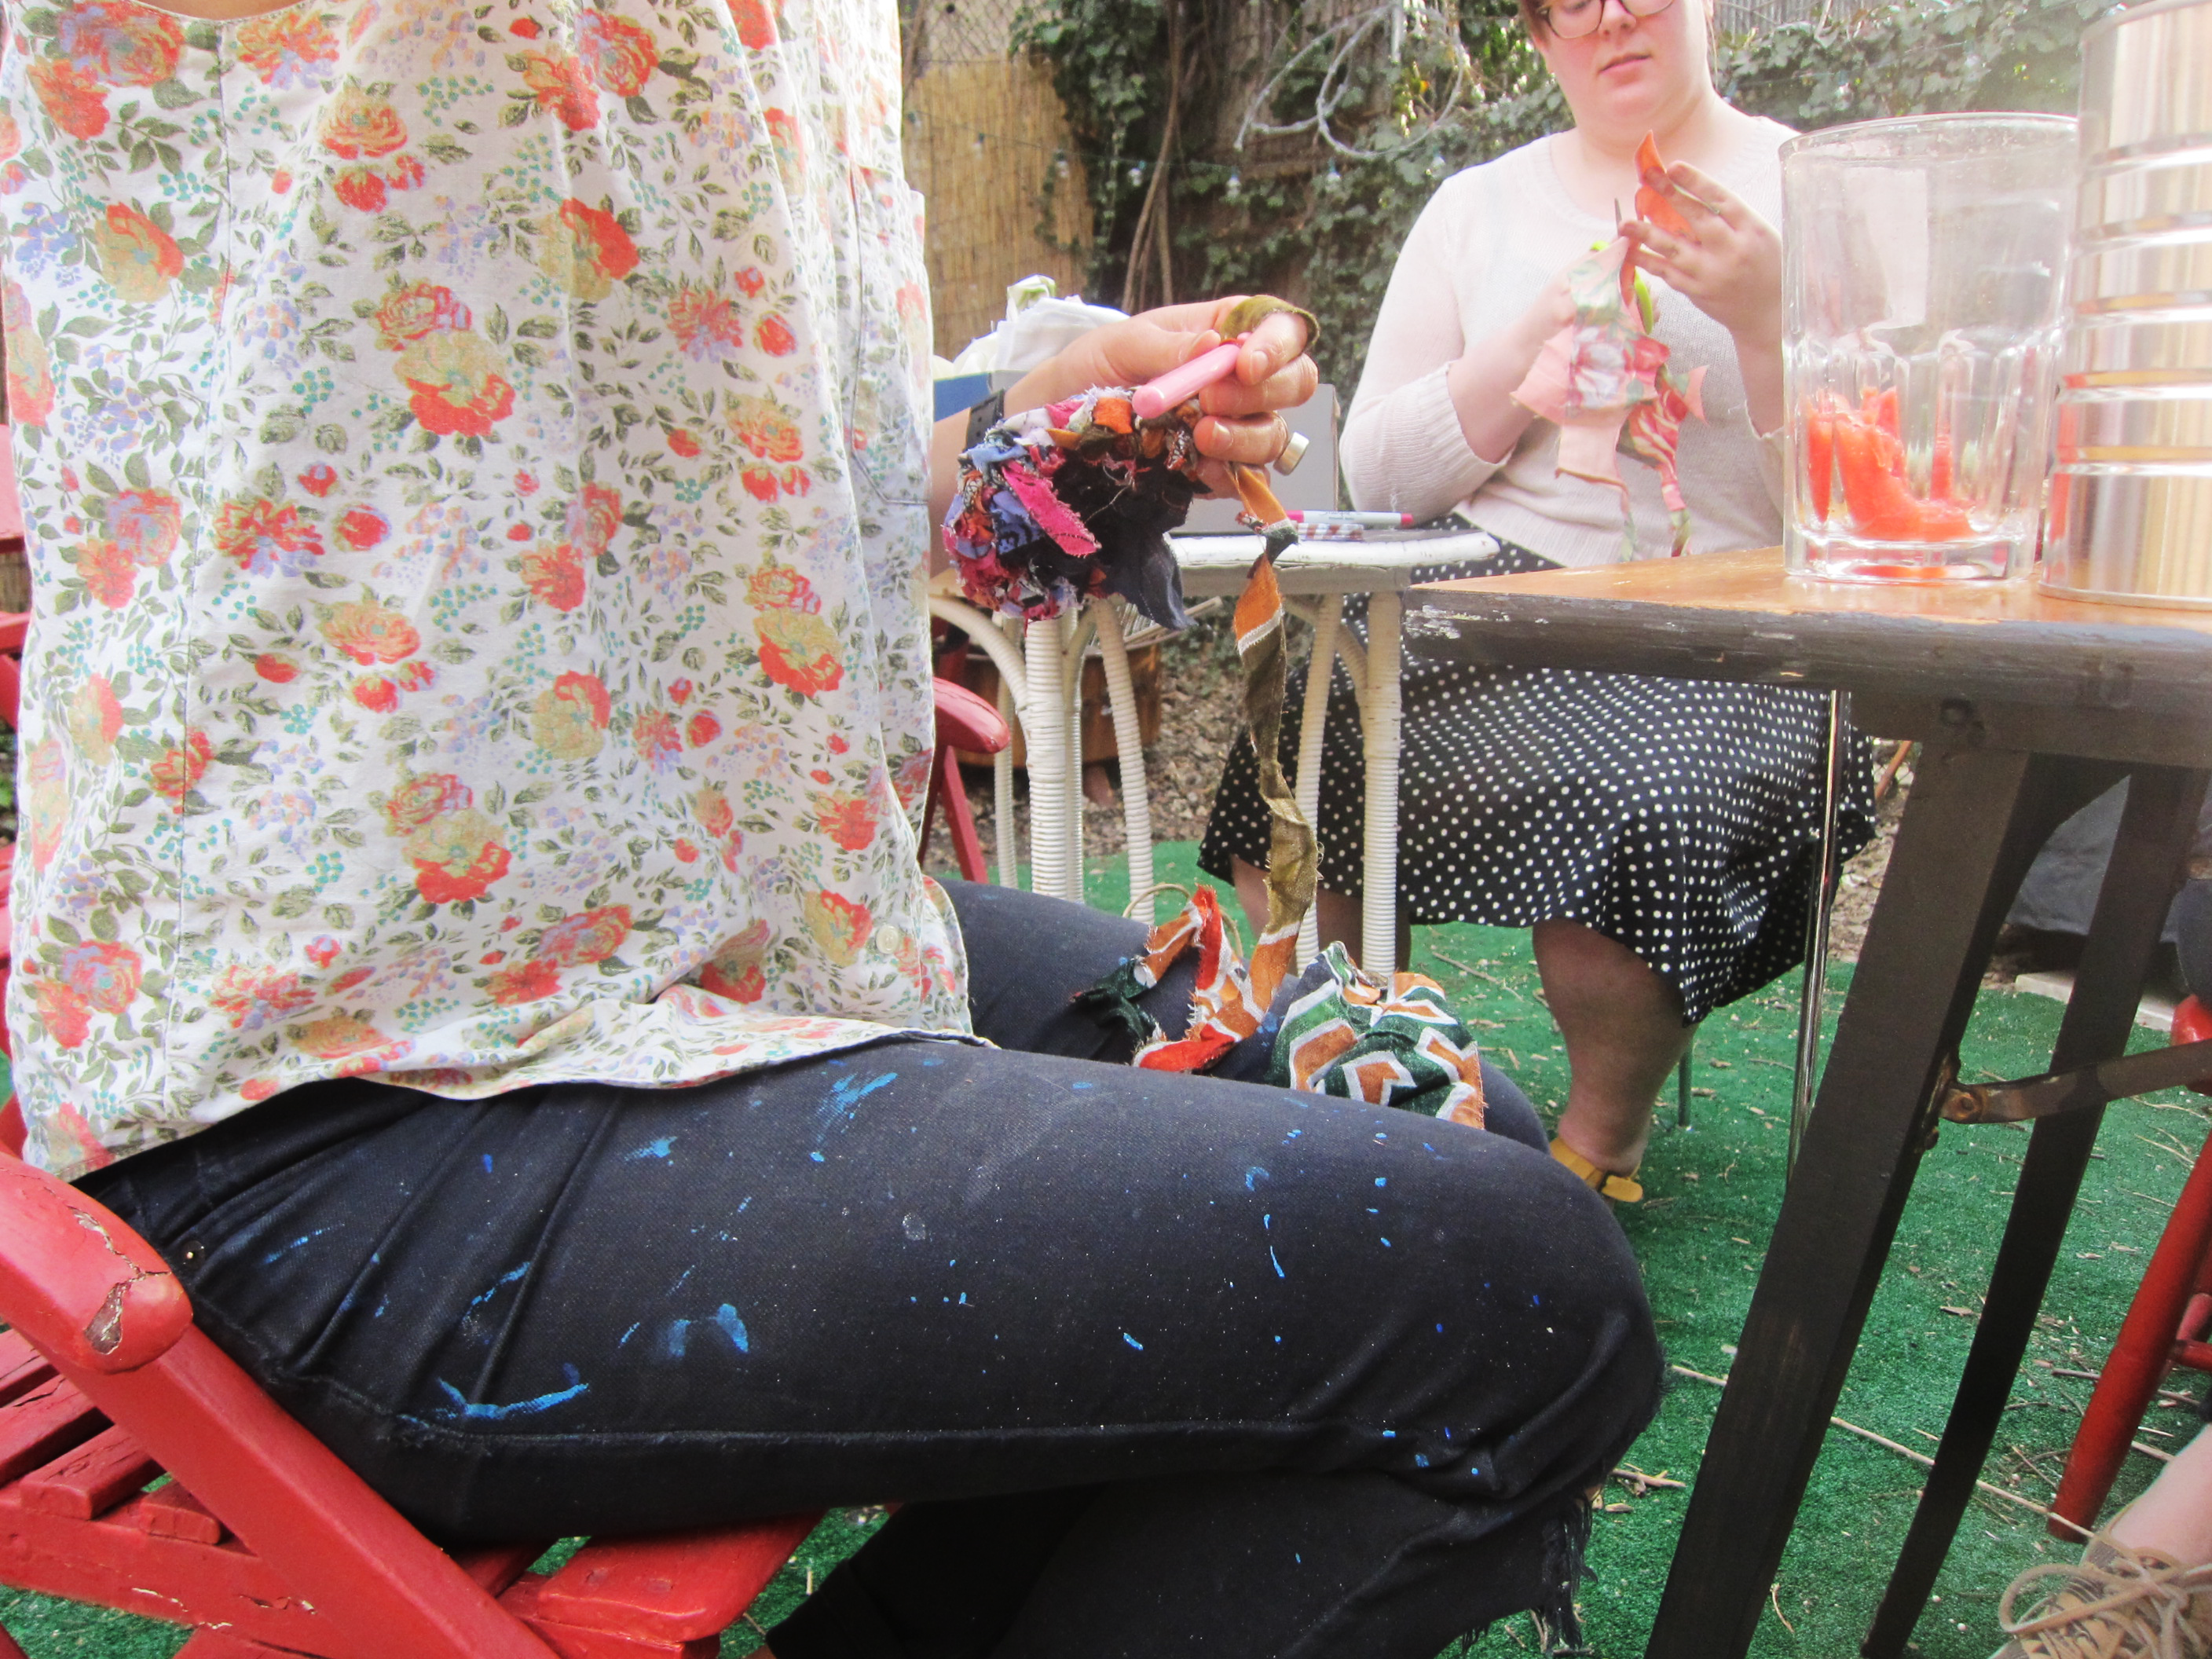
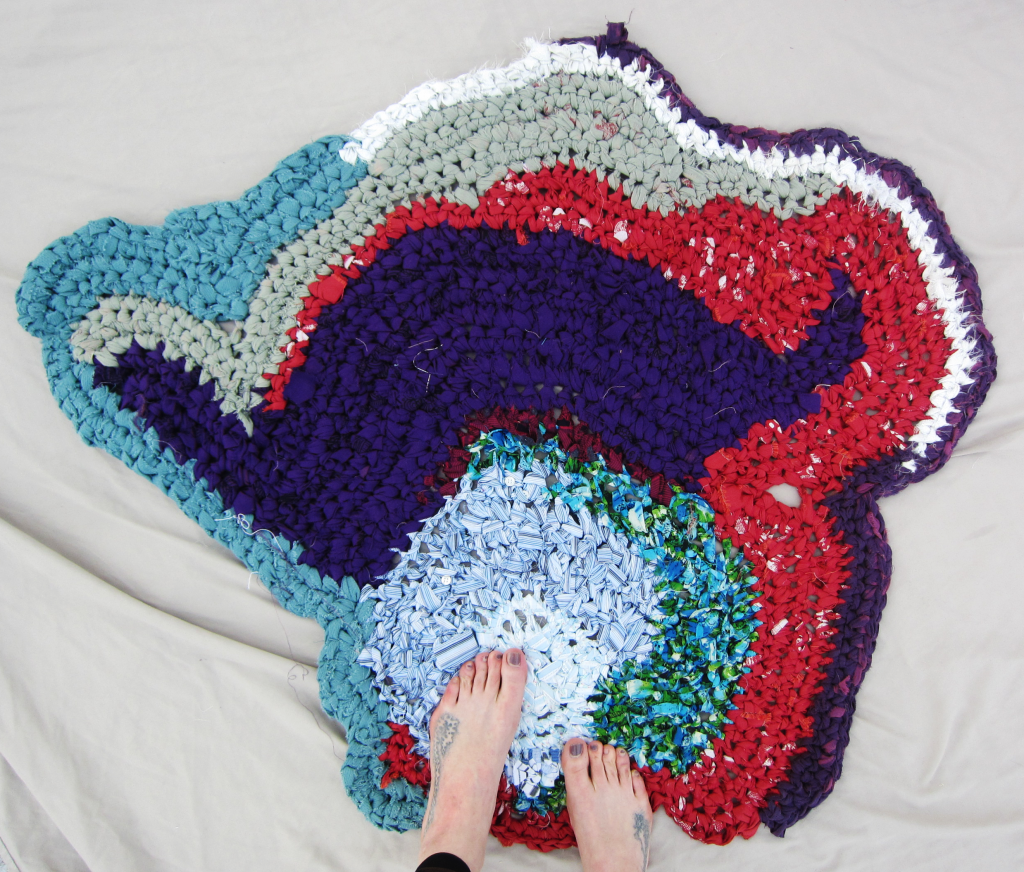
A few weekends ago we crafted in the backyard of BK TAC's after-school educator, Joey Korein's house for hours into the sunset on a warm Sunday, drinking sparkling, fruity drinks and getting to know each other better. Some of the girl's made repurposed fabric flower garlands, and Joey reeducated me (an 8 yr old taught me at TAC's camp last summer) about how to crochet a flat circle, so I could make a rag rug. After sadly missing Kayla Carpitella's Rag Rug After Workshop, I've been obsessed with creating a rag rug. Rugs are in general, amazing and rag rugs grow quickly, are super thick, soft and potentially very beautiful and colorful. And you can throw it in the washer!
Recently, I’ve been reading a really interesting textile history book, where the pro-union and early feminist historian, Louise Lamprey, delves into the history of spinning, and how its always been something that women did...never men:
"Spinning was so important a part of women's work that one may say they spun their way into history. Girls learned to spin so early that they hardly remembered when they did not know how. They went on spinning, laying up store of thread if they had thrifty mothers, to be woven into their wedding outfit of linen, blankets, and coverlets. Spinster to this day means an unmarried woman."
And since before the industrial revolution, machines have taken their place. In the past girls would spin raw material into thread to create textiles for their family and home. In this modern world exploding at the seams with overproduction and massive waste, I think it's time to open all of our eyes to the inherent beauty in everything that surrounds us, and use our innate ability of love and creation to rejuvenate ourselves, our loved ones and our world.
These days, another's trash can be your treasure. You can just cut up rags and make them into rugs... or what I would like to call The People's Quilt. Rag Rugs are extremely forgiving in any mistakes you might make. I'm sure I made a ton. These leftover threads, and 'mistakes' we may or may not make, can and should be embraced. Just as we should embrace and empathize with everyman. I’ve chosen crochet, because it only requires one crochet hook (which is possible to make!), your two hands, old textiles and your creativity. There is no pattern in my tutorial, or math. I’ve instructed the tutorial in a way that can be interpreted in countless ways. With the foundation I’ve layed, I encourage you to explore your creativity and share your results and knowledge with others. Plus consider all the health benefits.

So I guess I'm a spinster. But in this modern world, I am happy that I am able to have the option to create beautiful and useful things, with my own hands, dancing their eternal dance.
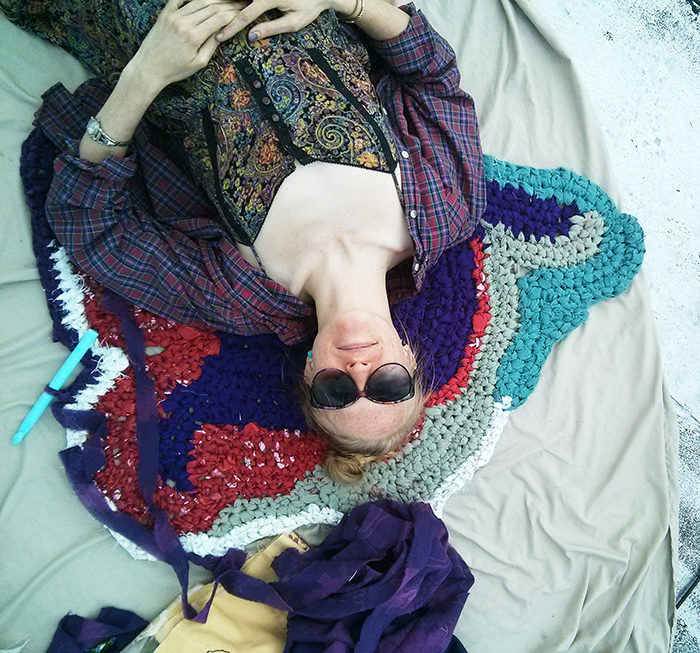
I crocheted this rug from scraps shared with me from friends, other creators and art supply give aways, such as the wonderful Fourth Arts Block NYC Load Out!
Now Finally . . . Instructions on How to Crochet a Rag Rug (People's Quilt!)
To create your rug, you need 1 Large Crochet Hook (10mm is nice n' easy) and lots of fabric scraps!
This is a really great beginner crochet project because rags don't advertise mistakes. So dive right in...really!
I used only woven fabric scraps, because woven fabric retains its' stiffness (it doesn't stretch like knit), which is easy for beginner crocheting, as well as perfect for creating a thick rug! You can use anything ≥ 1inch X 12inches, so old clothing, old sheets, what you have around!
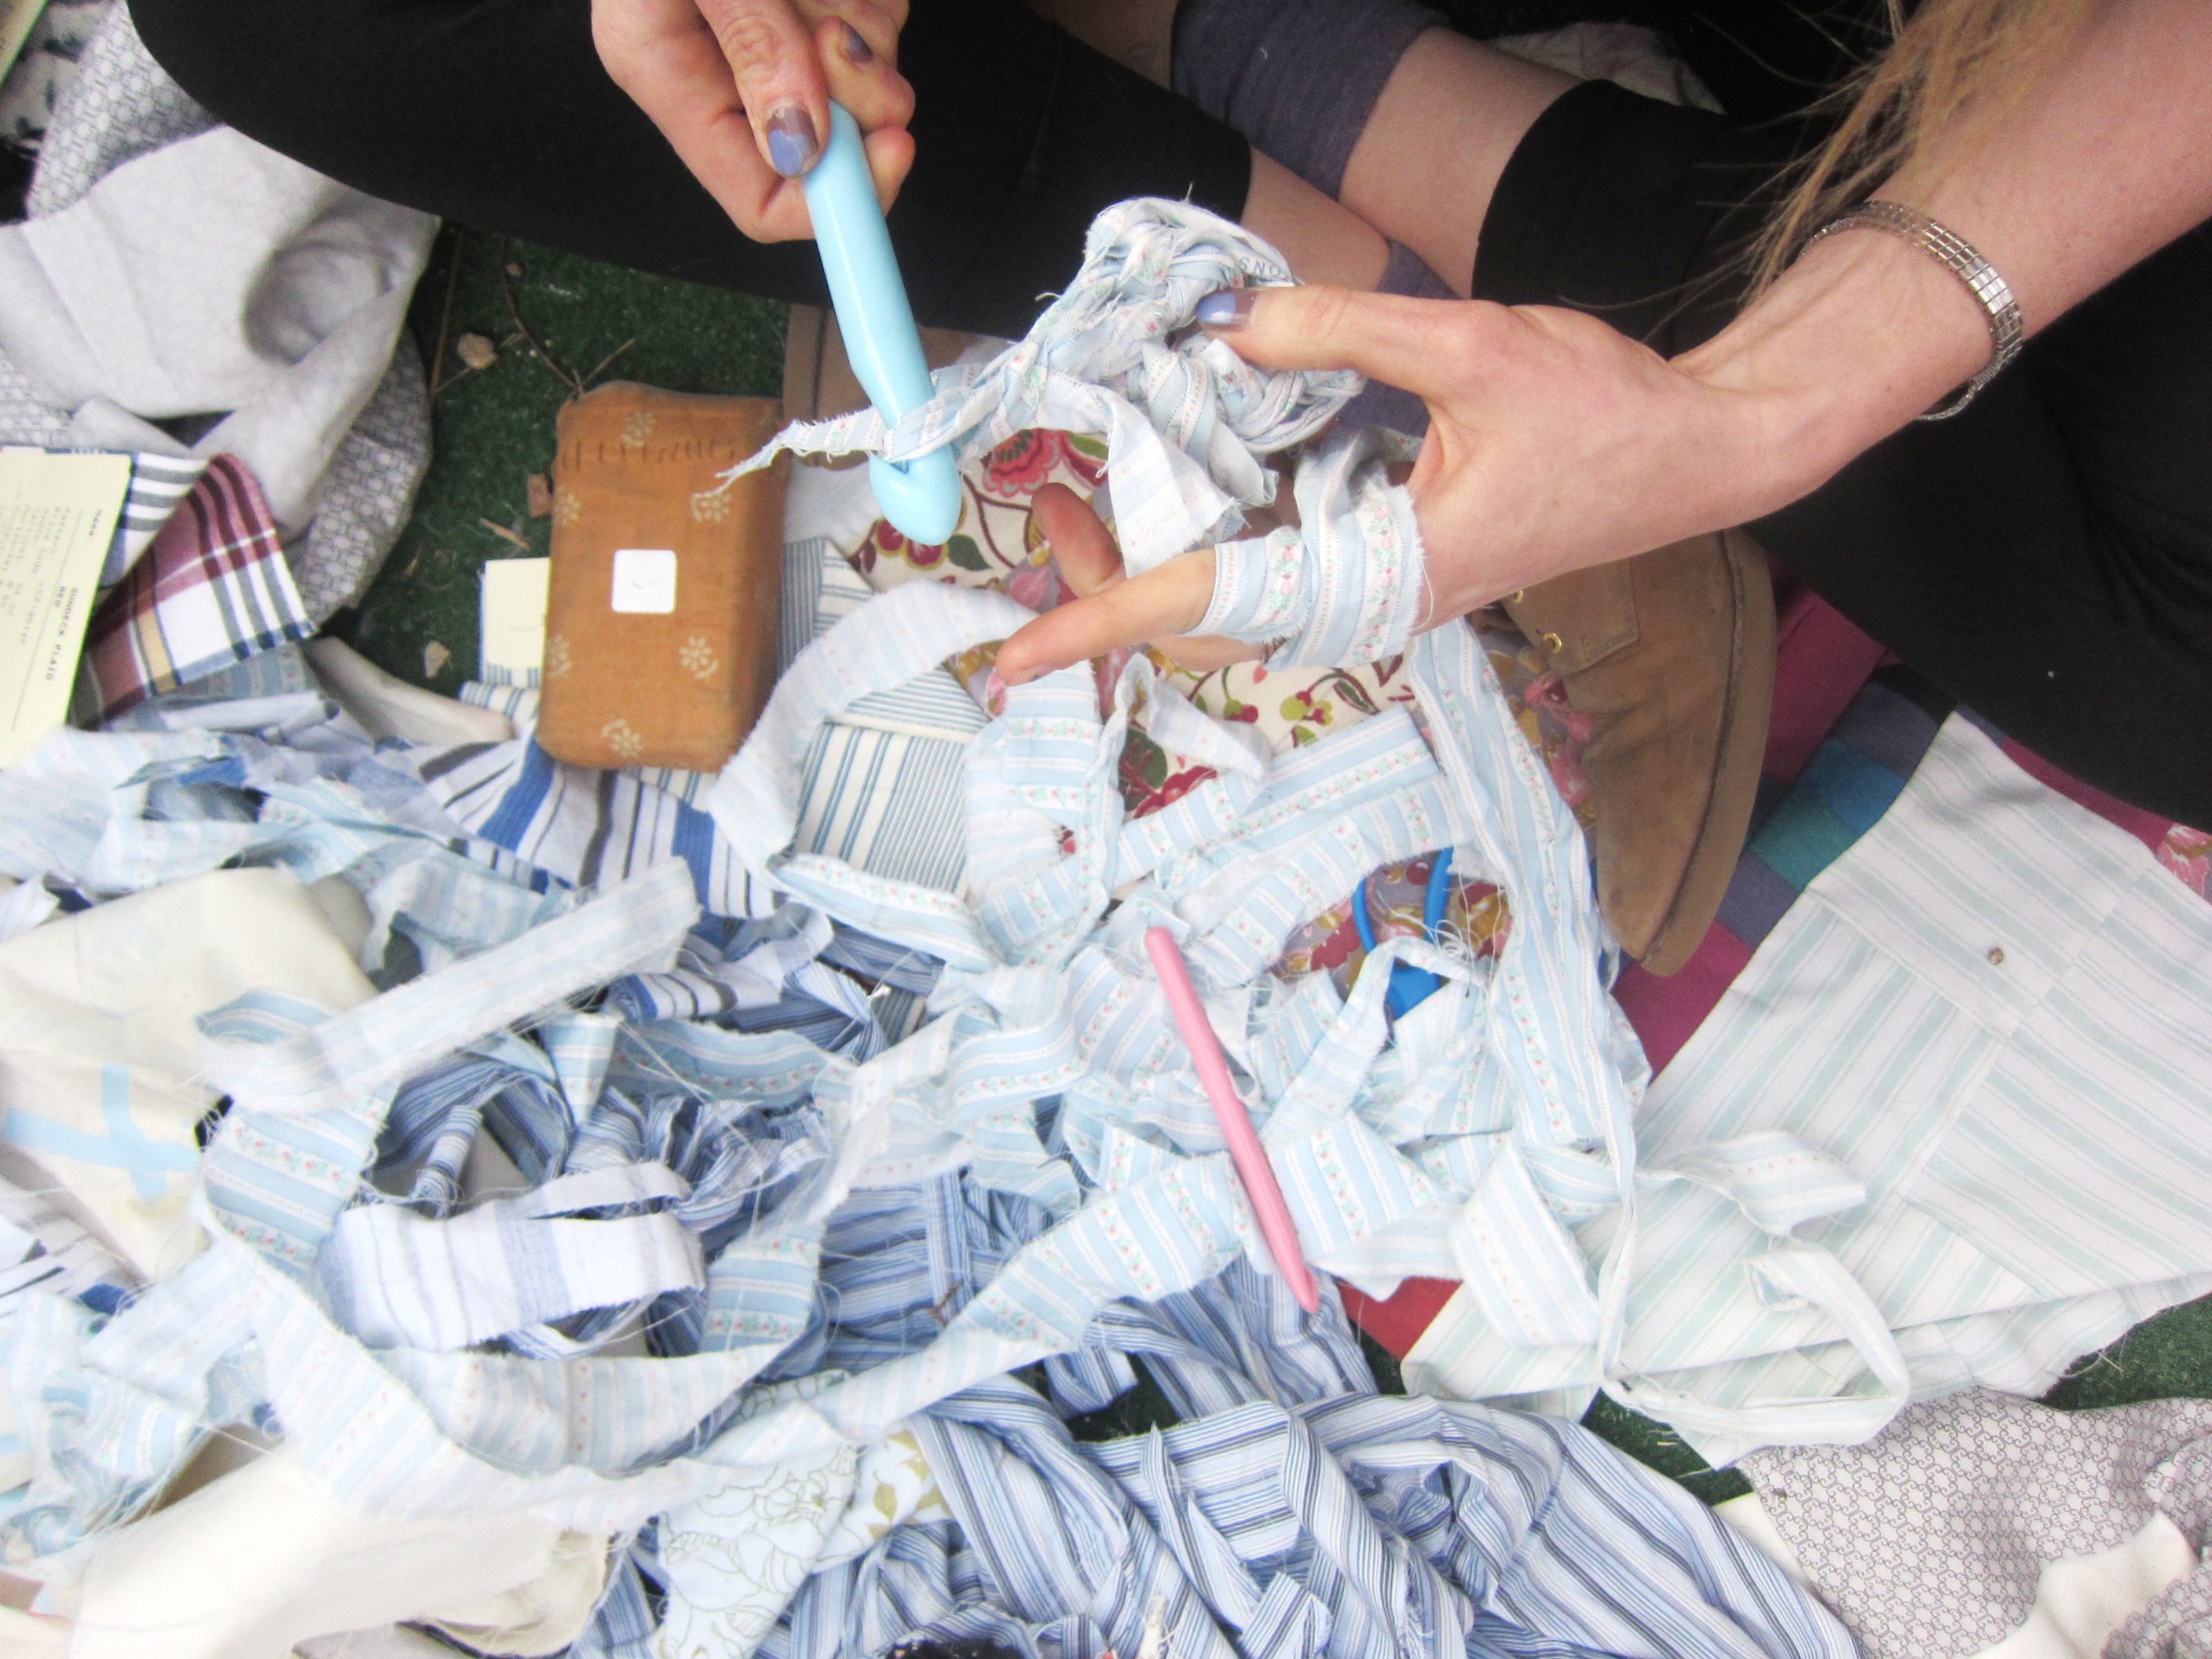
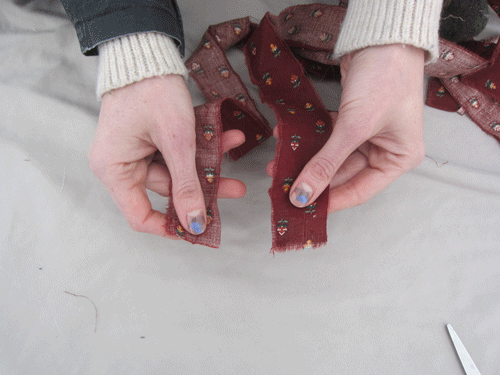
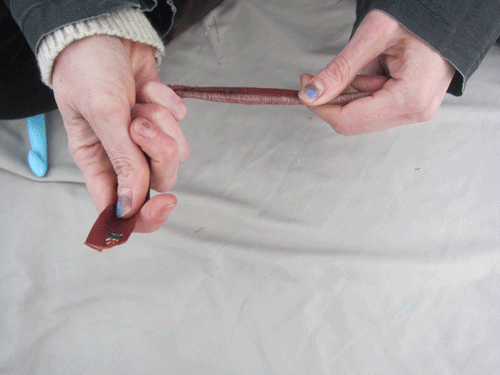
You can use scissors to snip the edge and then rip your fabric into strips, if you do it along the weave, or in most cases, just cut strips that are 1 - 1.5 inches in width. Cutting can at times be the best way to use the most of your fabric without having to join the ends.
When you need to join here's how you do it:
Now we can begin!
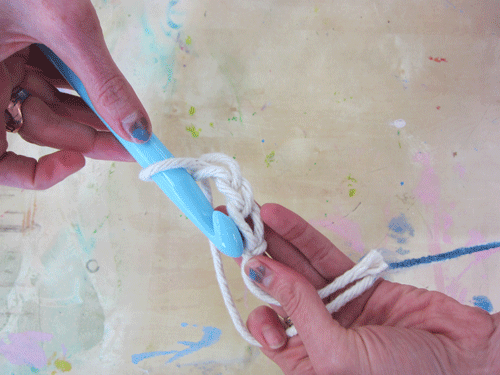
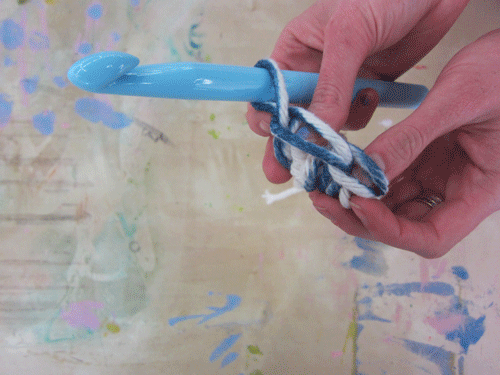
First, make a Slip Knot:
Now you can put the crochet hook through the loop and loosely, tighten it around the hook.
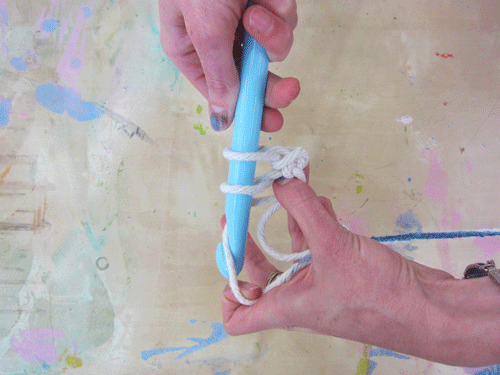
You are now going to create a simple chain by pinching the knot and rag strip with your non-dominant hand, while using your dominant hand (I'm a righty!) to hold the crochet hook. You will then use the hook to pull the strip through the loop, creating another loop over the hook. Make your chain 4-5 stitches/loops:

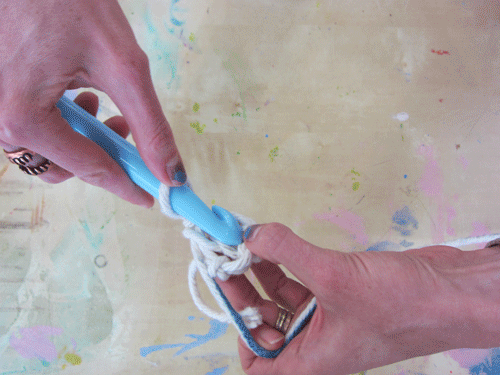
Now you need to connect that chain into a circle.
1. Put the needle through the first stitch and pull a second stitch on the hook:
Now you can complete the circle and finish your first full crochet stitch, by using the hook to pull another stitch through both loops on the hook:
Now your circle is connected! Bravo!
Next, build your circle by doing the same stitch, through the center of the circle, around and around until there is a solid circle shape (really! keep going through the center of the circle!):
Now you are free to start building circumference! If you look at the outer edge of your circle, it should look like a braid going around a wheel. Each braid section, is a stitch. To build circumference, you will do 2 full stitches through each braid stitch hole. You have to put two in each so the circle can grow!
And don't worry if it's hard to find the stitches...this step is always confusing (even to the experienced!) The stitches will show better after you go around once, and remember, mistakes won't show!
Now you need to exponentially add stitches (2 through each hole) going around and around until your circle gains around 4 inches in diameter. At this point, your flat circle may start to ruffle. This is due to the Hyperbolic math principle, explained here in Margaret Wertheim's TED talk, The Beautiful Math of Coral. Her project is super cool, but we aren't making rag rug coral, we are making a rug! And rugs should be flat!
So once your disk gets bigger, you should sometimes do 1 stitch, sometimes do two.
If your disk is ruffling, that means you have too many stitches.
If it's just pulling towards you or away (forming a bowl), that means you have too few stitches, and should add some.
I found this works best if you work on a flat surface, like the floor! Crocheting is very sculptural. Sometimes I would pull out a bunch of stitches, so I could fix a ruffle or pull. It's worth it to have a perfectly flat rug!
Now, to make a perfect circle, you just keep going around and around, adding strips as yours gets short until you have the size circle you want....
or you can make any shape! You can always add to a certain point by just turning your work over and going 'backwards'! You don't even have to take out the hook... just turn it around!
I recommend working on this whenever you can (it's easy to become obsessed) and bring others along for the ride! Share your knowledge with everyone (not just ladies!), so we can grow strong together as a whole.
Horray for the People's Quilt!
Thanks for helping me take pictures Blair Wilson, Joey Korein, Kayla Carpitella, Sara Duell and Patrick Joajoco.