In Cycle 3 of TAC Afterschool, we recently made patchwork tote bags using elemental dyeing methods. We explored three different techniques that used unconventional techniques to dye fabrics for our bags.
The first process was snow dyeing:
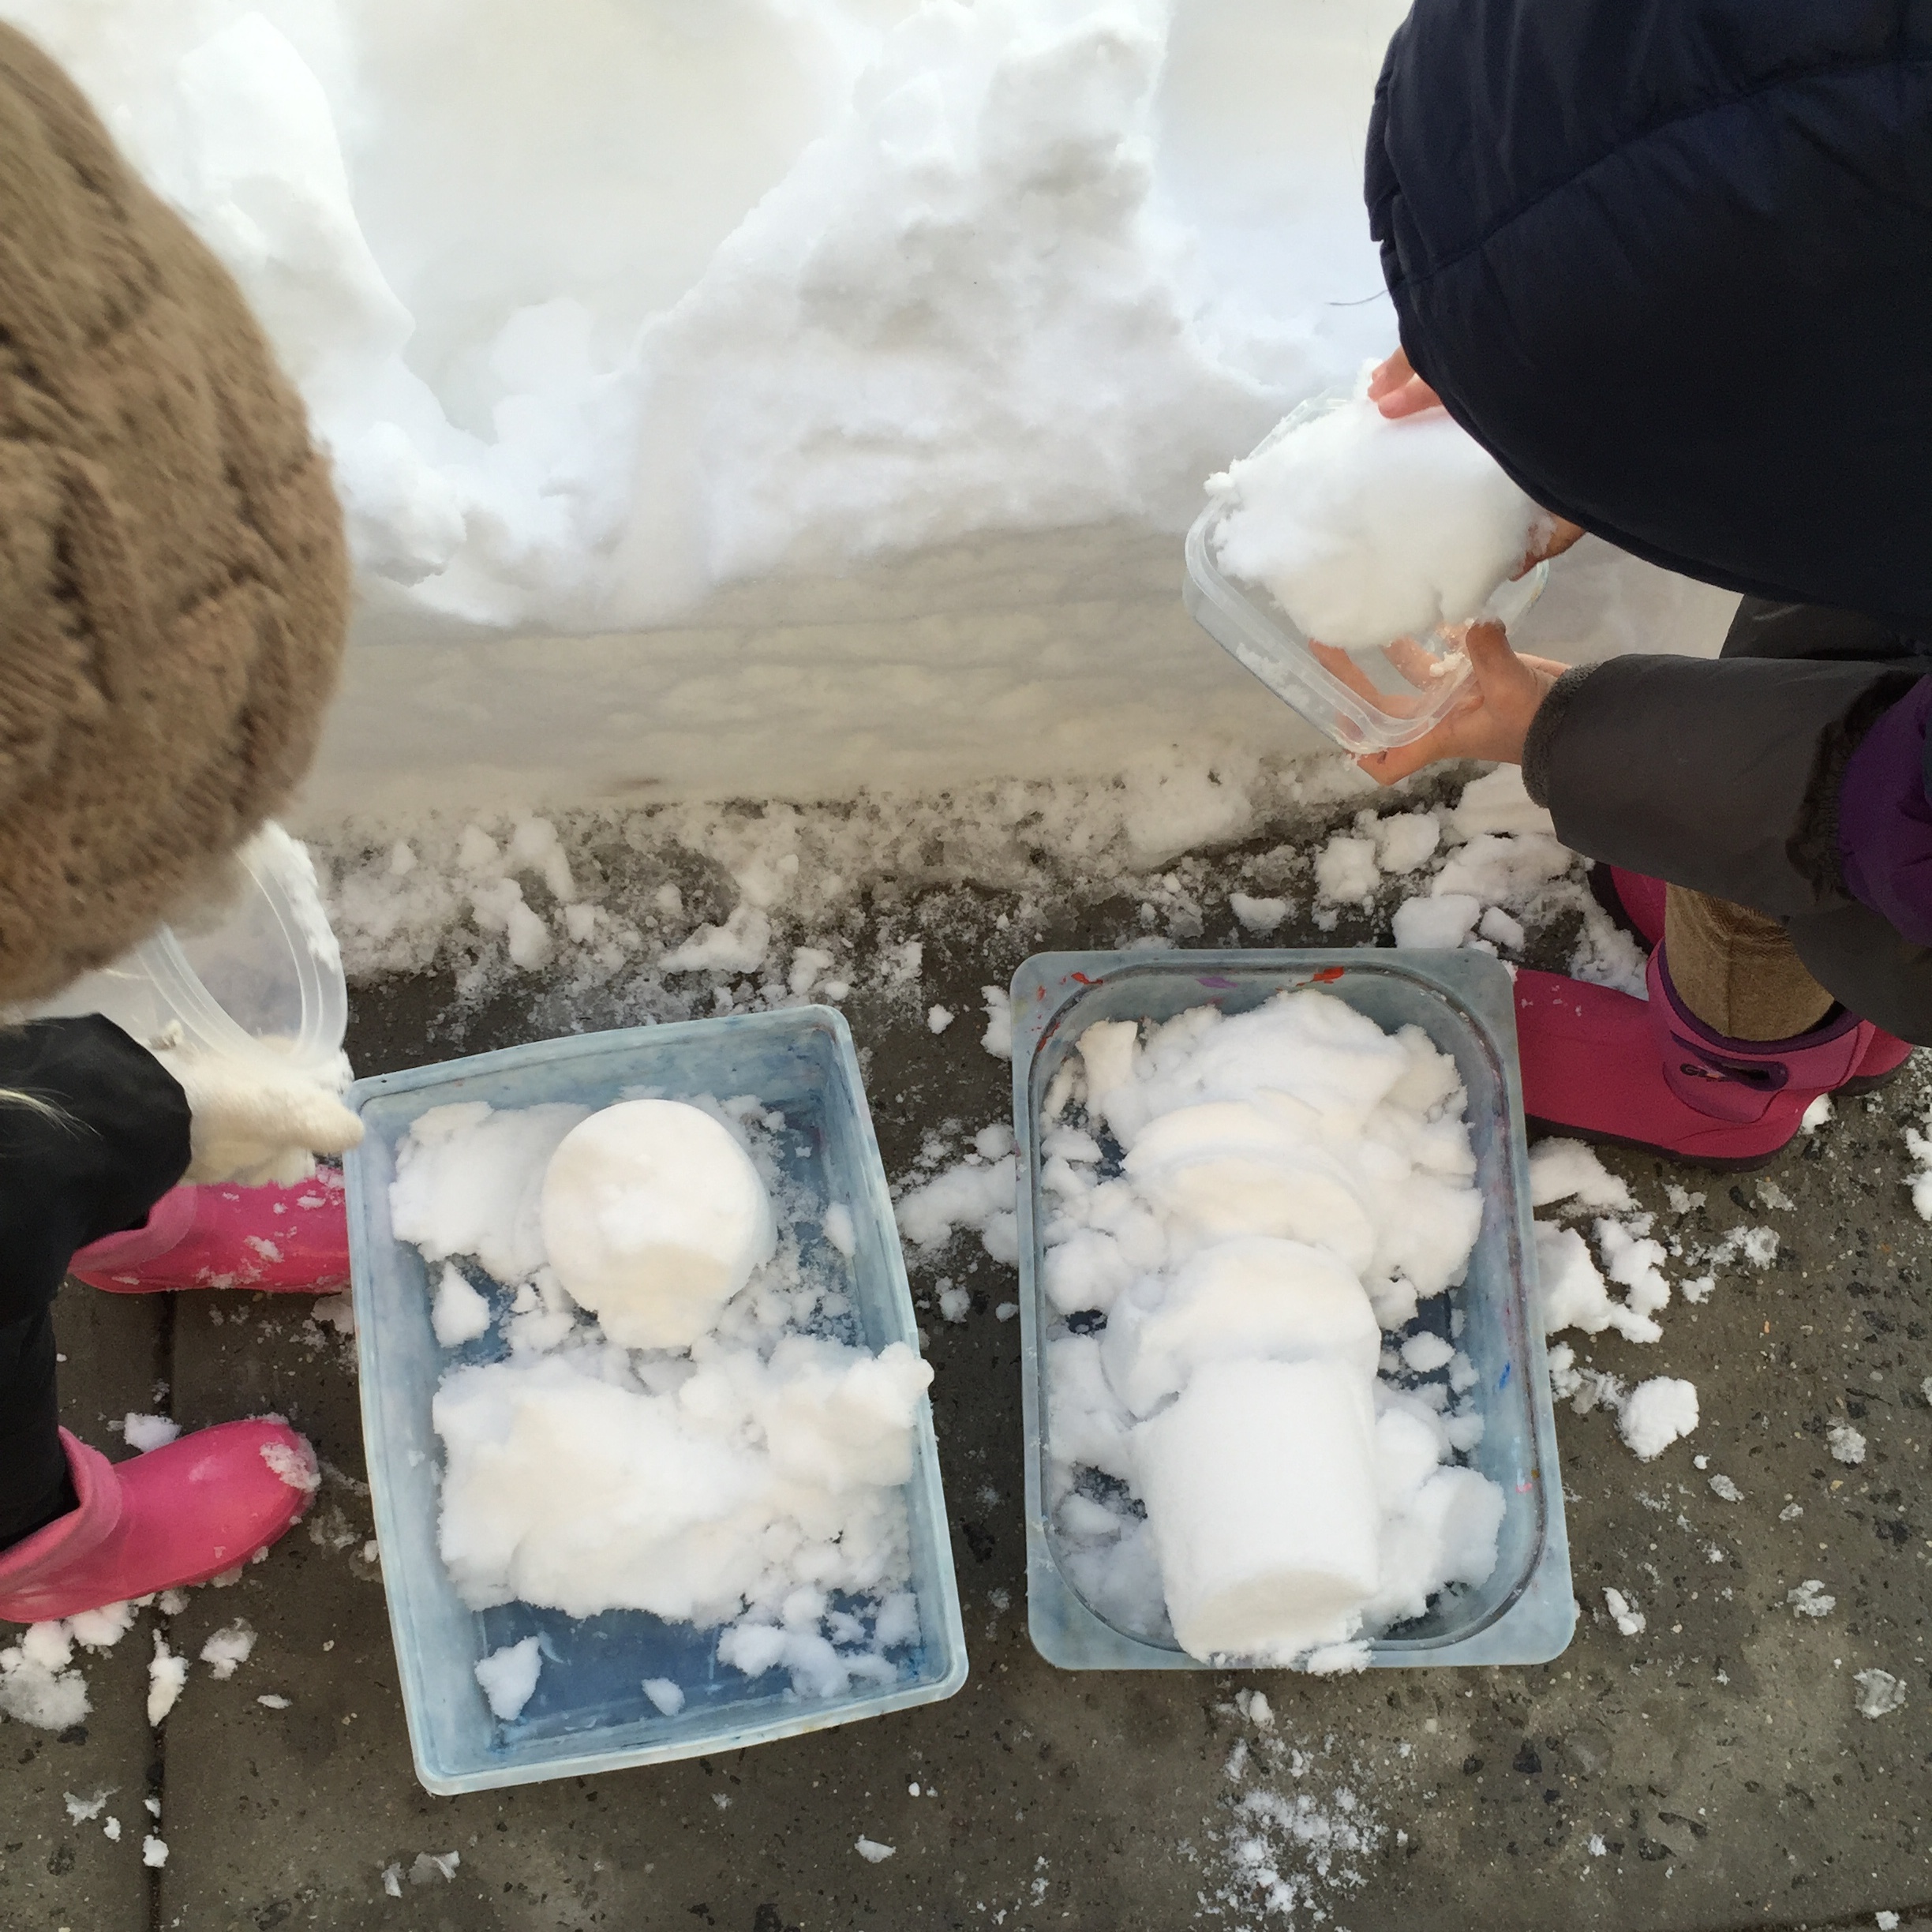
First, we gathered snow from outside.
Each student folded, pleated, or scrunched up their fabric and put it in a plastic bin on top of a surface so that the snow could drain as it melted, then we filled the bin with snow.
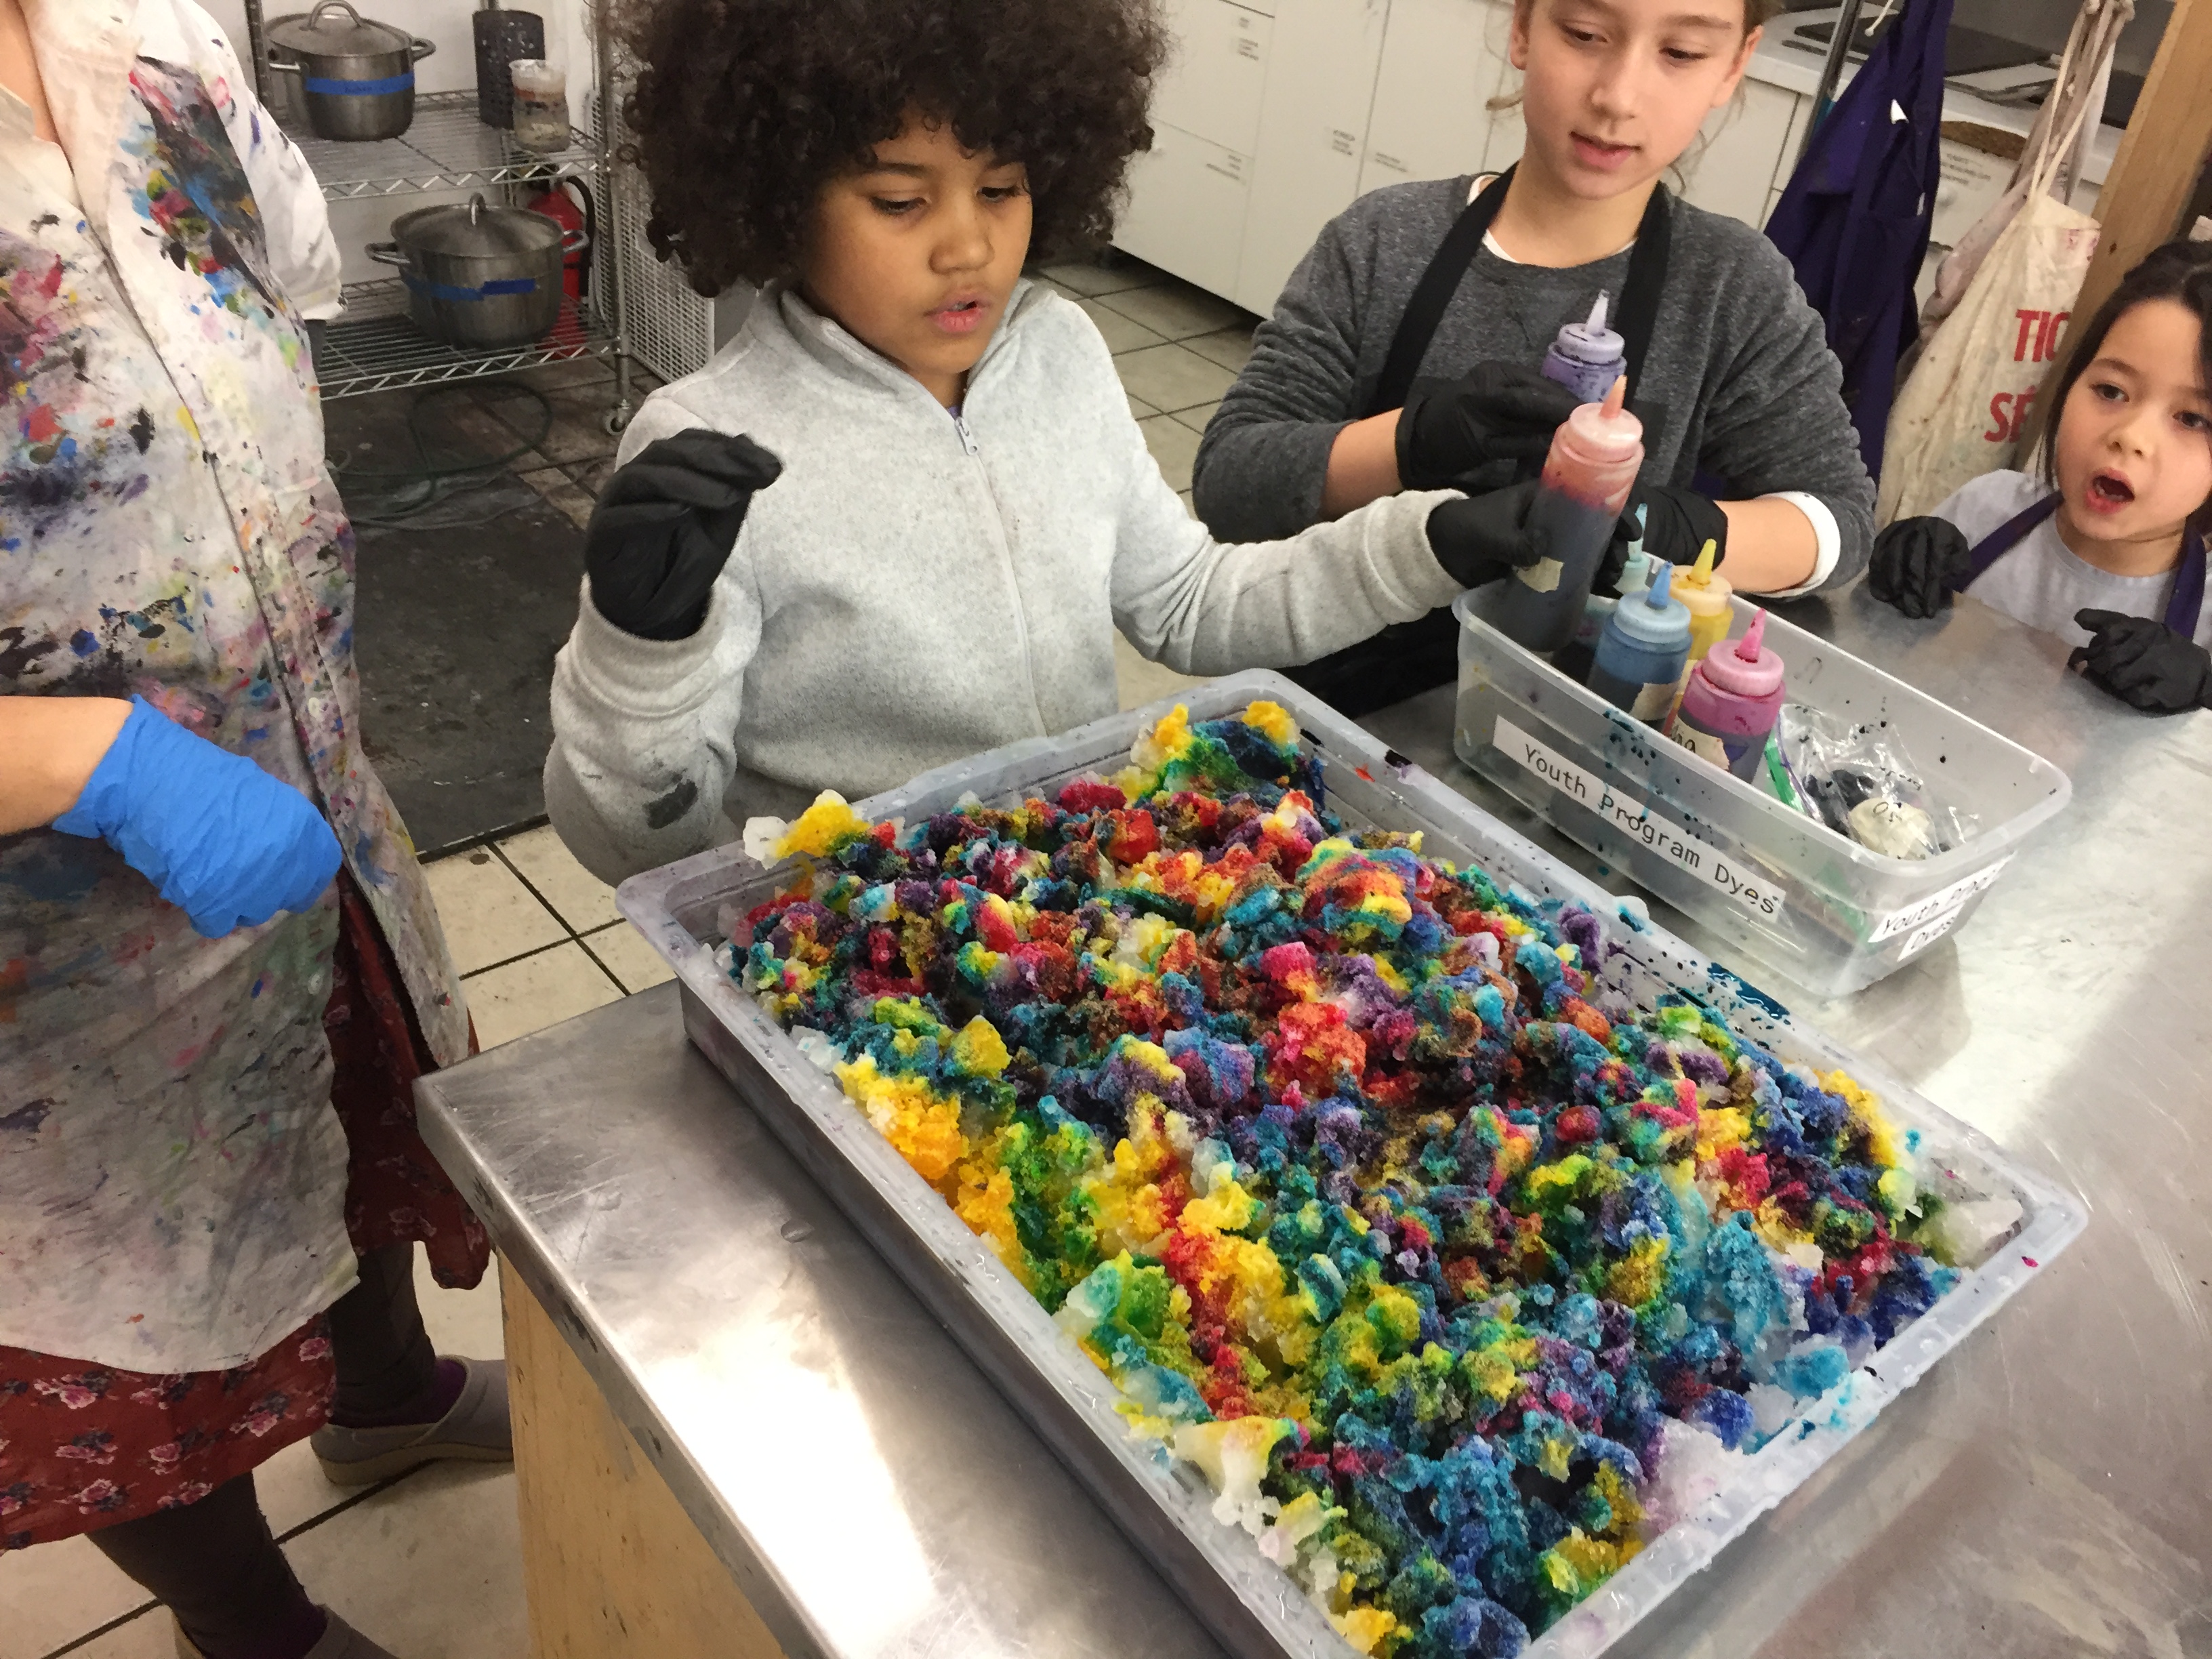
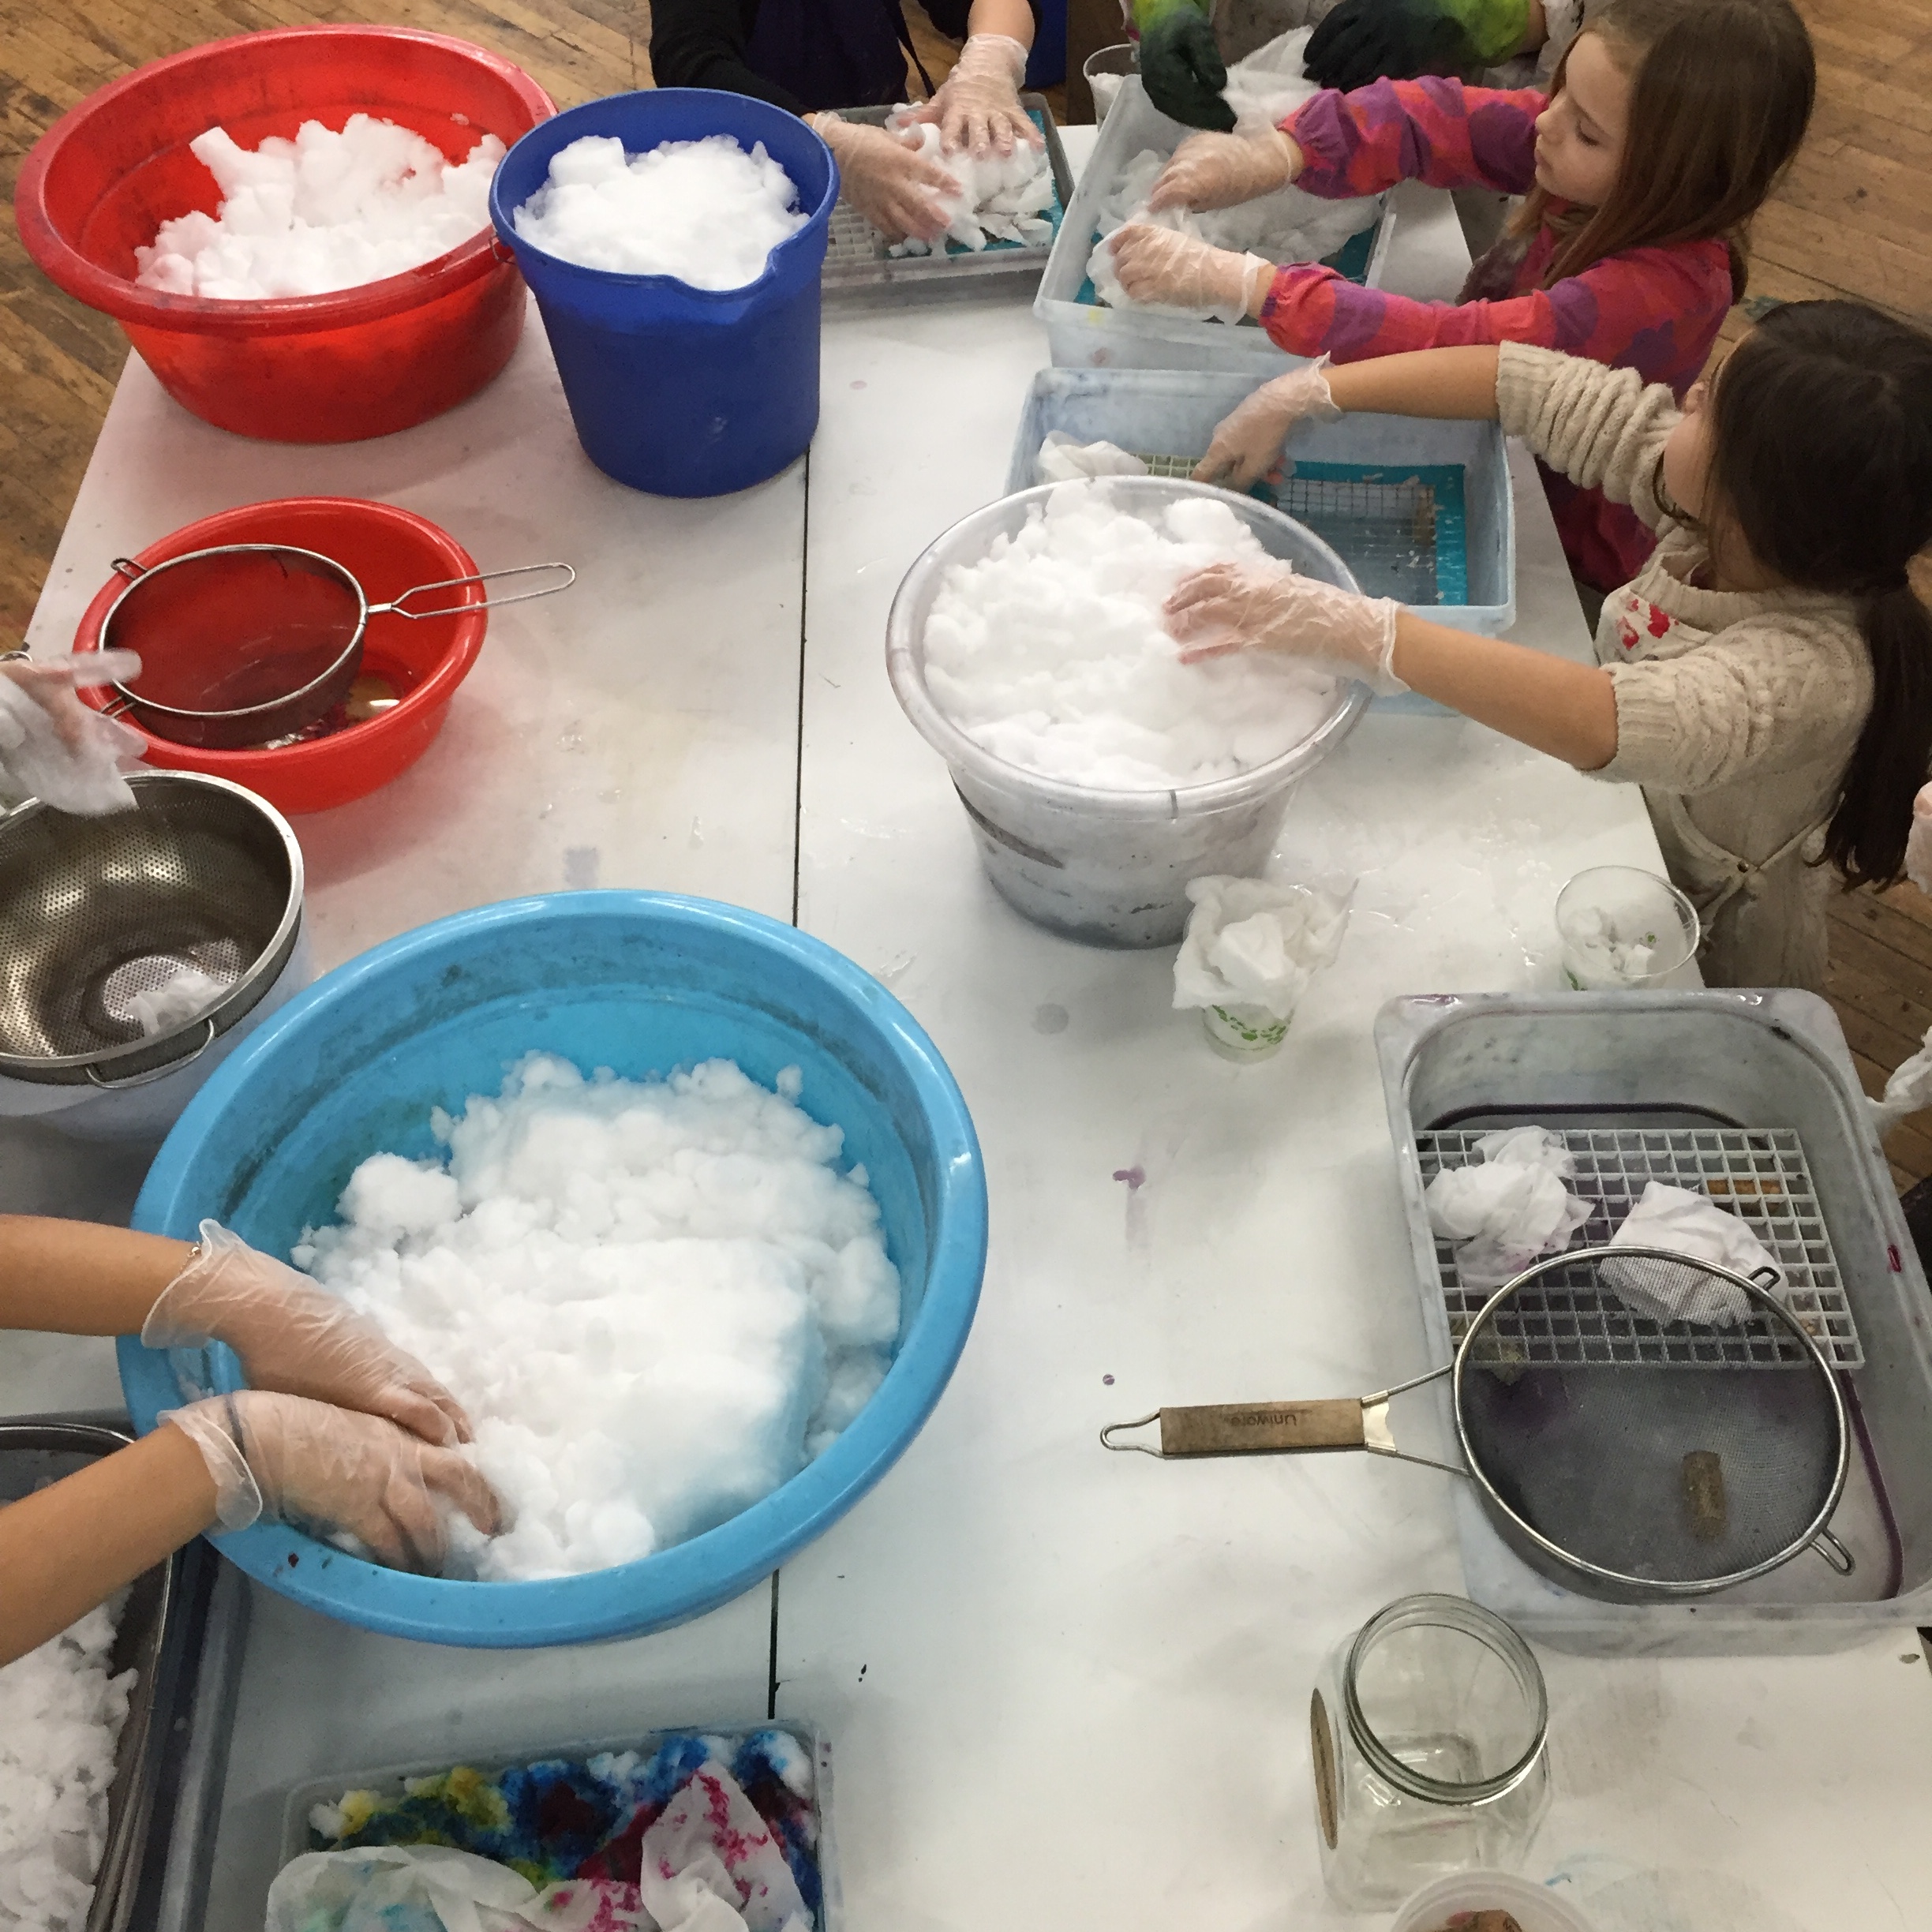
Now for the fun part.. Everyone took turns squirting dye over the snow until it looked like a massive snow cone!
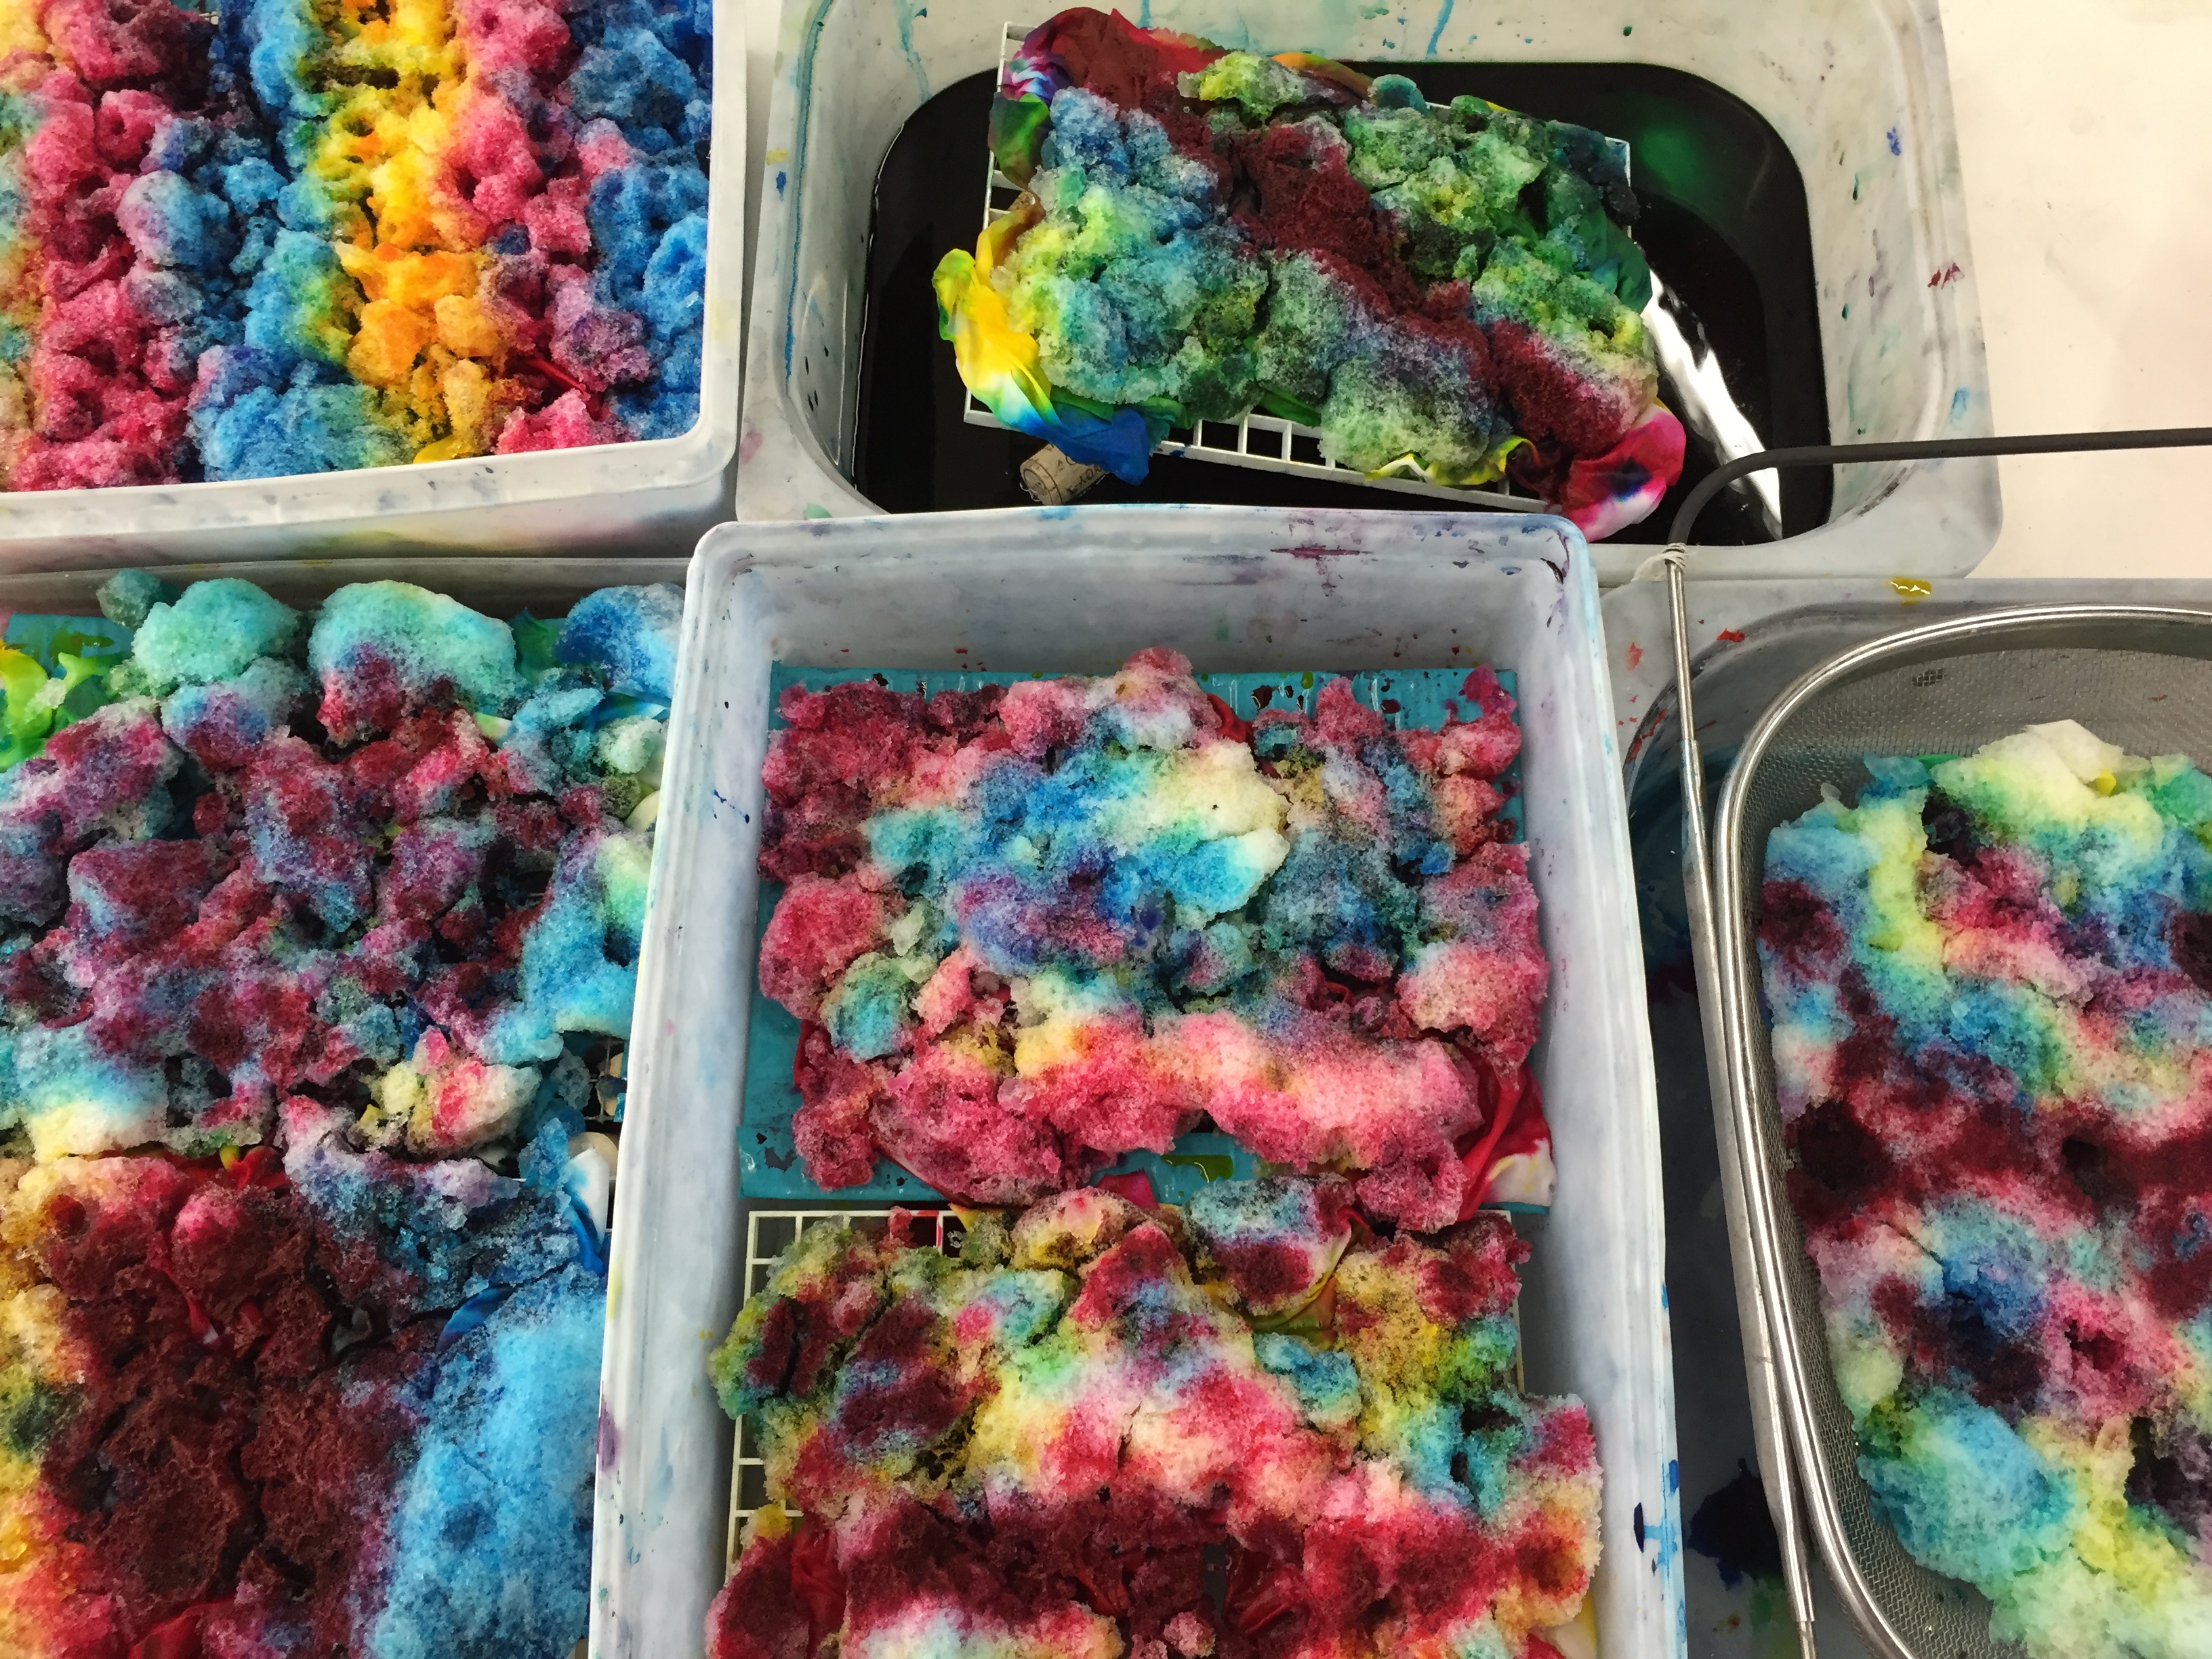
As the snow melted, it slowly brought the dye into contact with the fabric to create a glowing, tie-dye effect.

The magic of snow! Who knew winter could be so colorful?
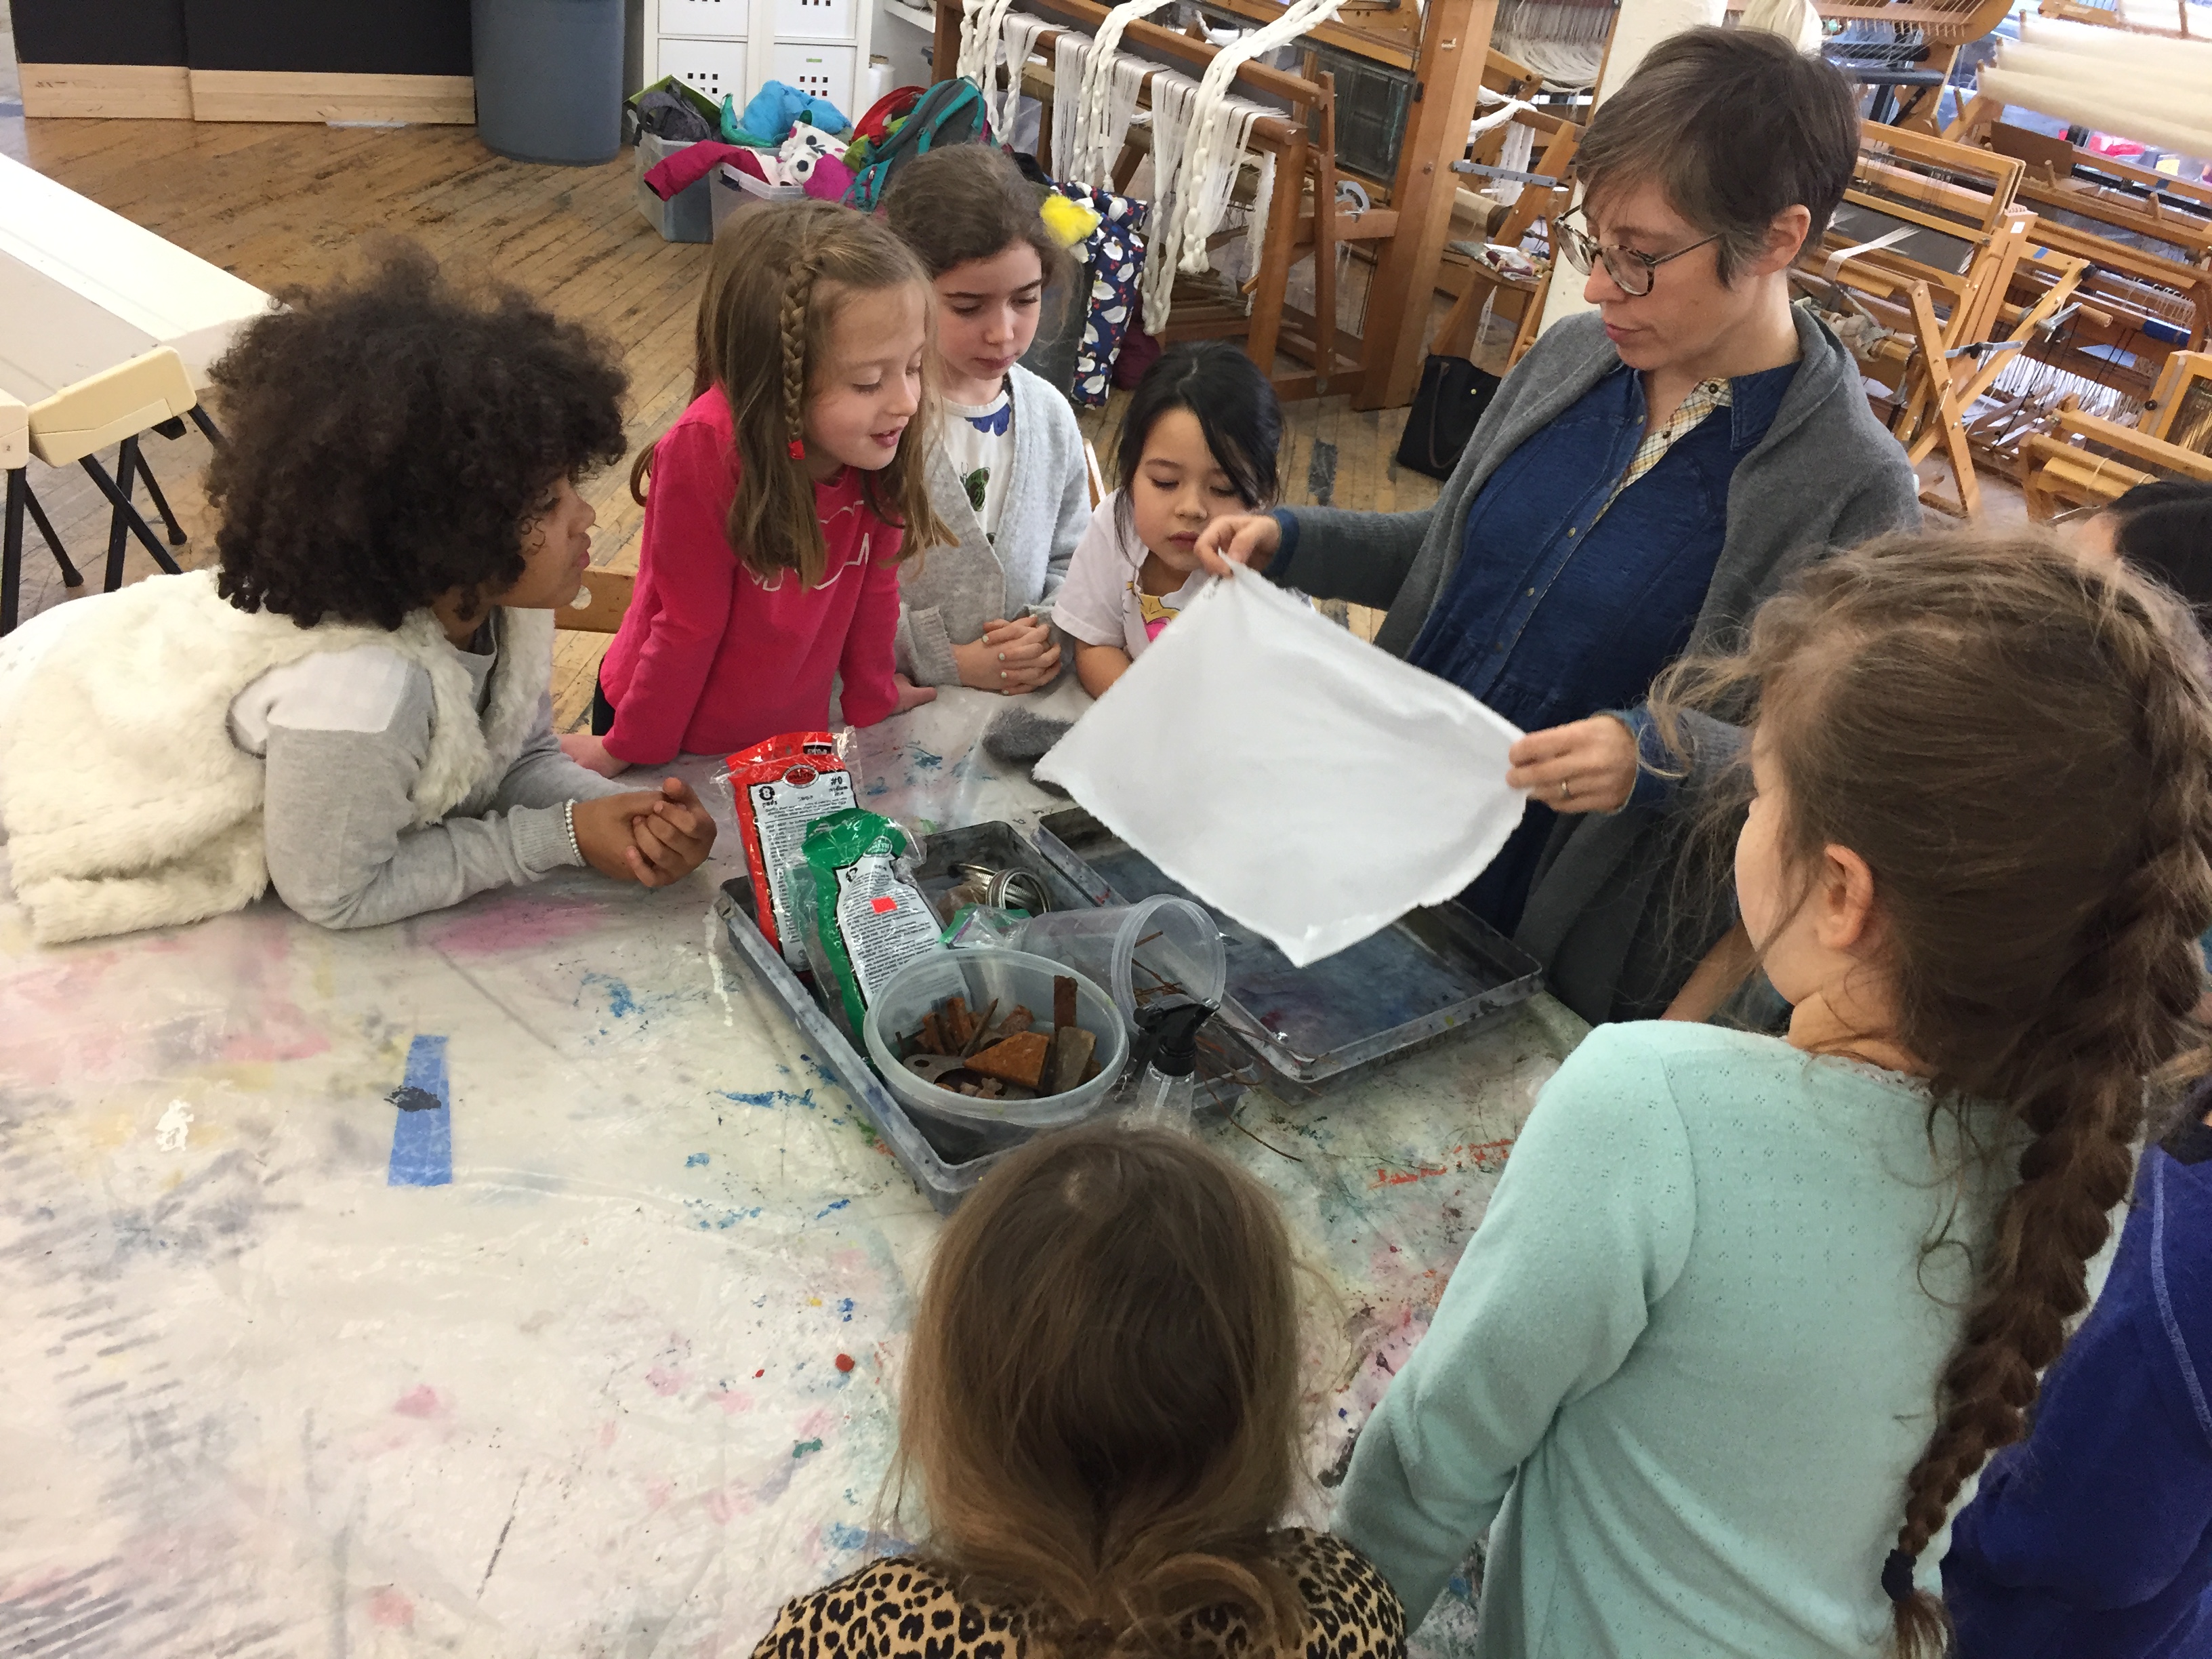
The next process of our elemental dyeing was rust dyeing -- a simple process -- just be sure to wear gloves!
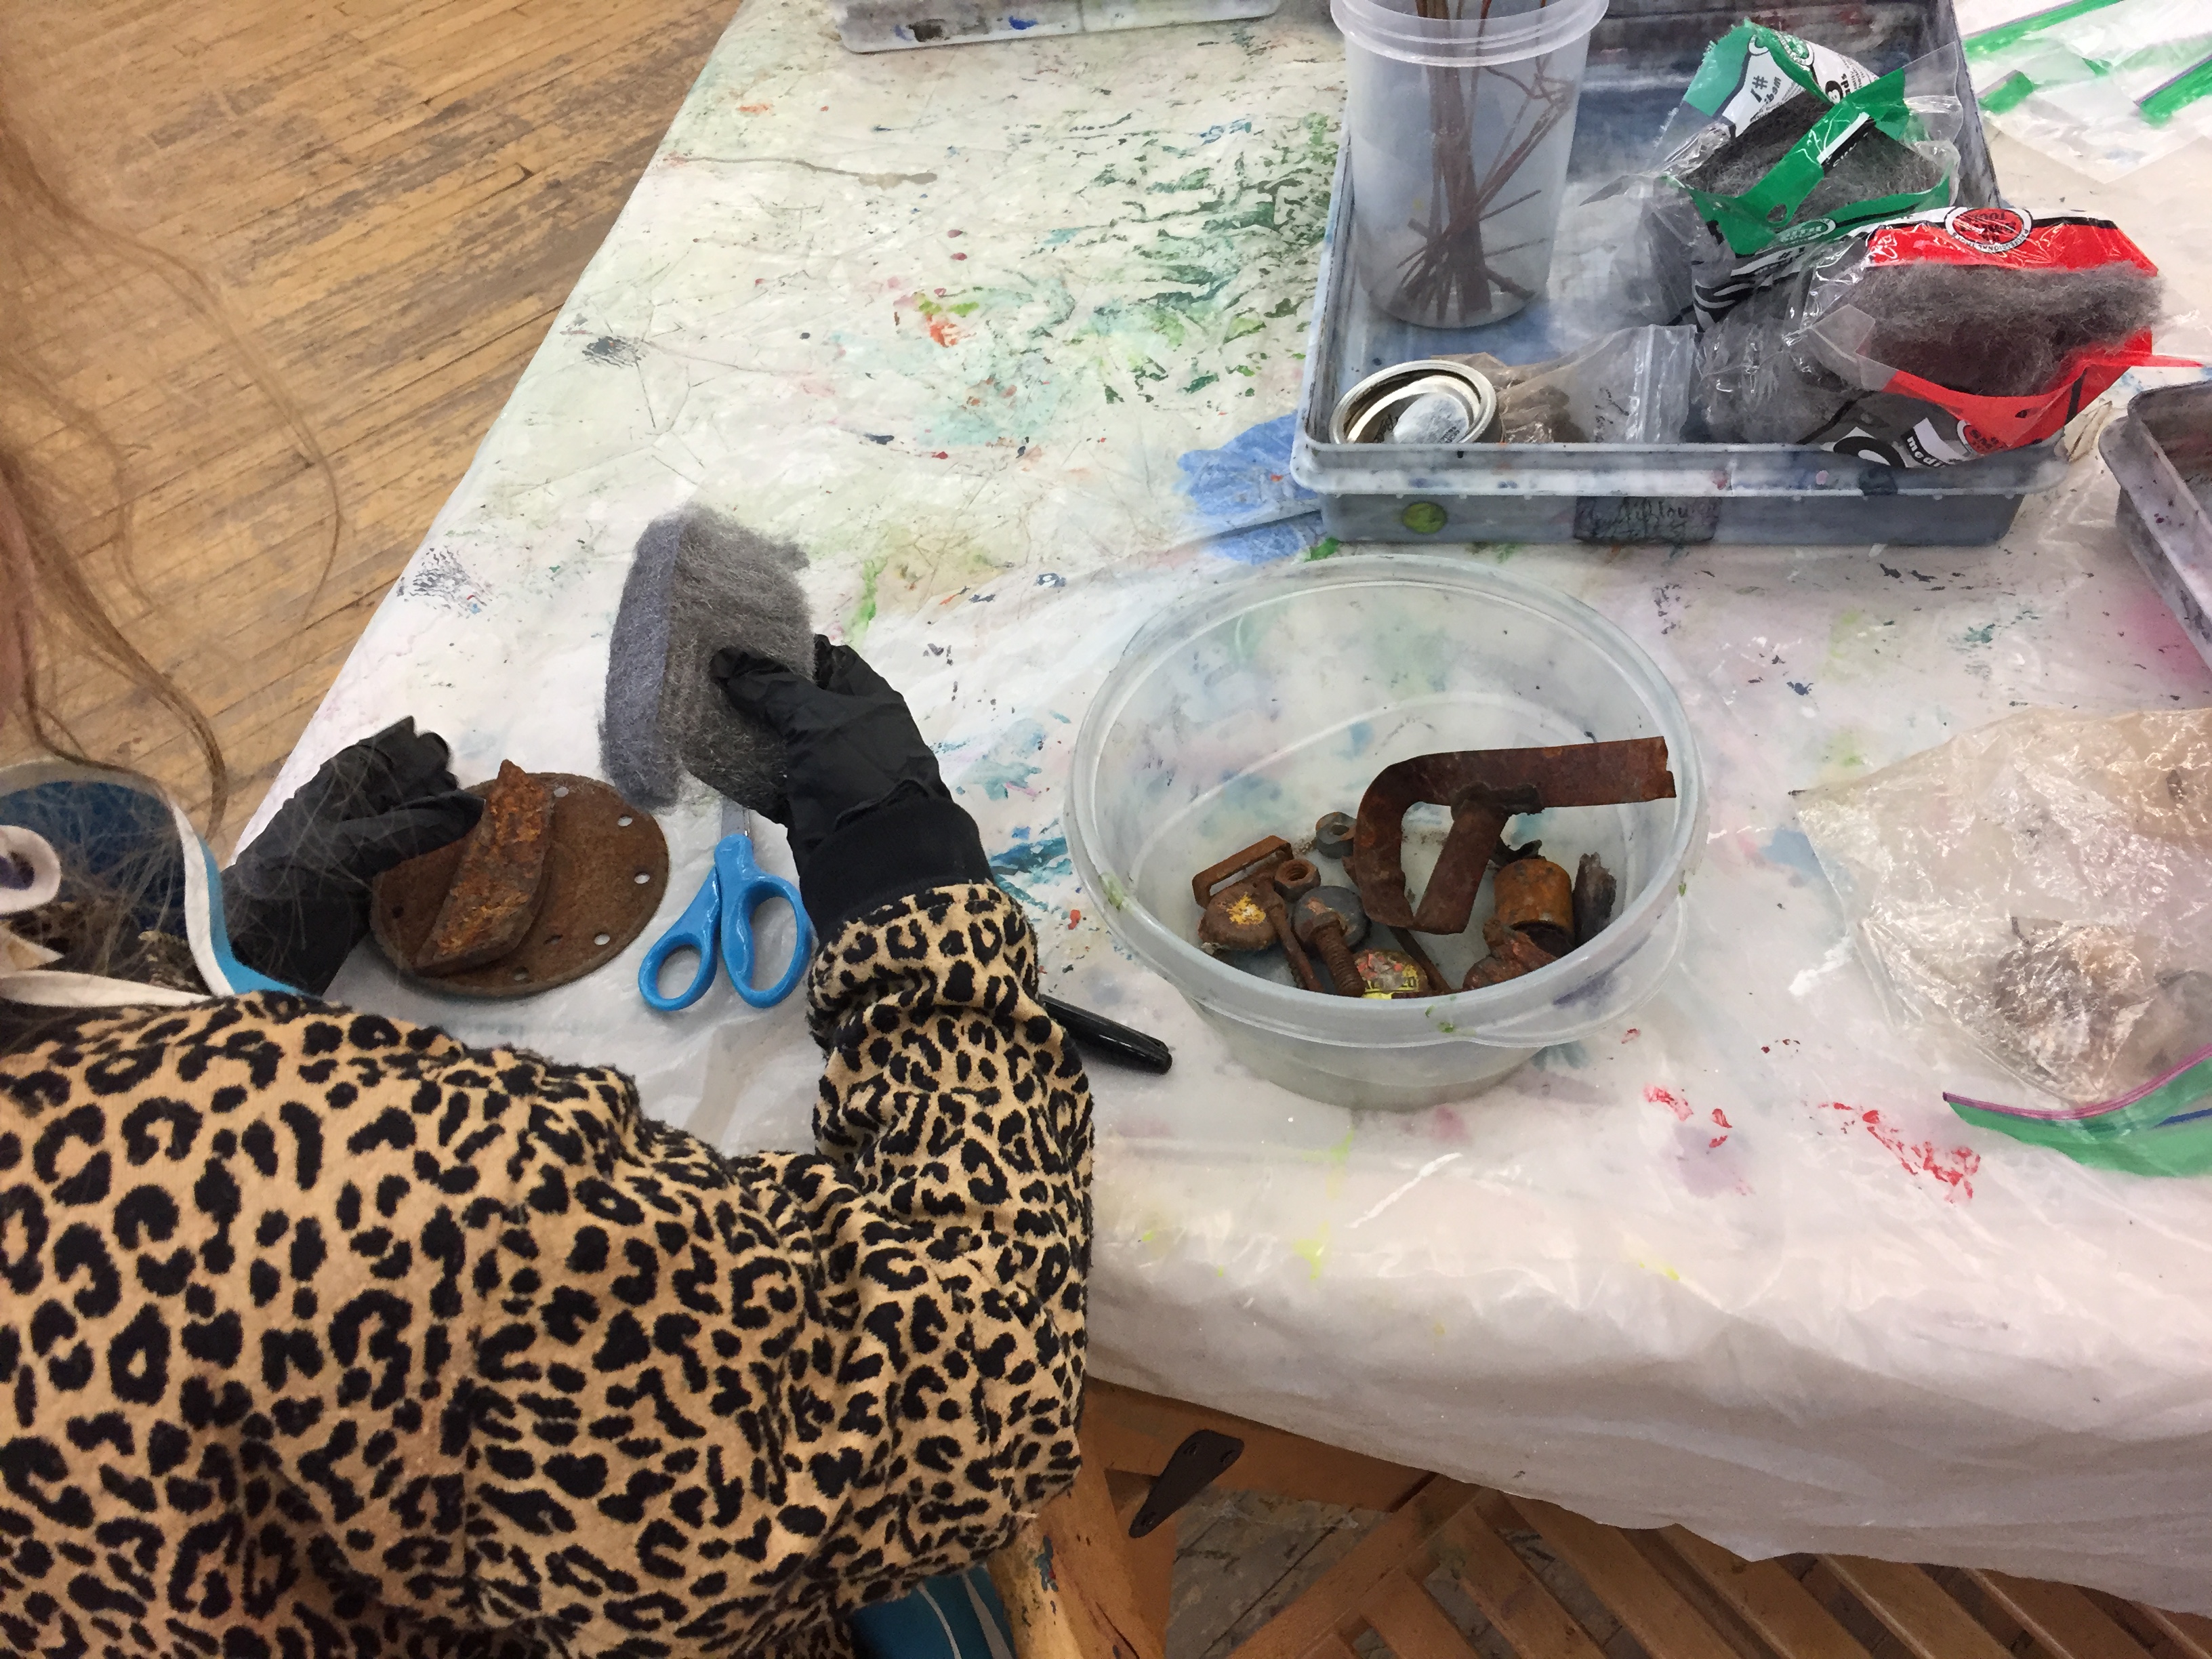
You can use any number of rusted, metal objects for this, or even things that you know will rust quickly, such as steel wool.
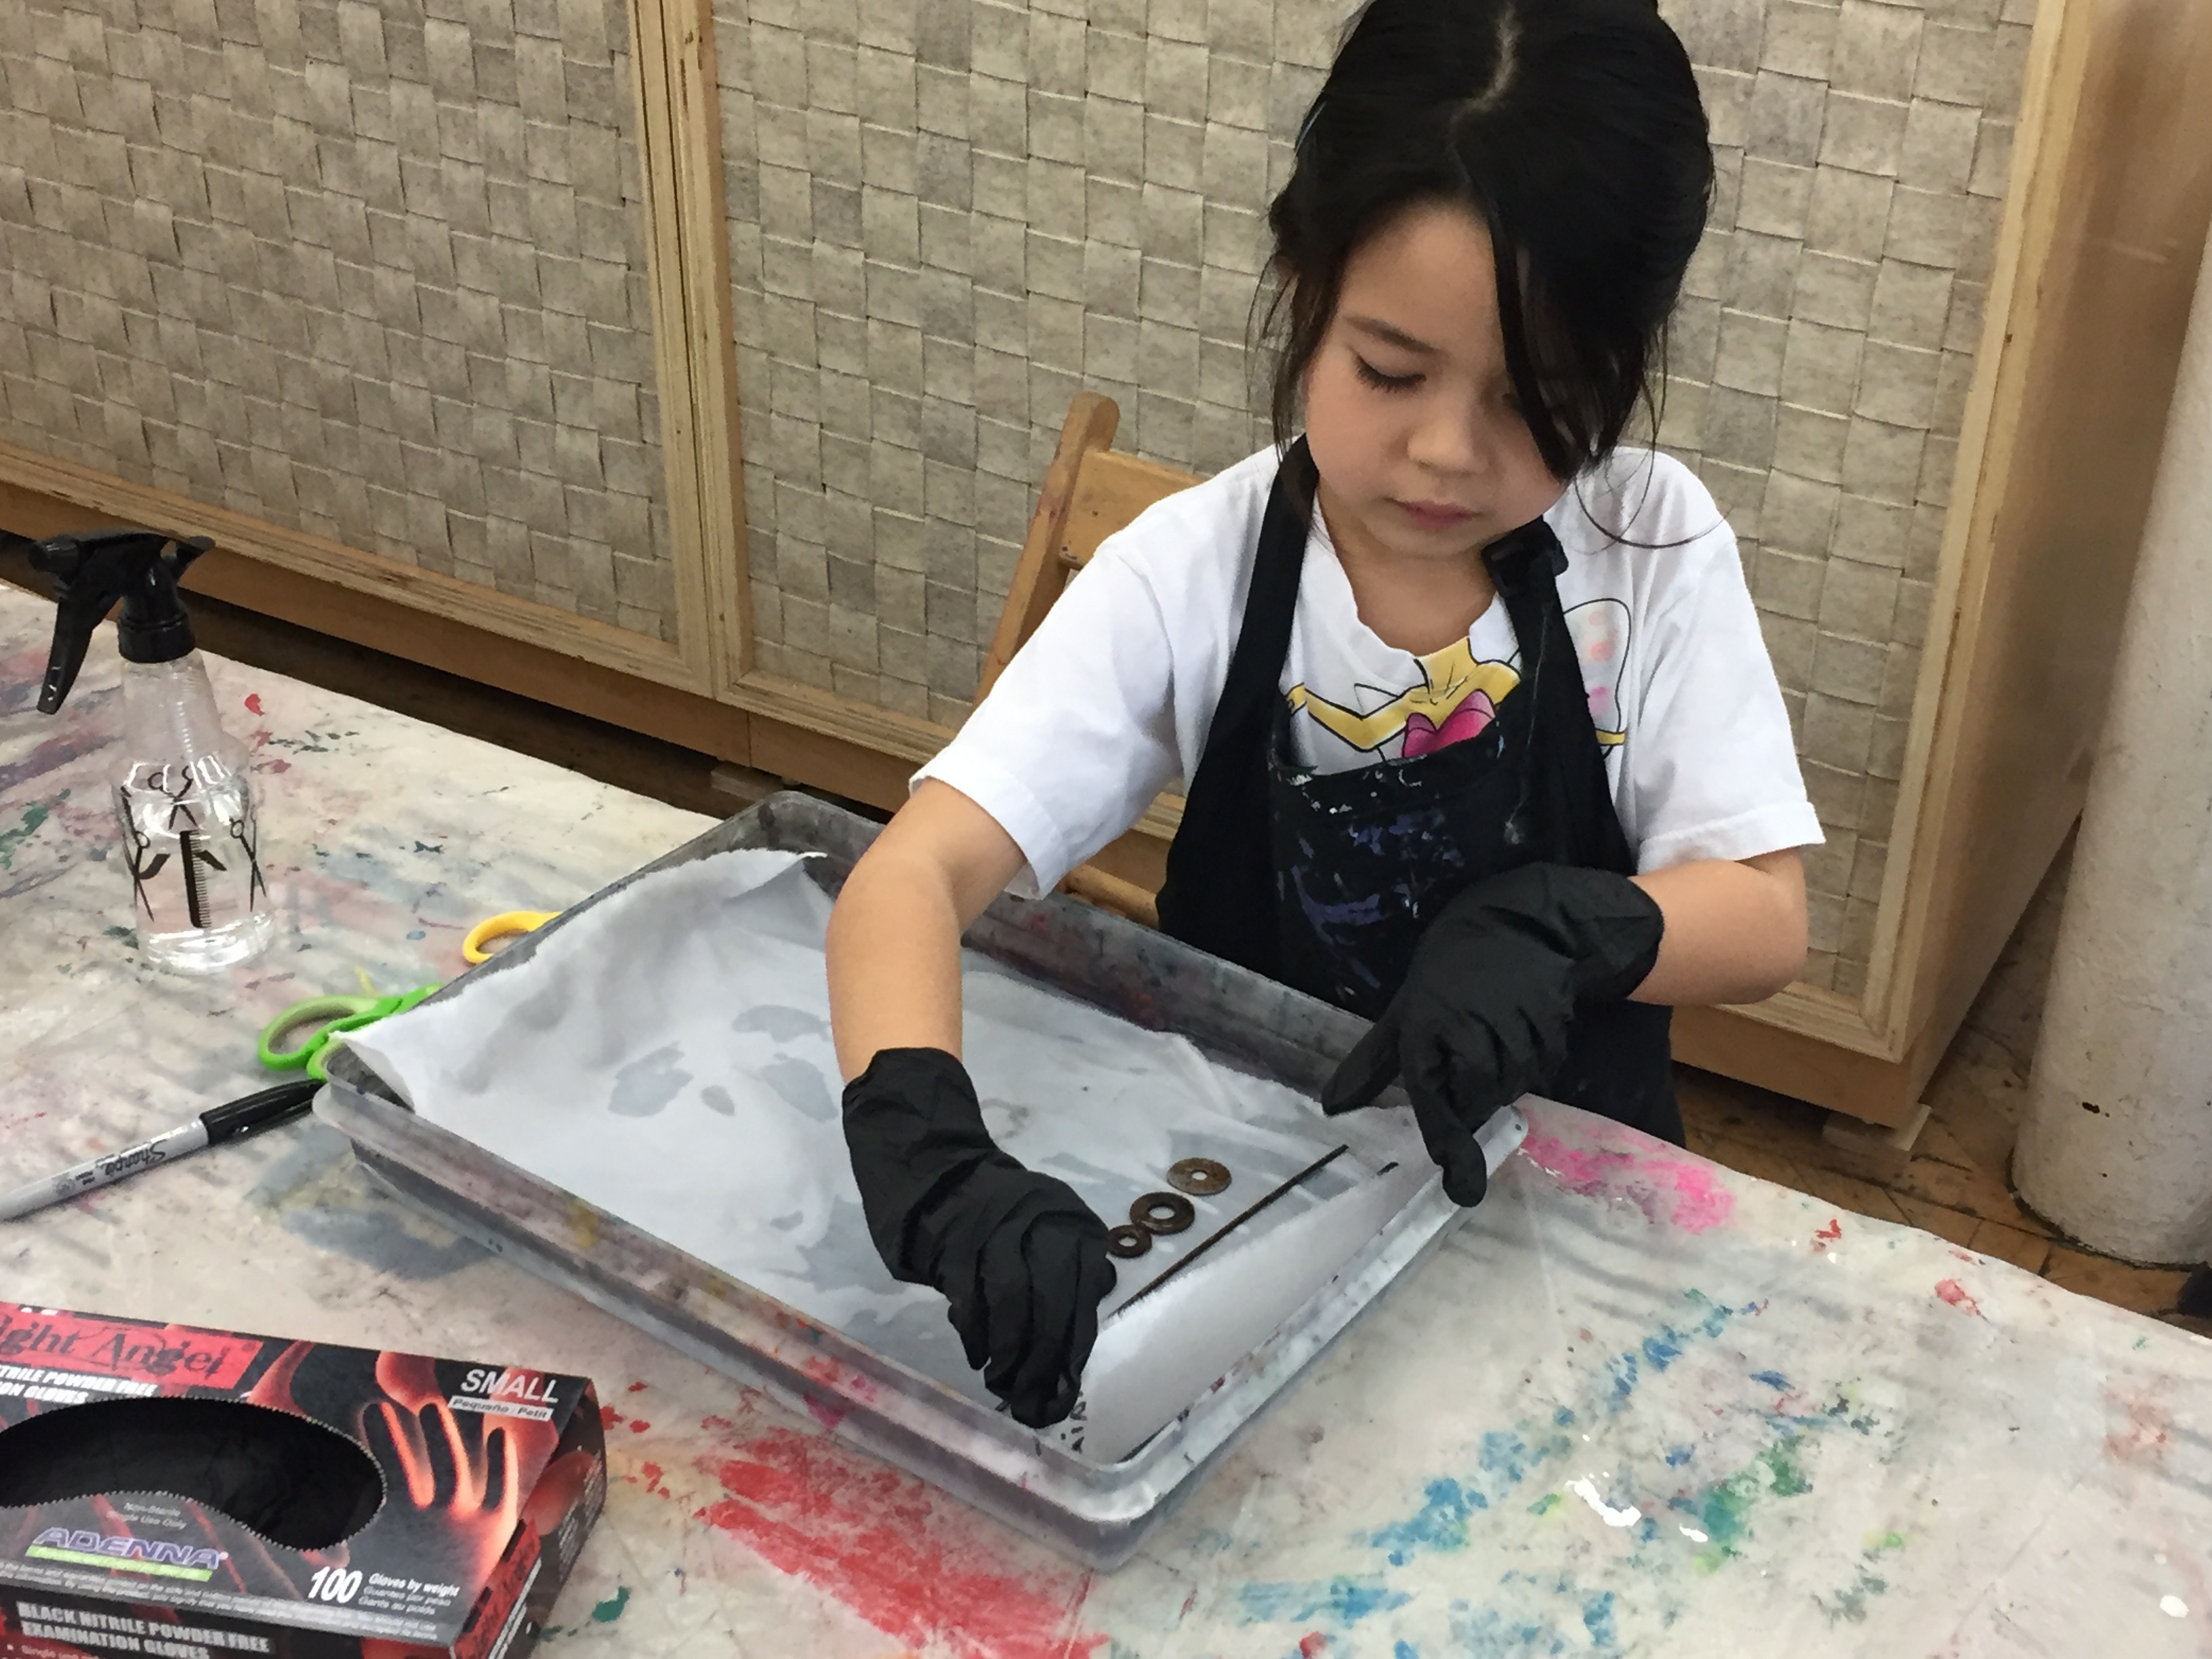
We laid out our objects in a design on part of our fabric.
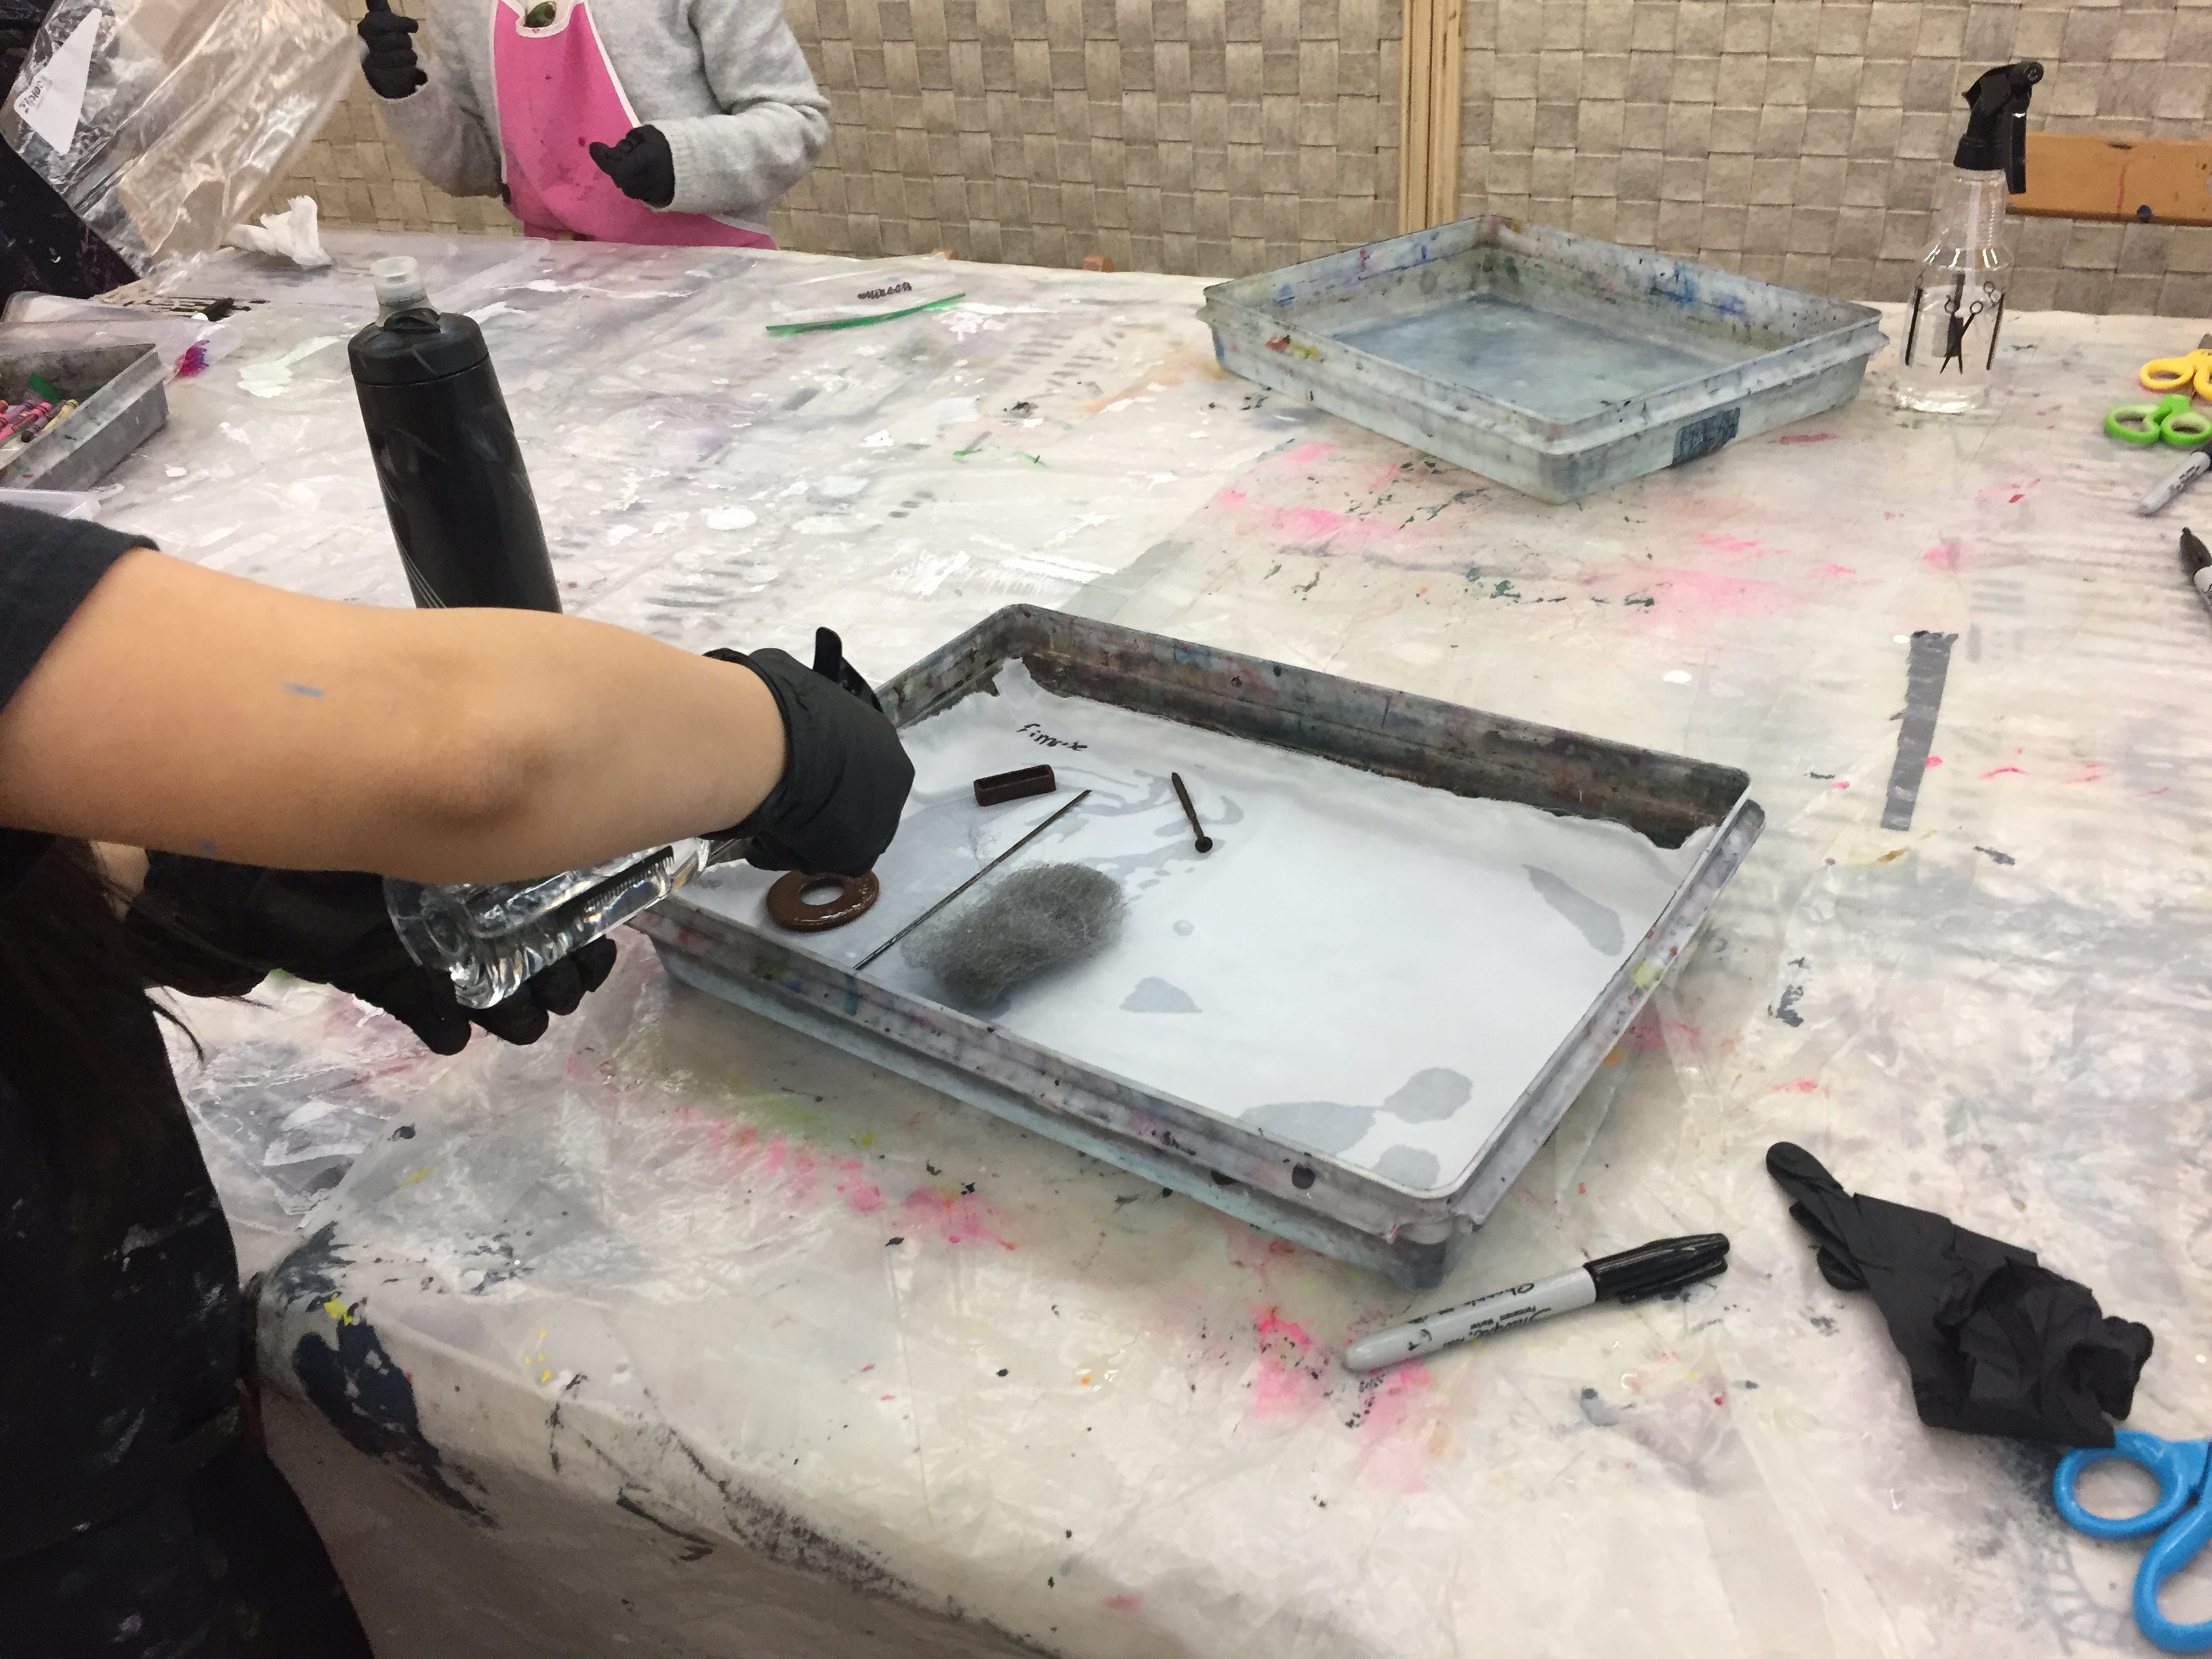
Next, we sprayed down the objects and fabric with vinegar diluted in water, which helps rust the objects further, and helps to transfer the rust to the fabric.

Next, we folded up our fabric into bundles around the rusty objects.
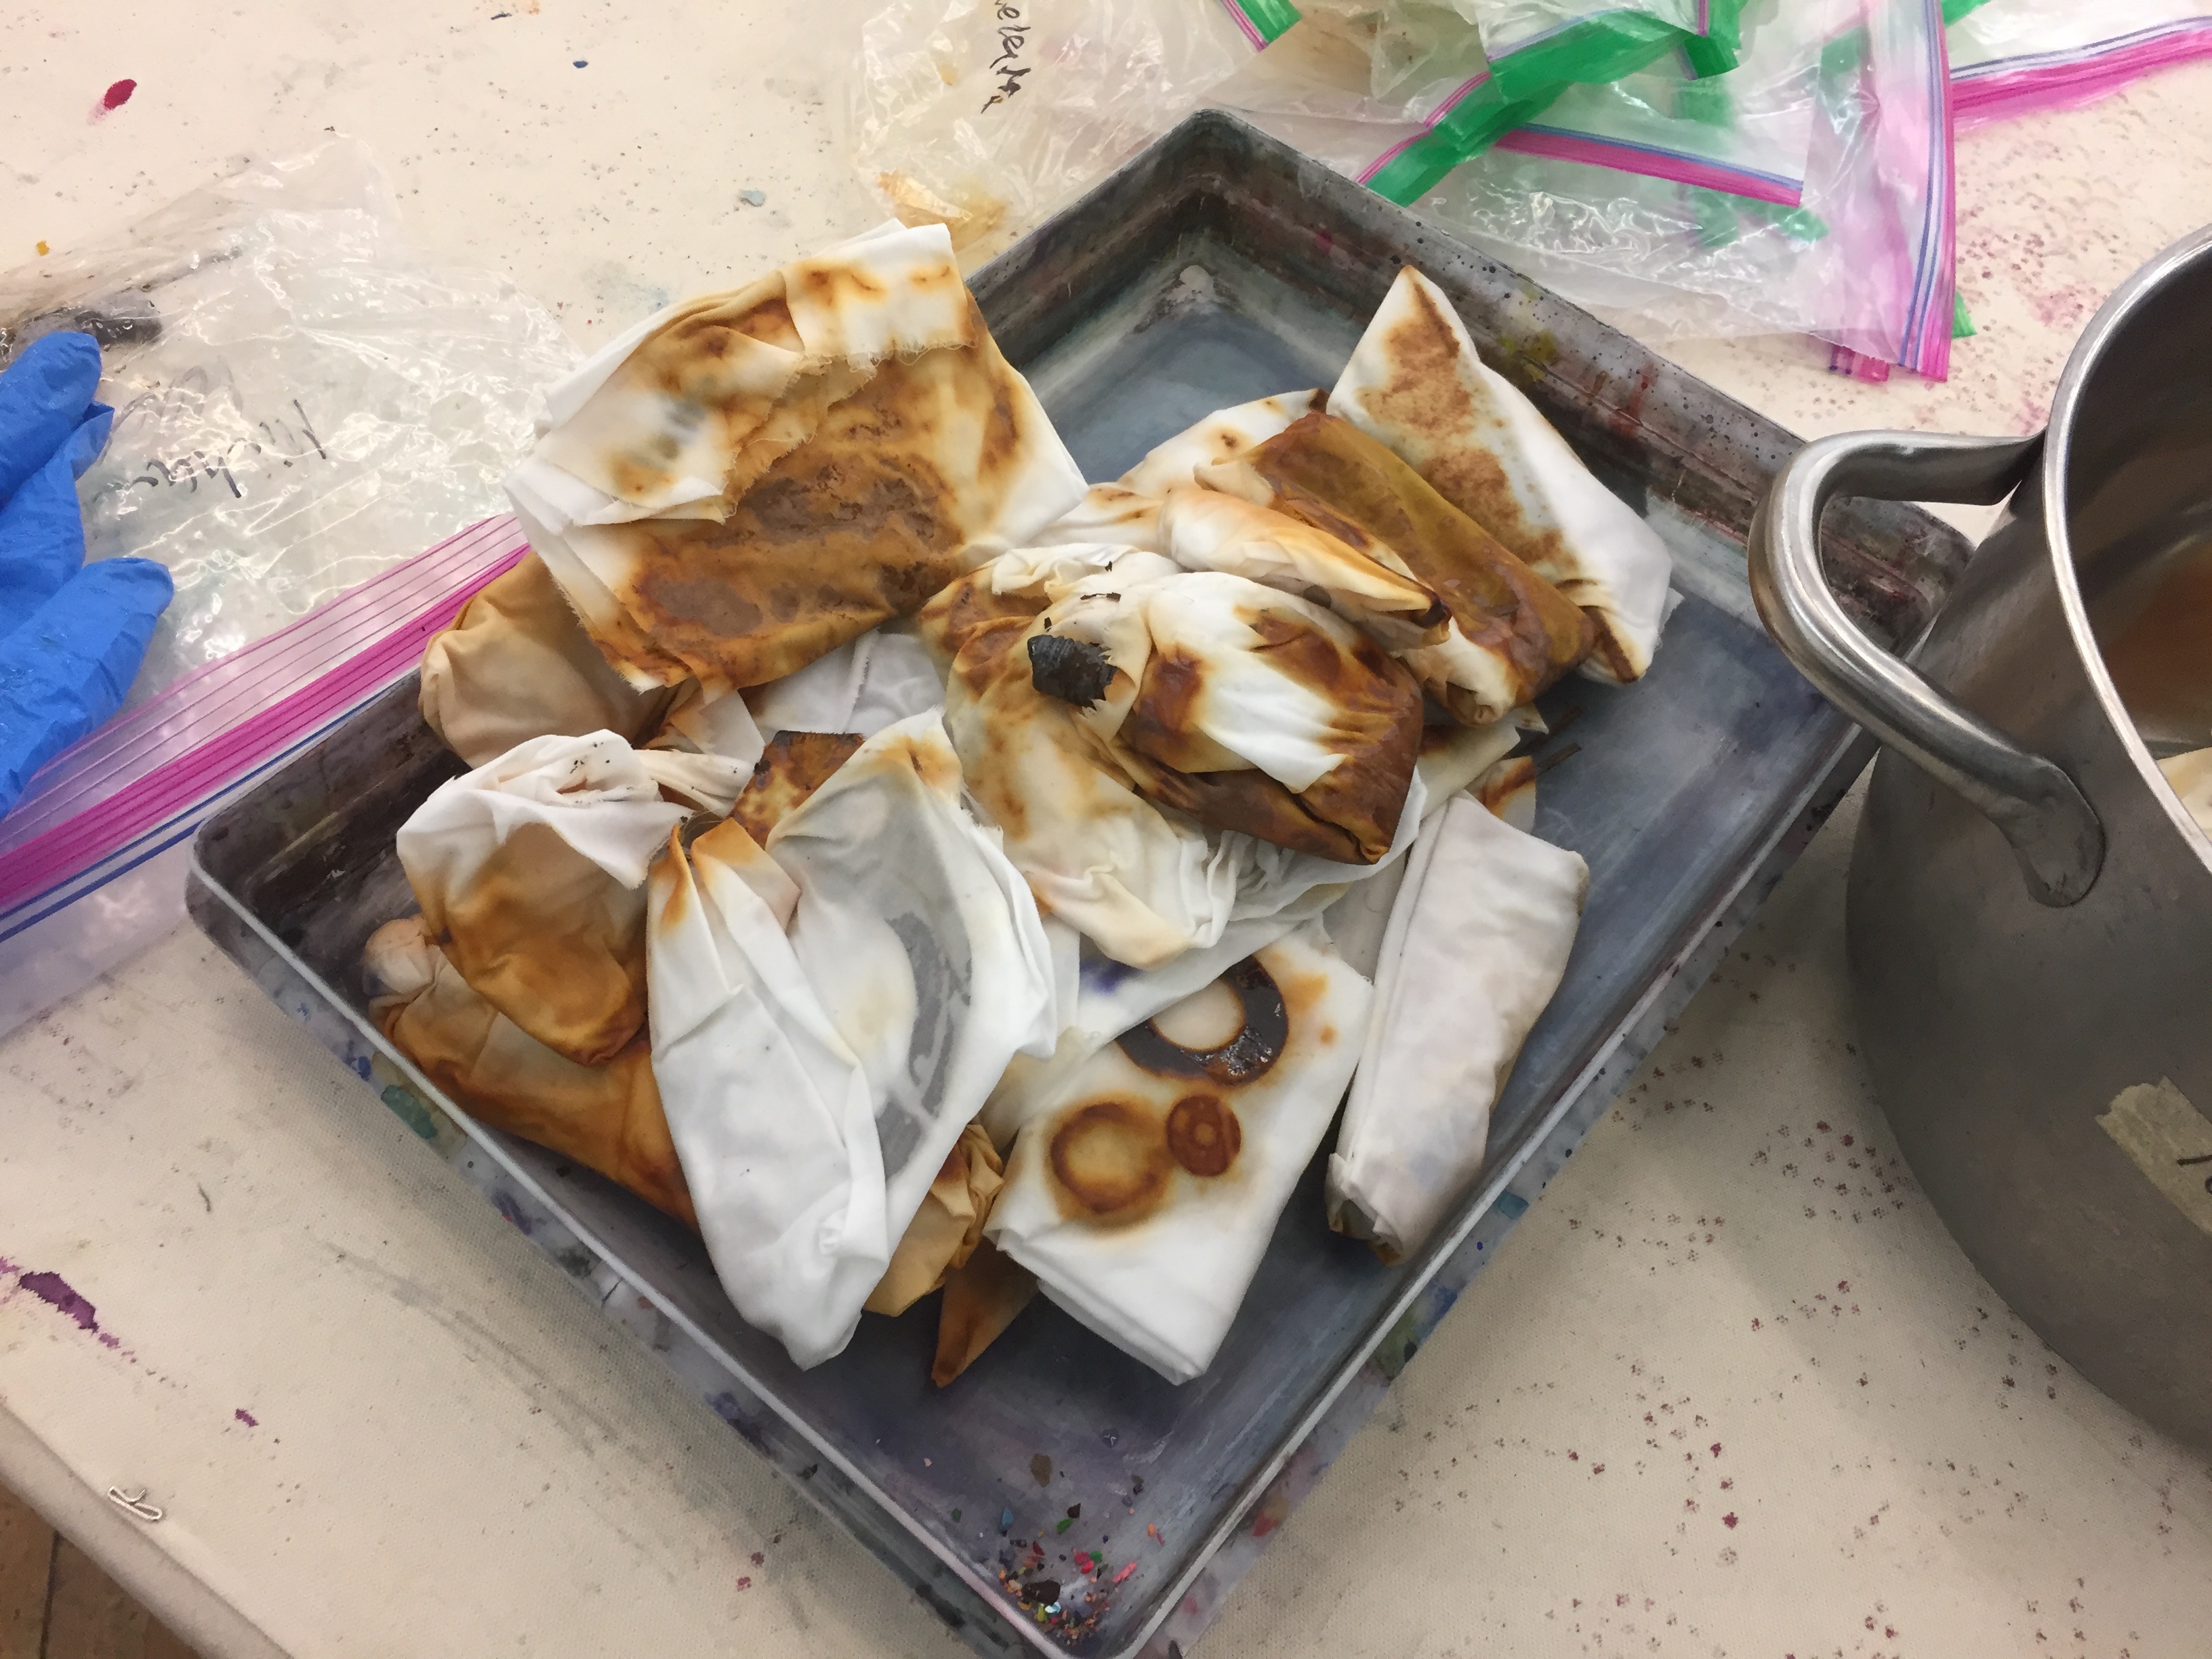
The bundles need to sit for a few days in plastic bags so that they stay wet. It is important that the wet fabric remain in contact with the rusty objects, so that the rust can dye the fabric. This is what our bundles looked like after just two days!
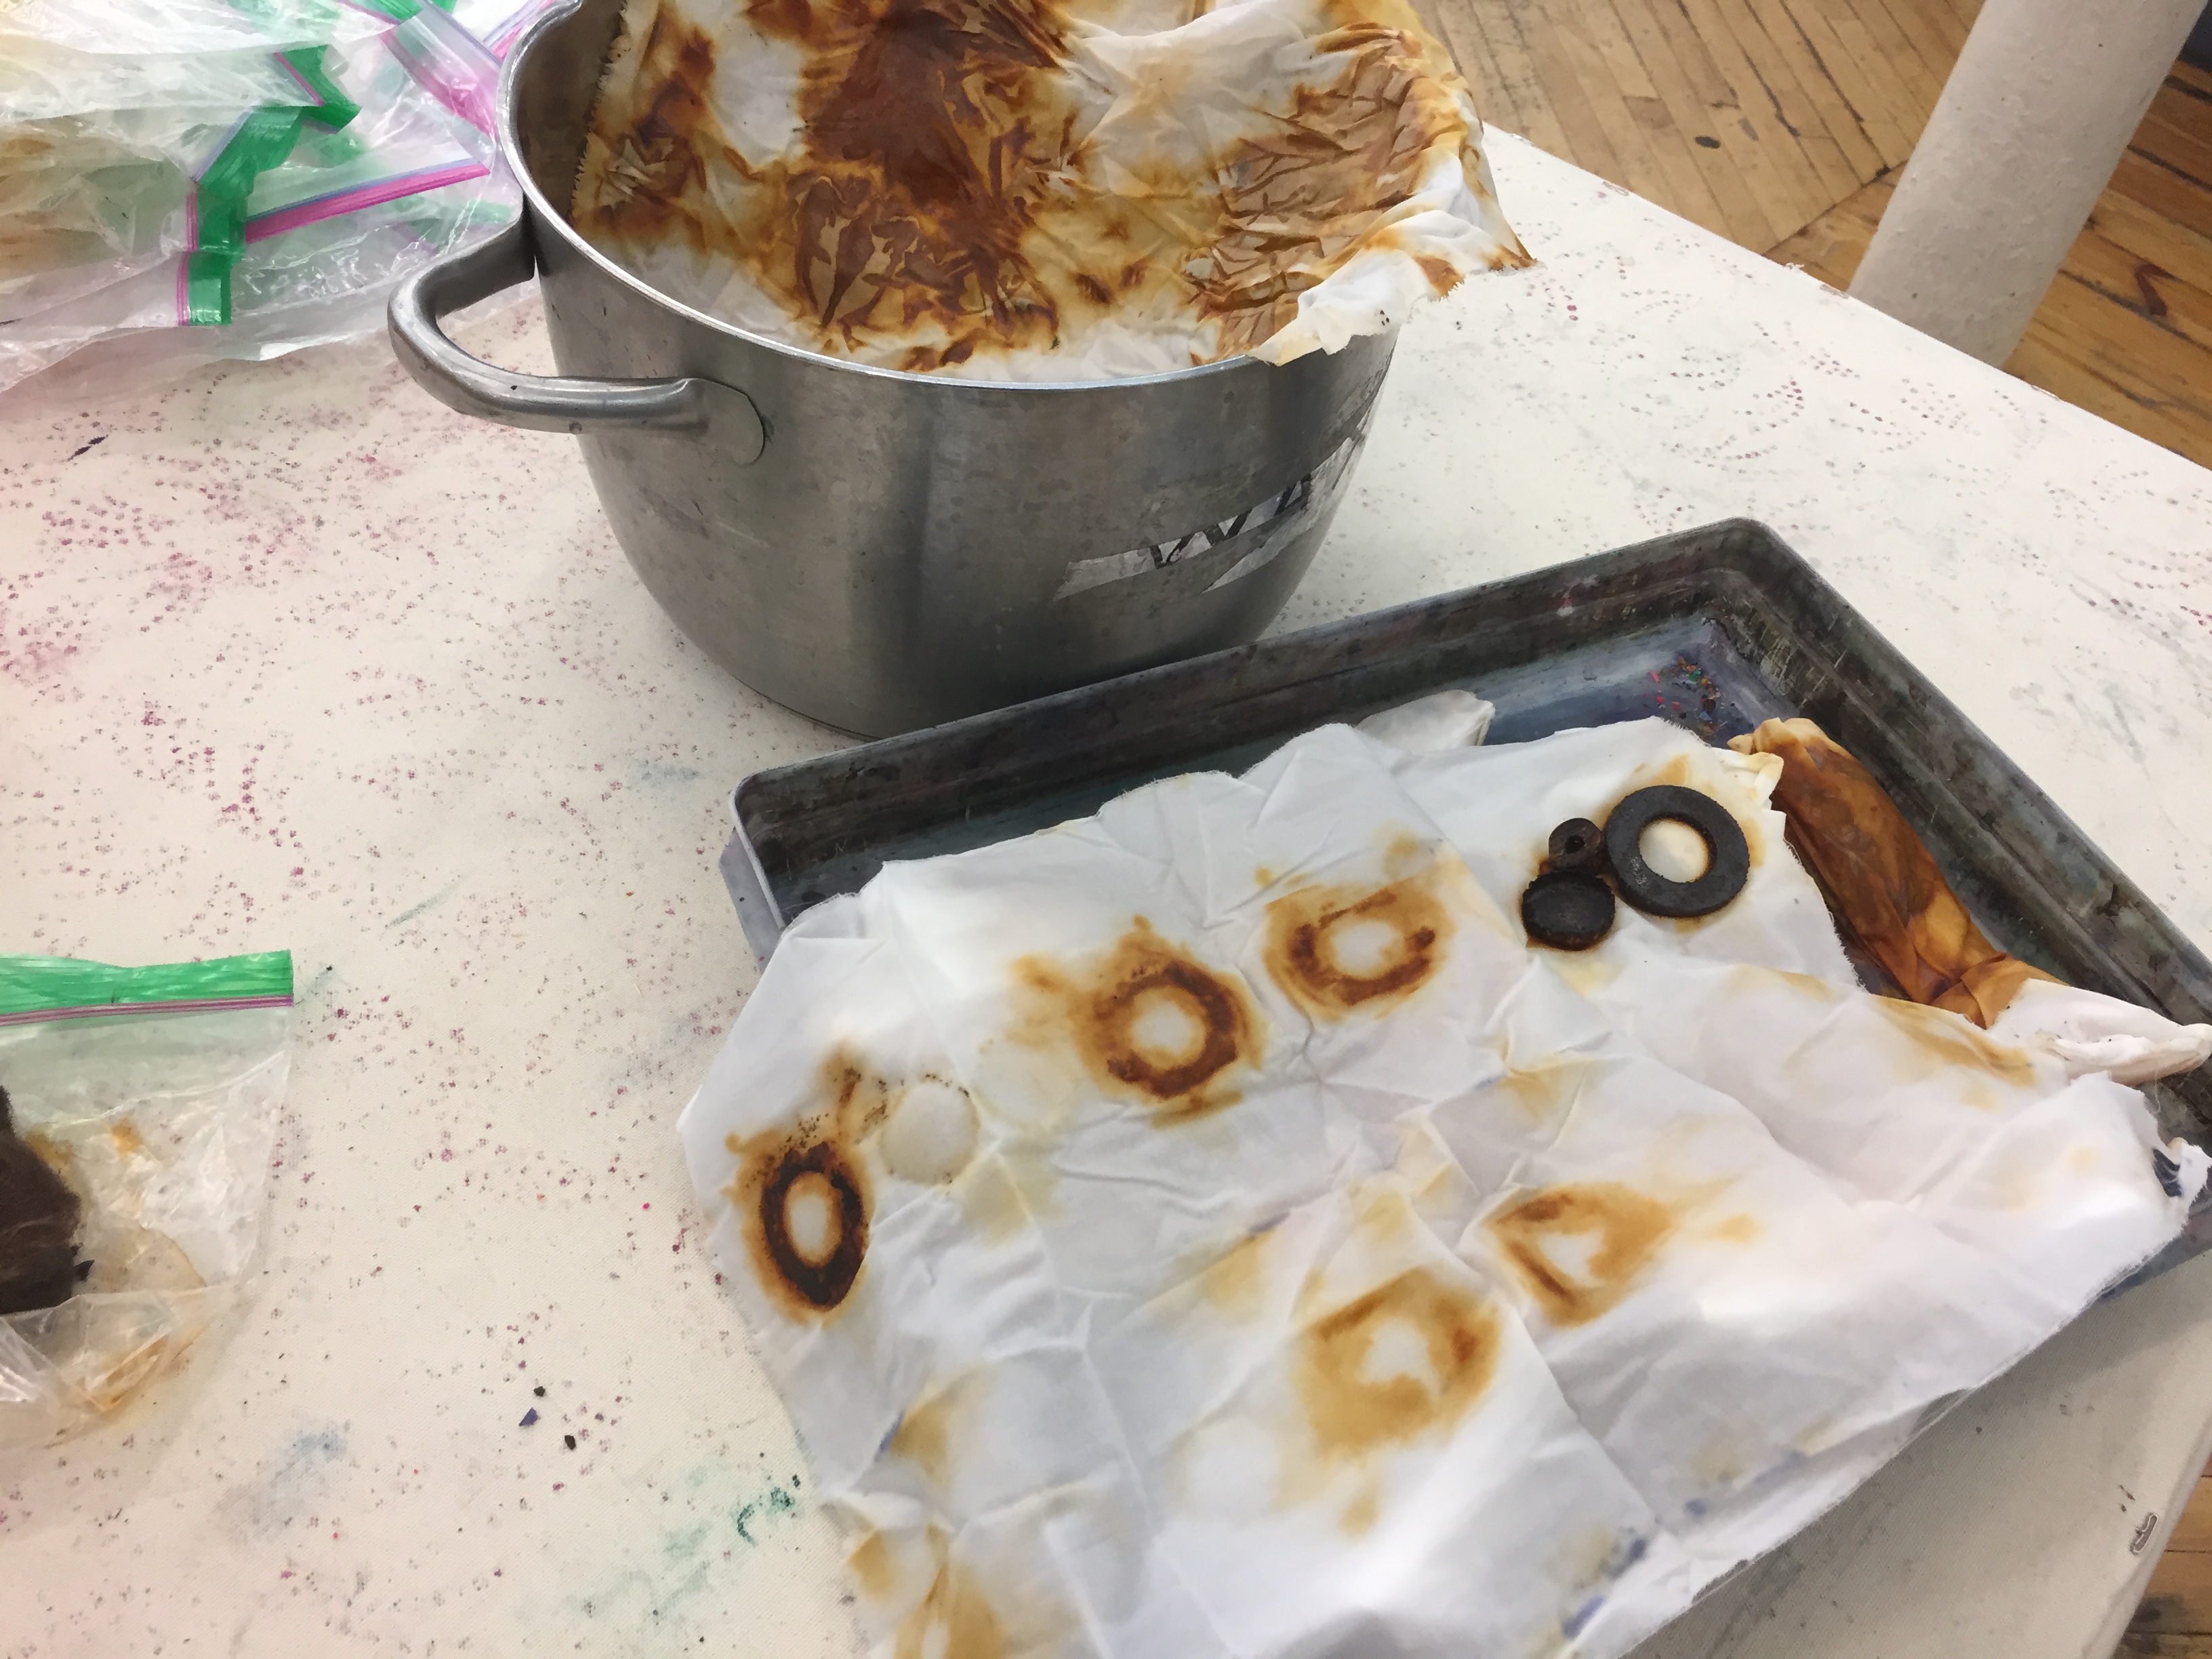
Once the fabrics were unfolded, the result was a repeating pattern based on the materials that we used in various degrees of intensity depending on the folds of fabric. Some results were straight forward while others were surprising, the fabric in the bowl’s design resulted from some iron wool! It wasn’t even rusted before we used it, and look what a dynamic job it did!
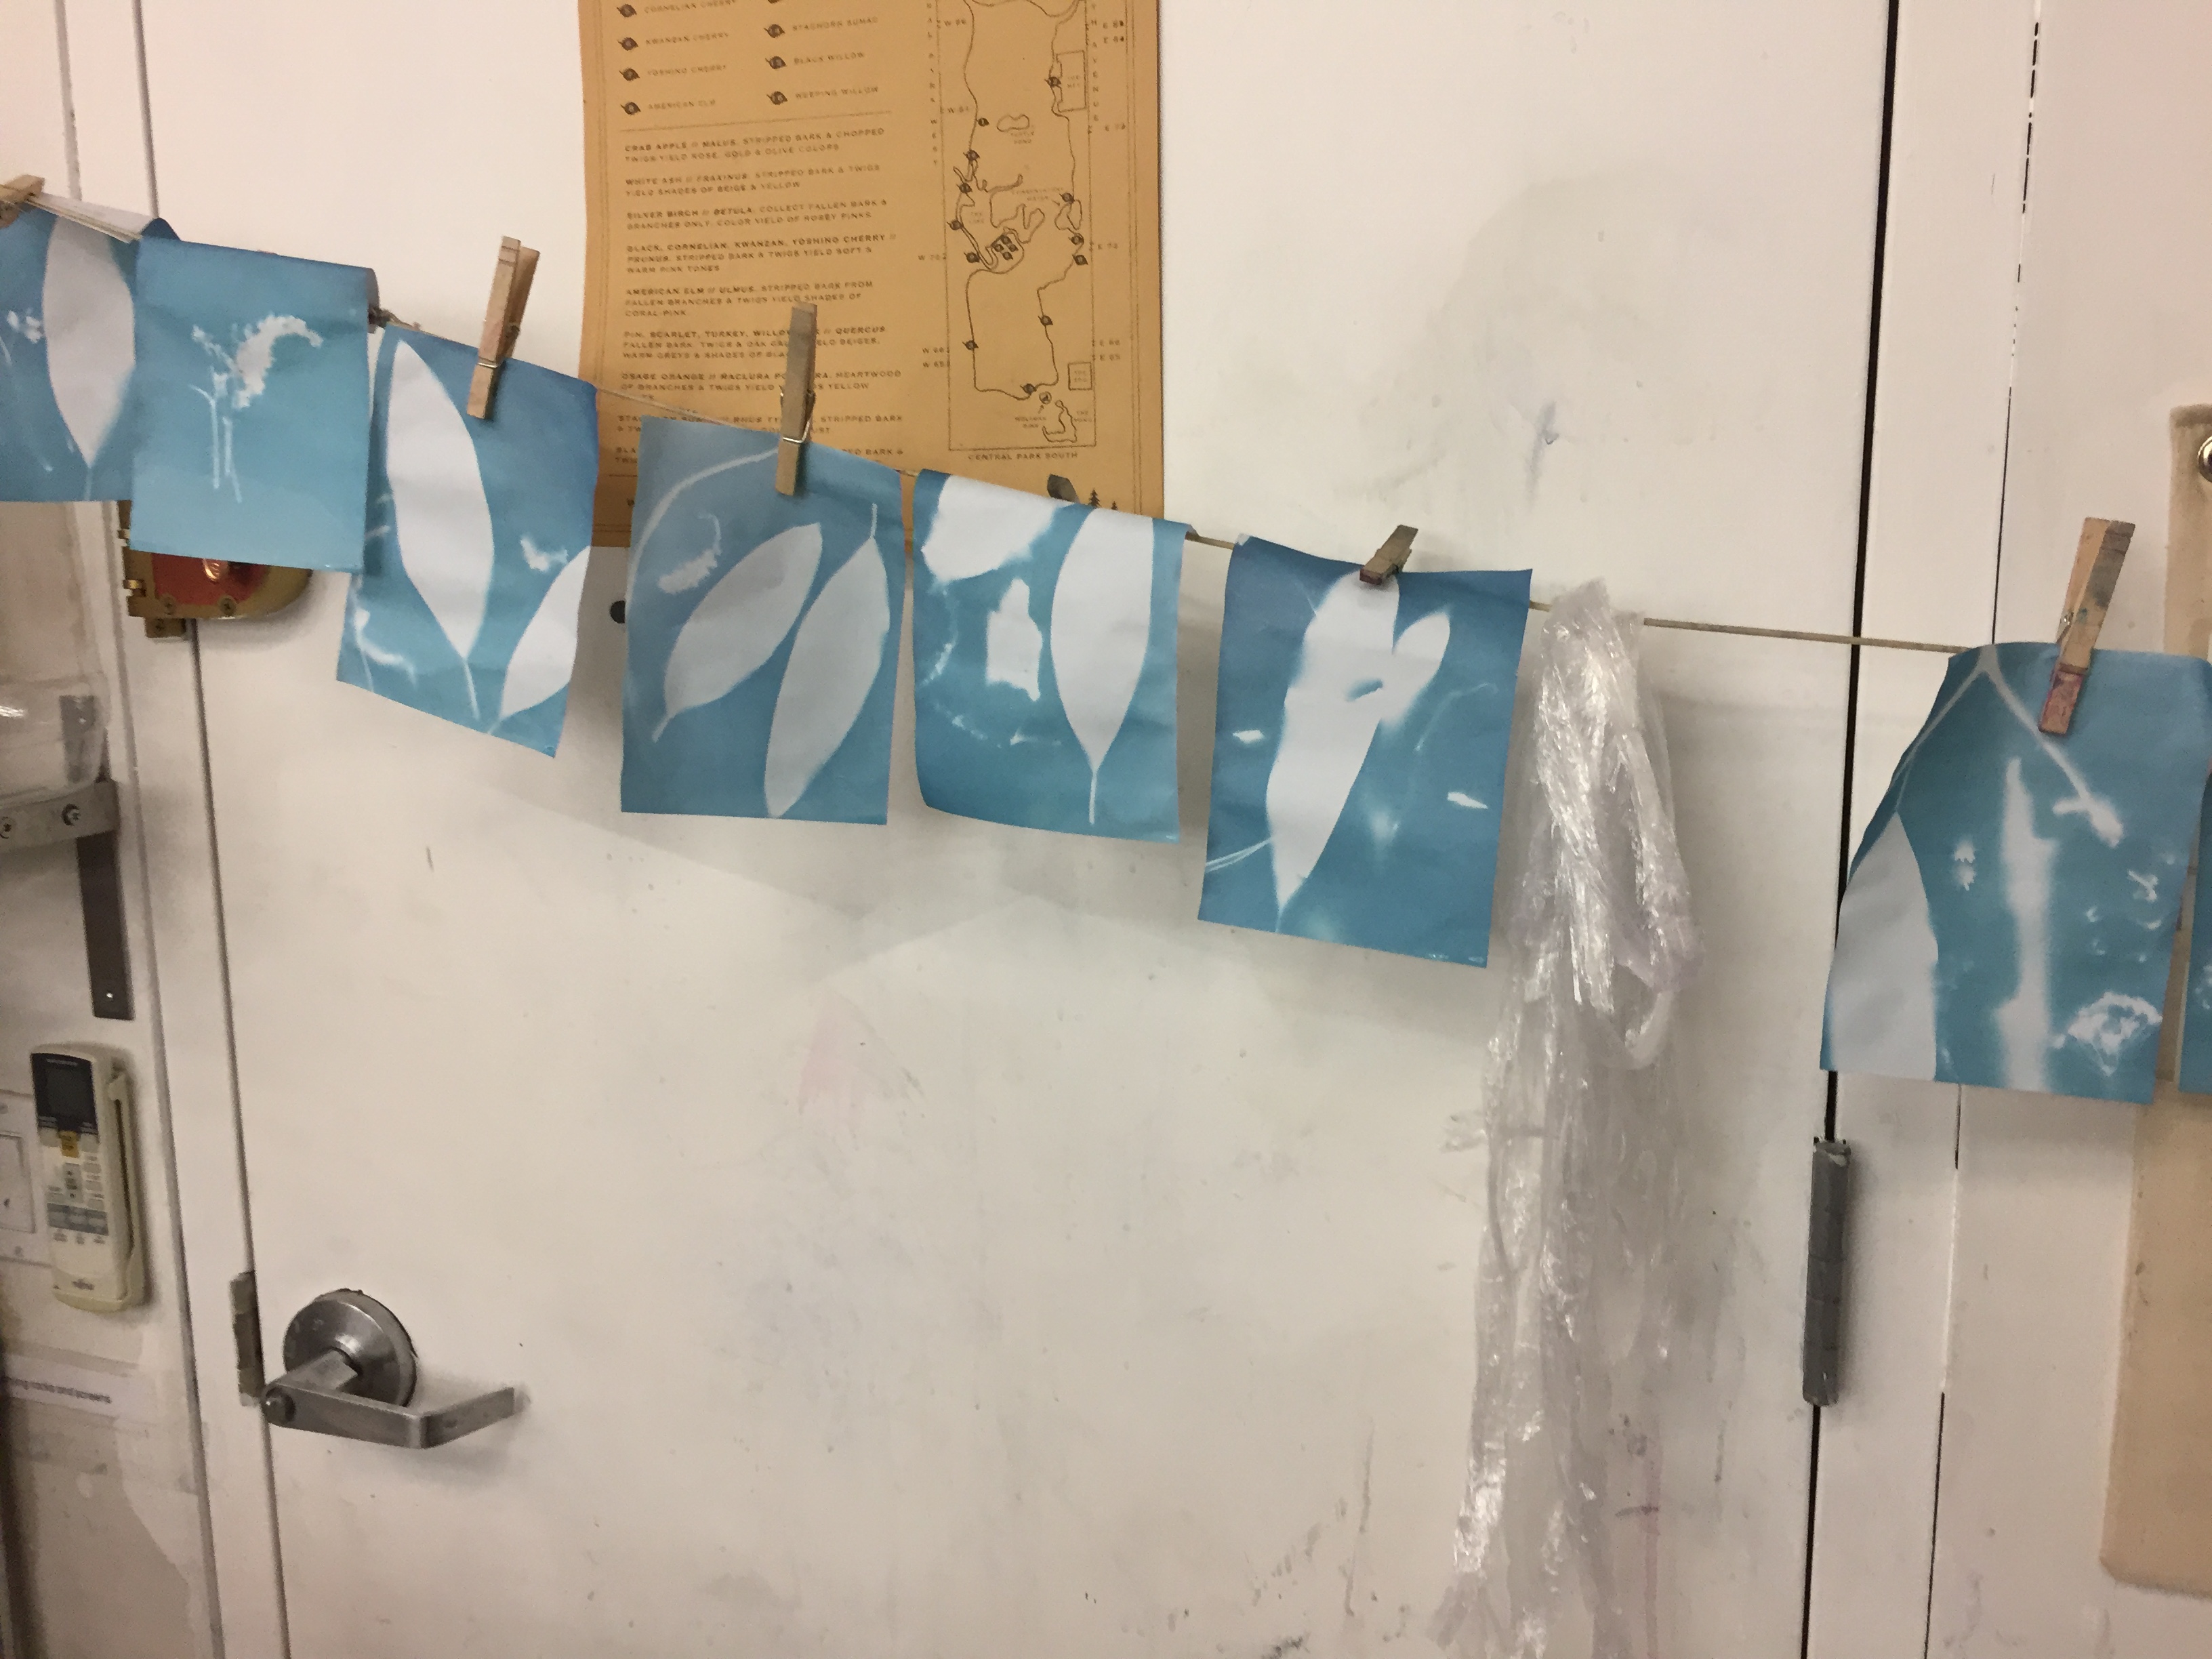
The final fabric in our elemental trilogy harnessed the power of the sun. Cyanotypes were one of the first forms of photography to be developed which uses two chemicals: ferric ammonium citrate and potassium ferricyanide. Once a material has been coated with these and is exposed to a light source, an image will result where the area exposed to light turns blue. Because the process is both involved and a one shot situation, we practiced a week ahead of time using cyanotype coated papers and the light table in our darkroom to experiment with compositions.
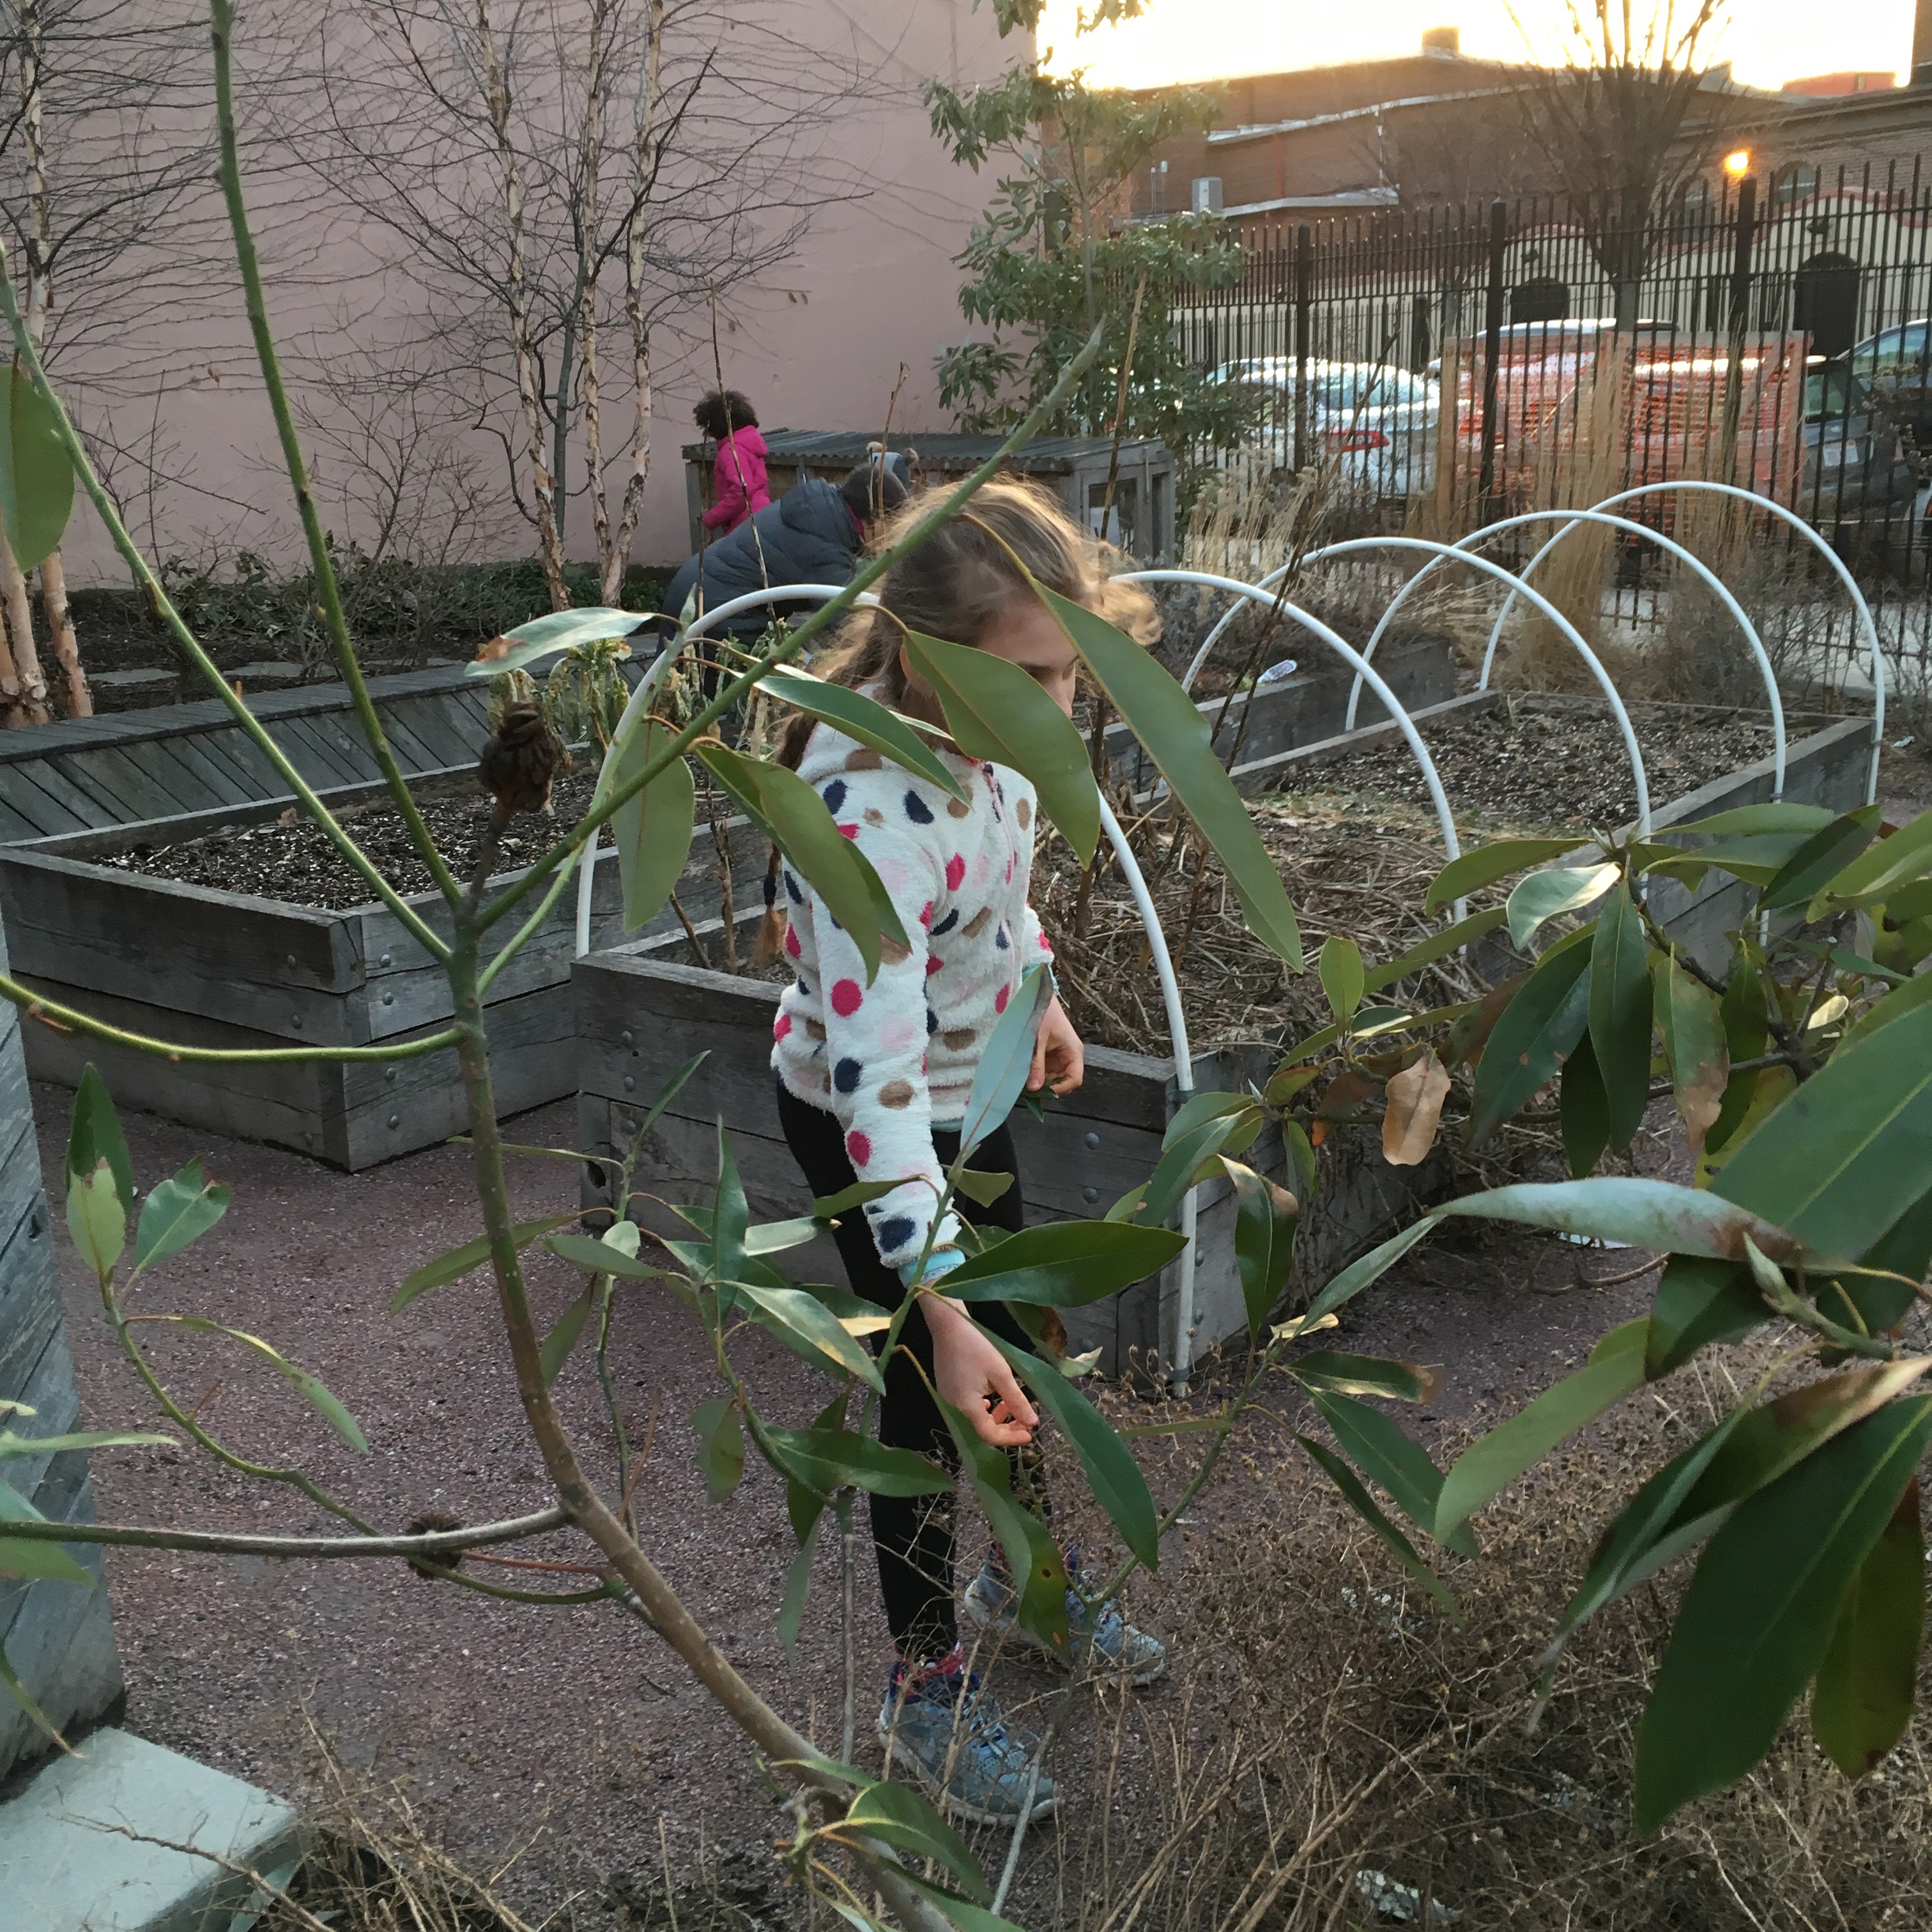
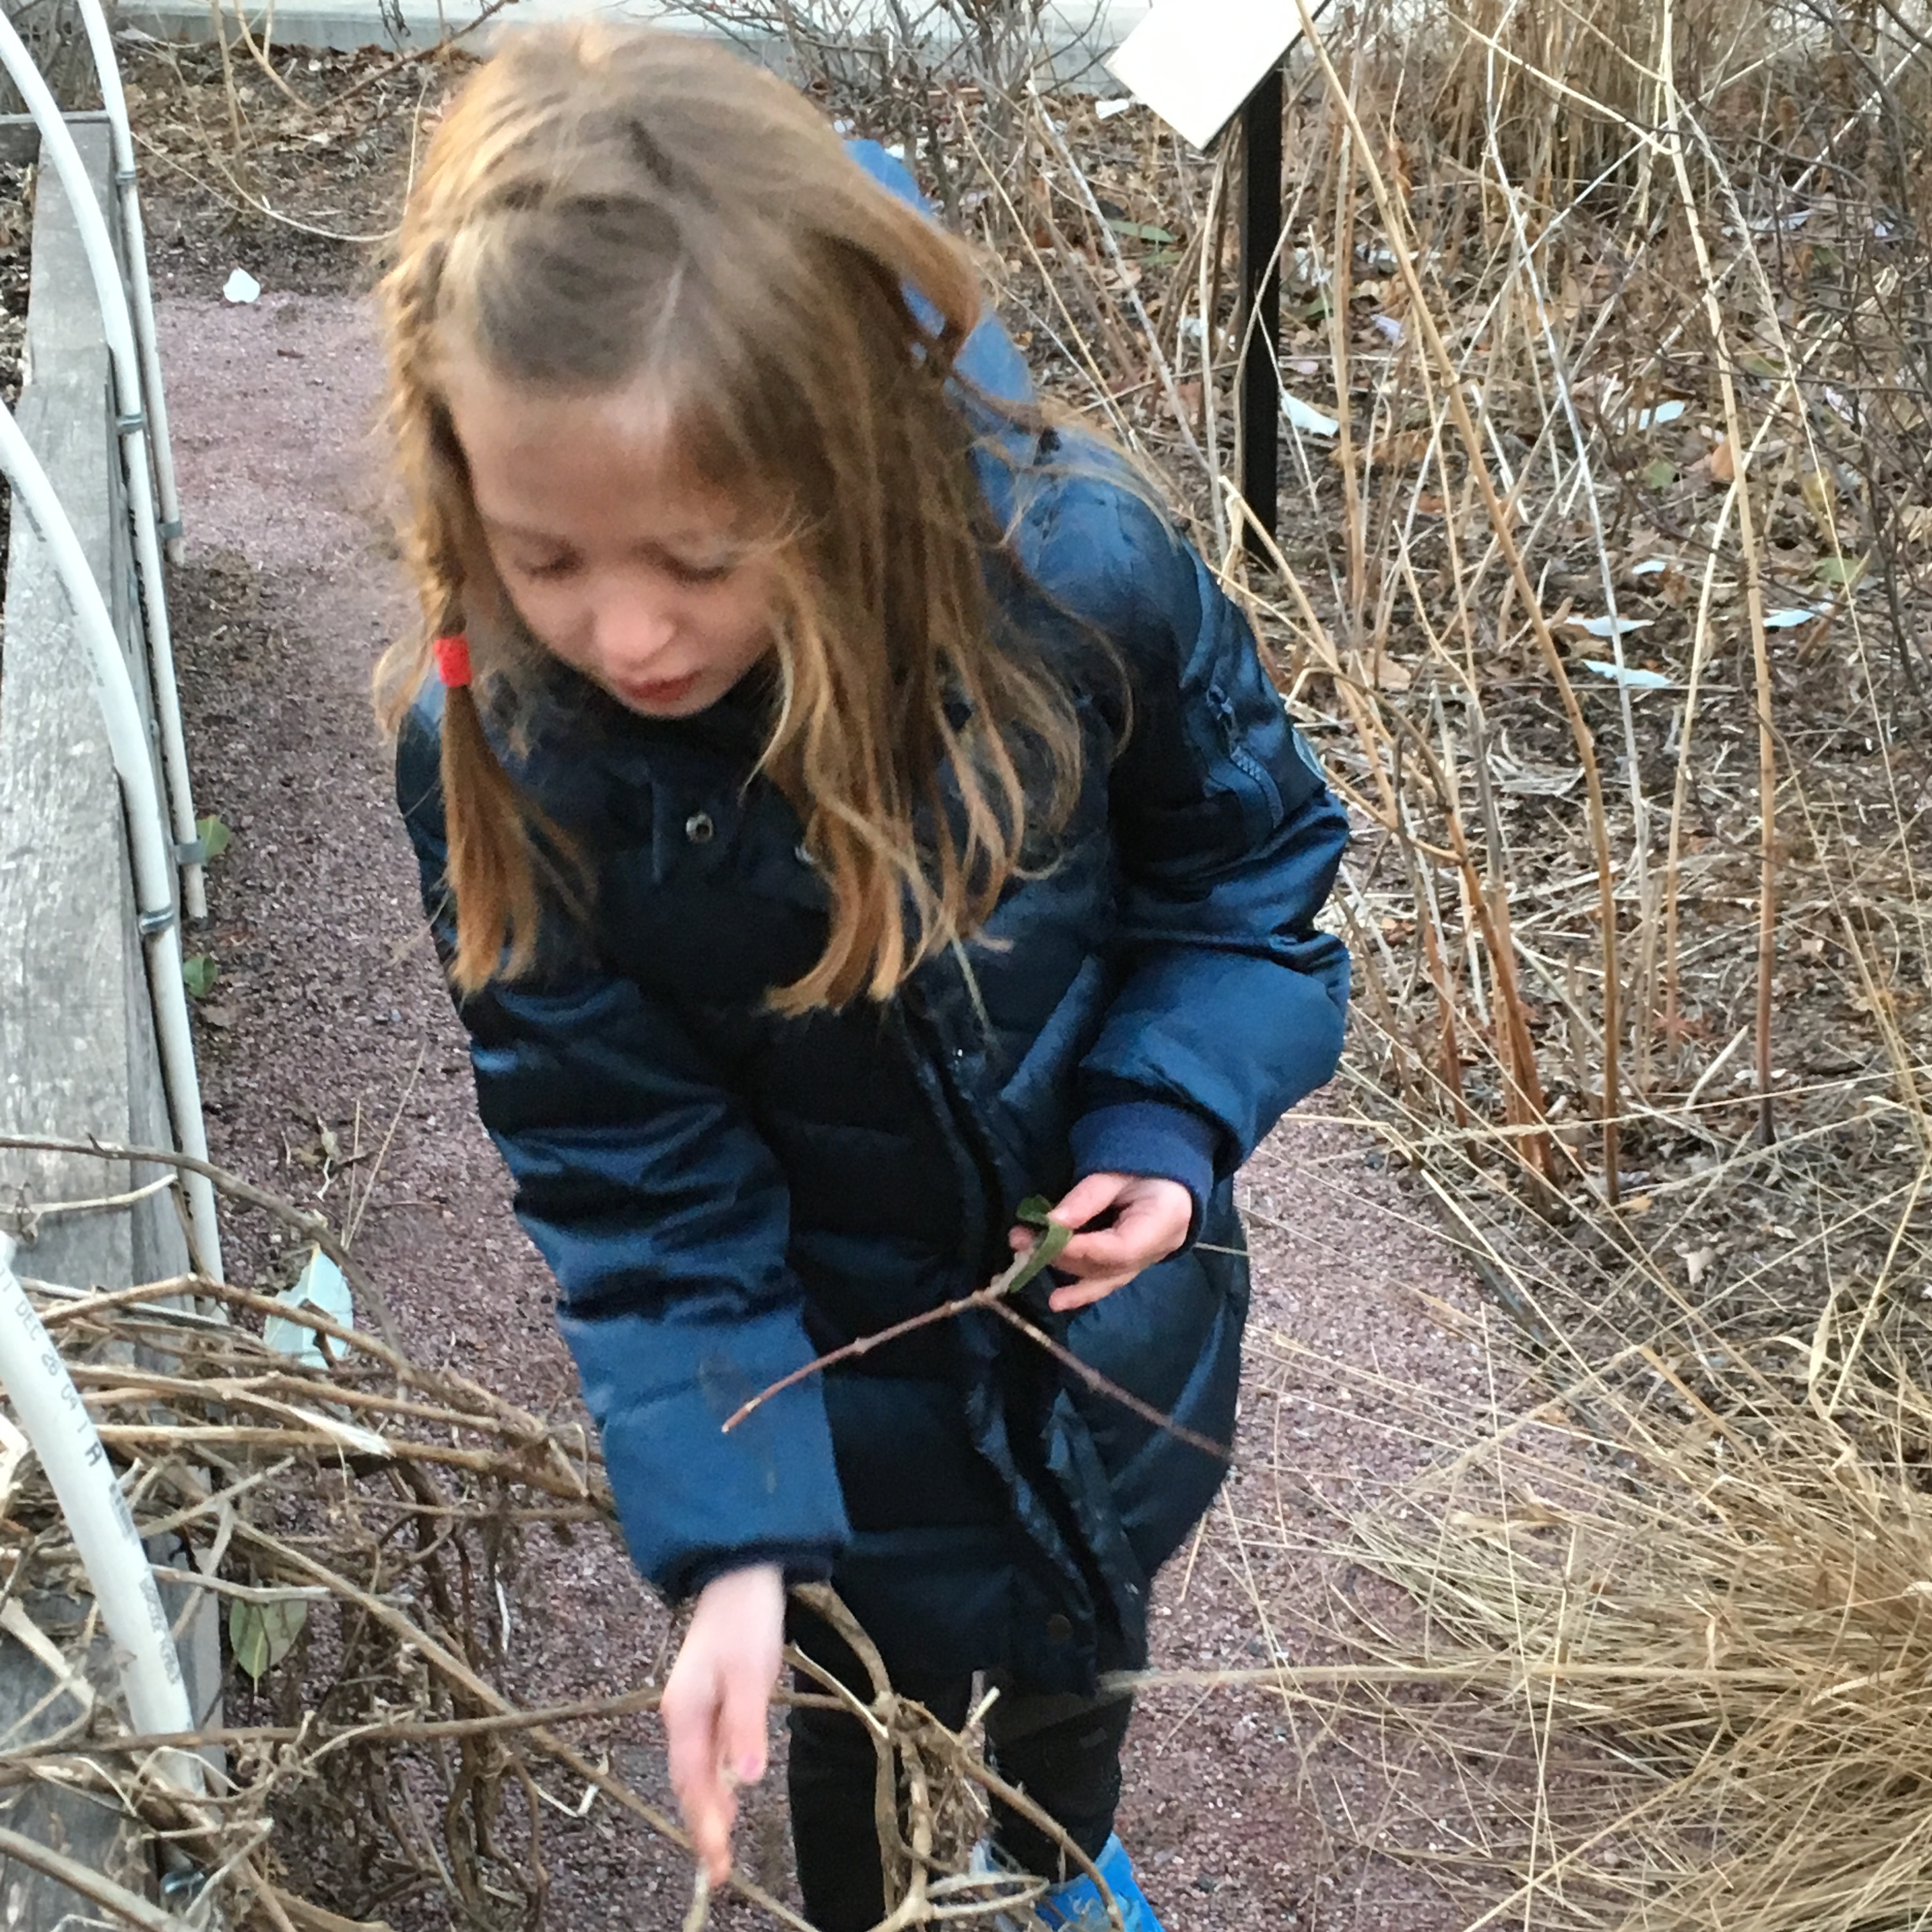
We went out into the nearby community garden to gather some organic materials (leaves, sticks, vines, and seed pods) to use as resists for our cyanotypes. Even though it was still winter, there were plenty of interesting forms to choose from.
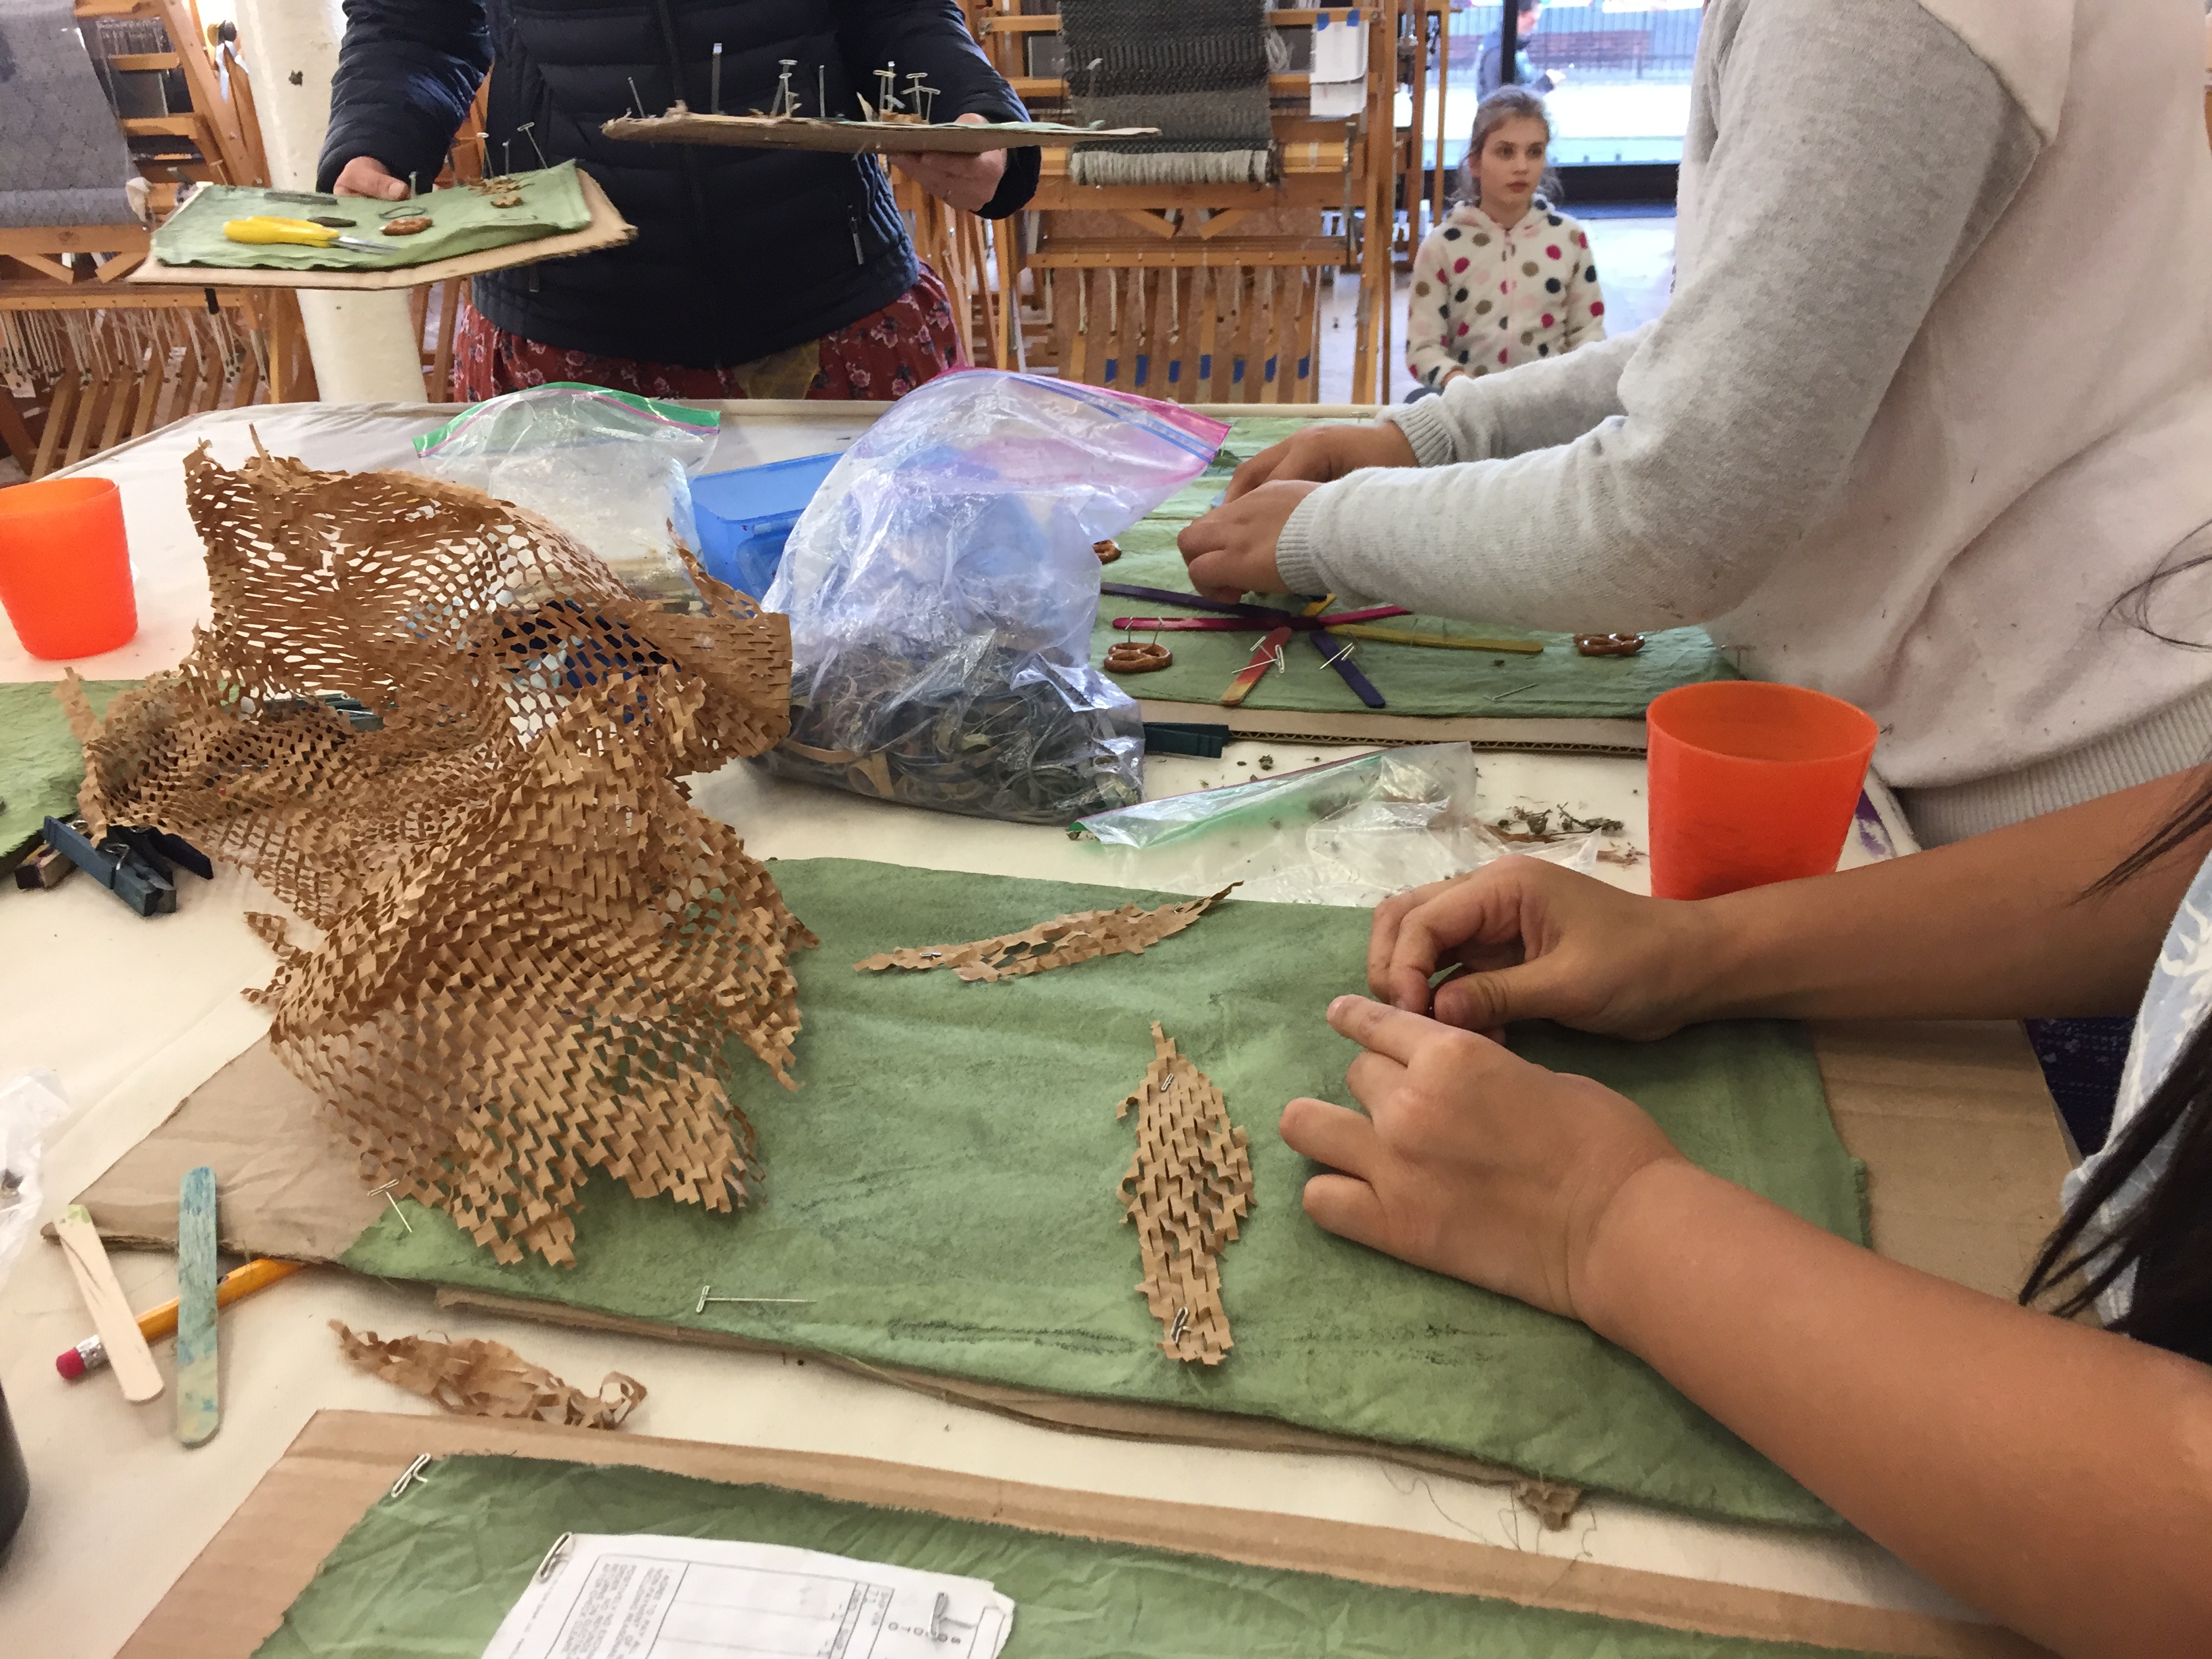
We set out the organic materials from the garden alongside materials that we found in the studio. The fabric was presoaked in a cyanotype solution that you can buy and mix up yourself. This needs to be done in a dark or dimly lit place where it can be left to dry without being exposed to light (we used the darkroom in our studio). If you do not have access to something akin to that, it is easy to source pre-coated cyanotype fabric from many art supply stores.
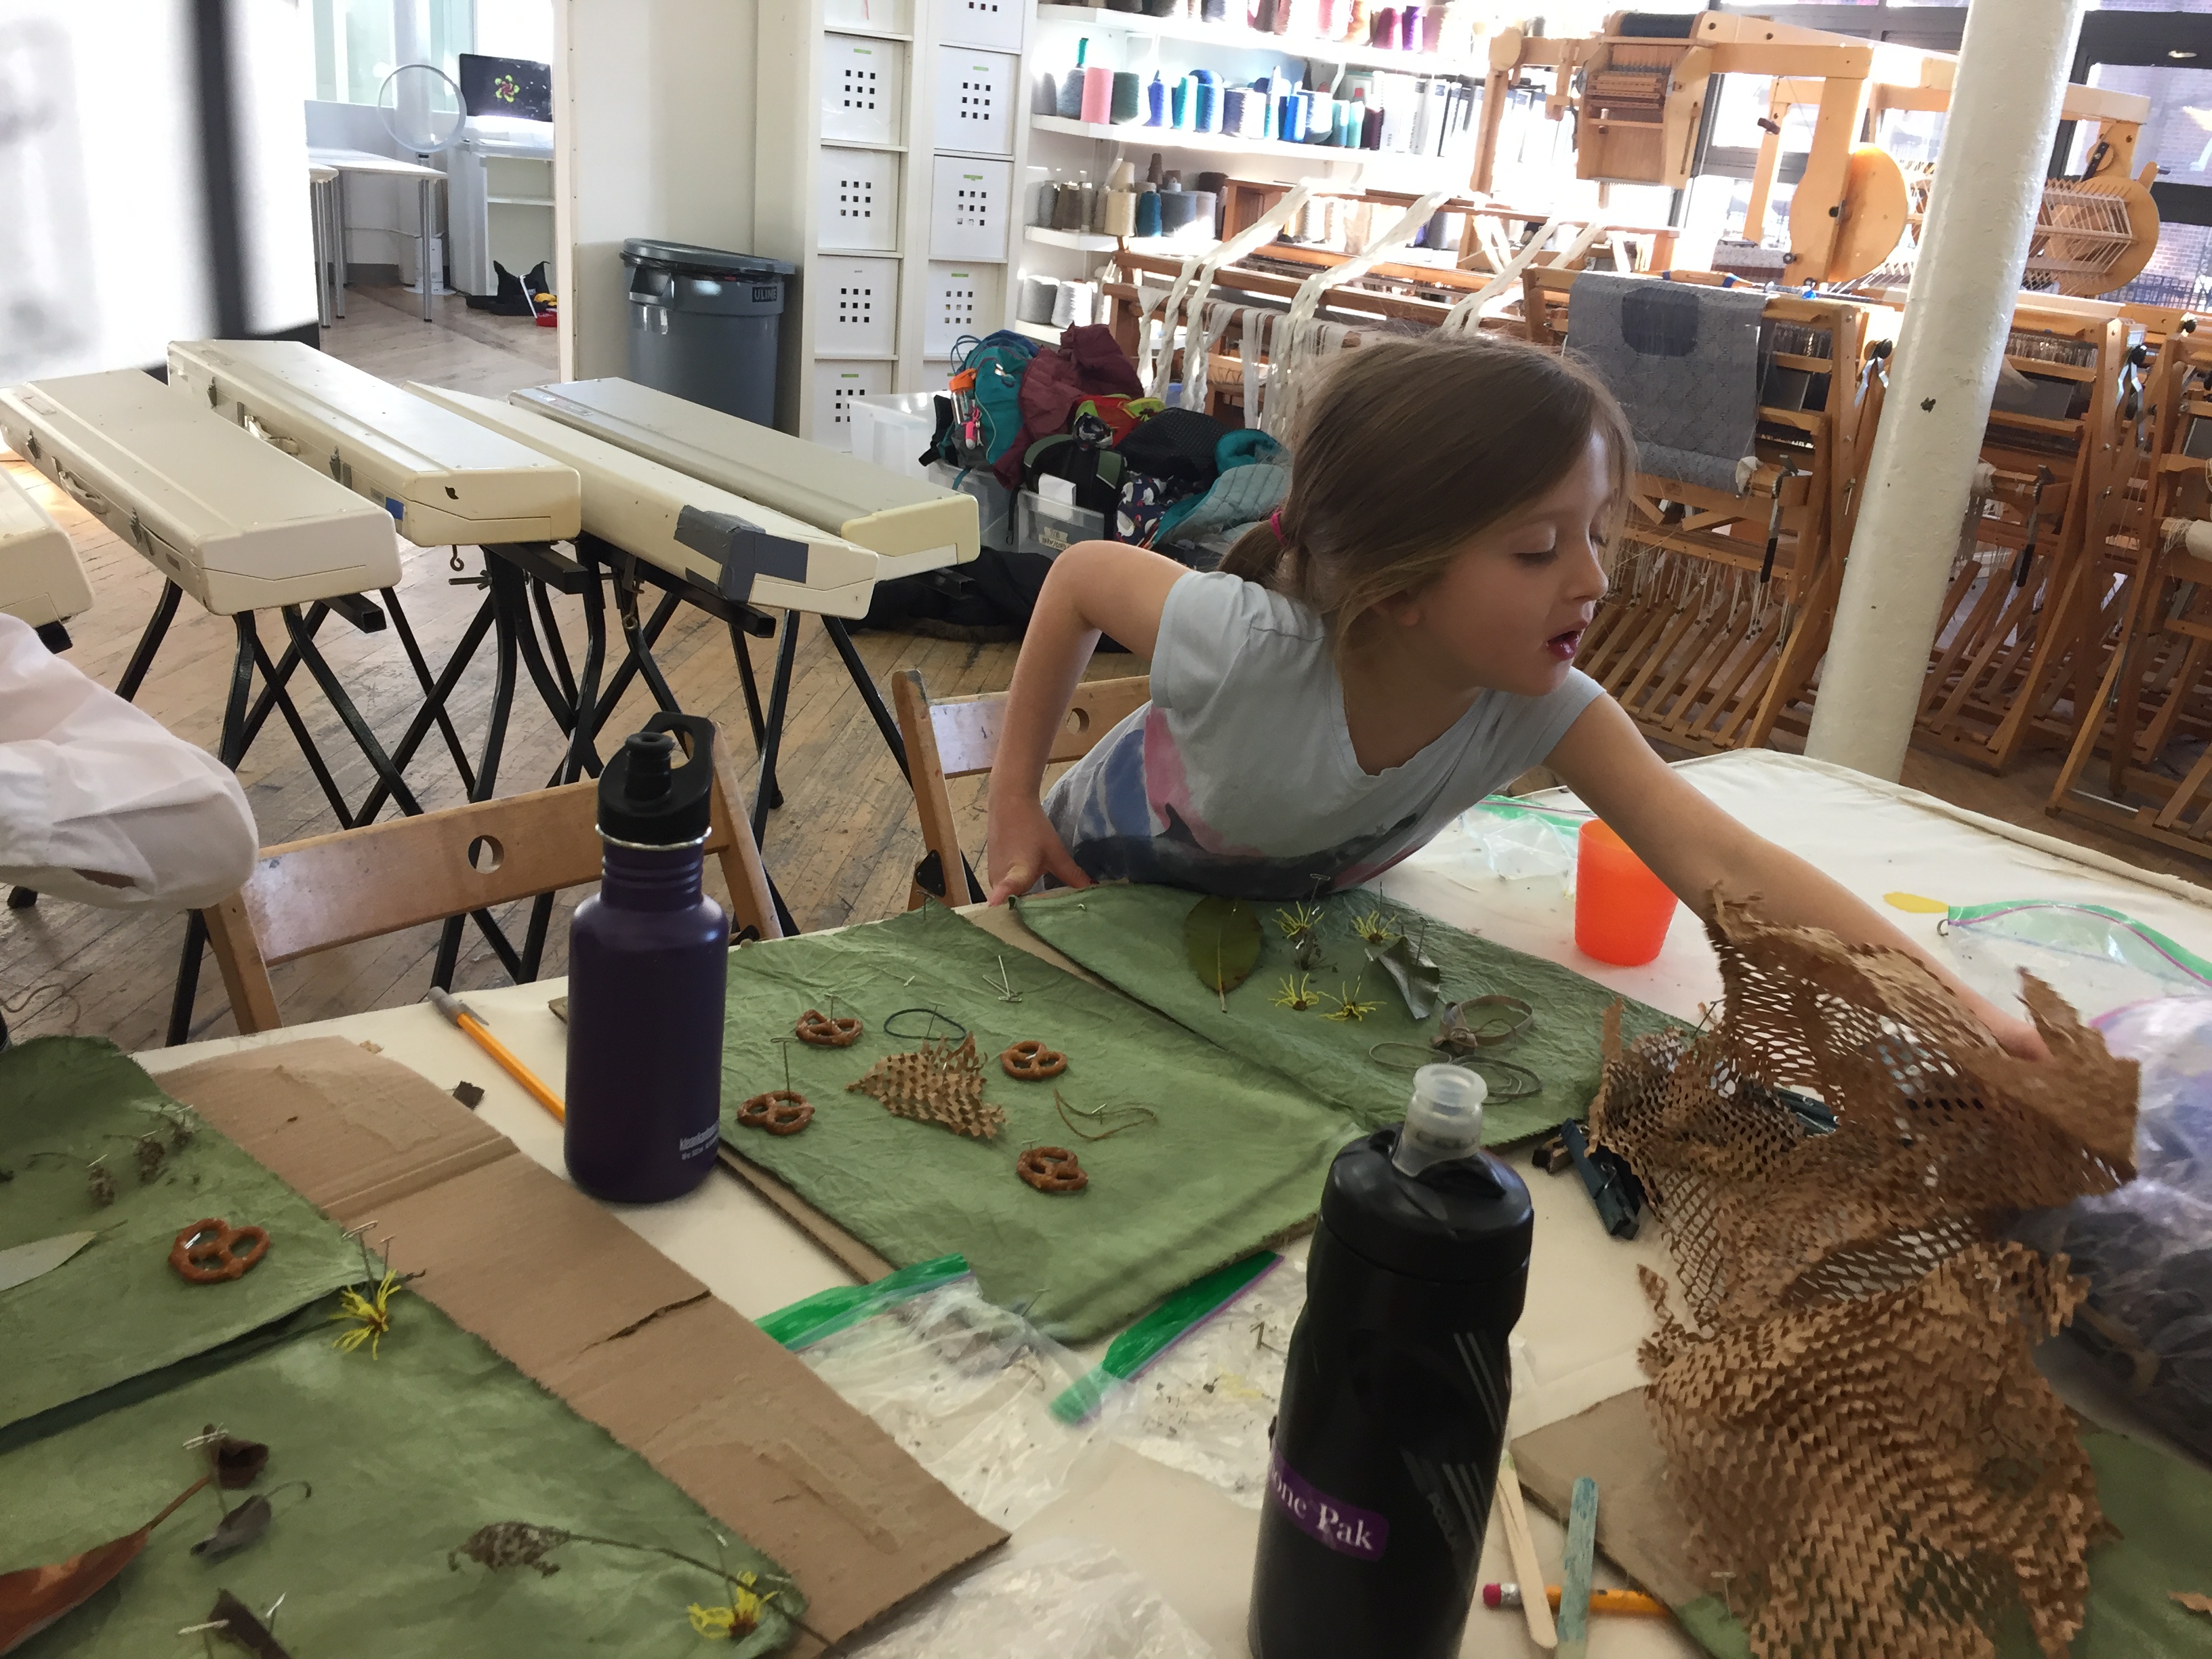
With so many options to choose from, sometimes it’s hard to decide!
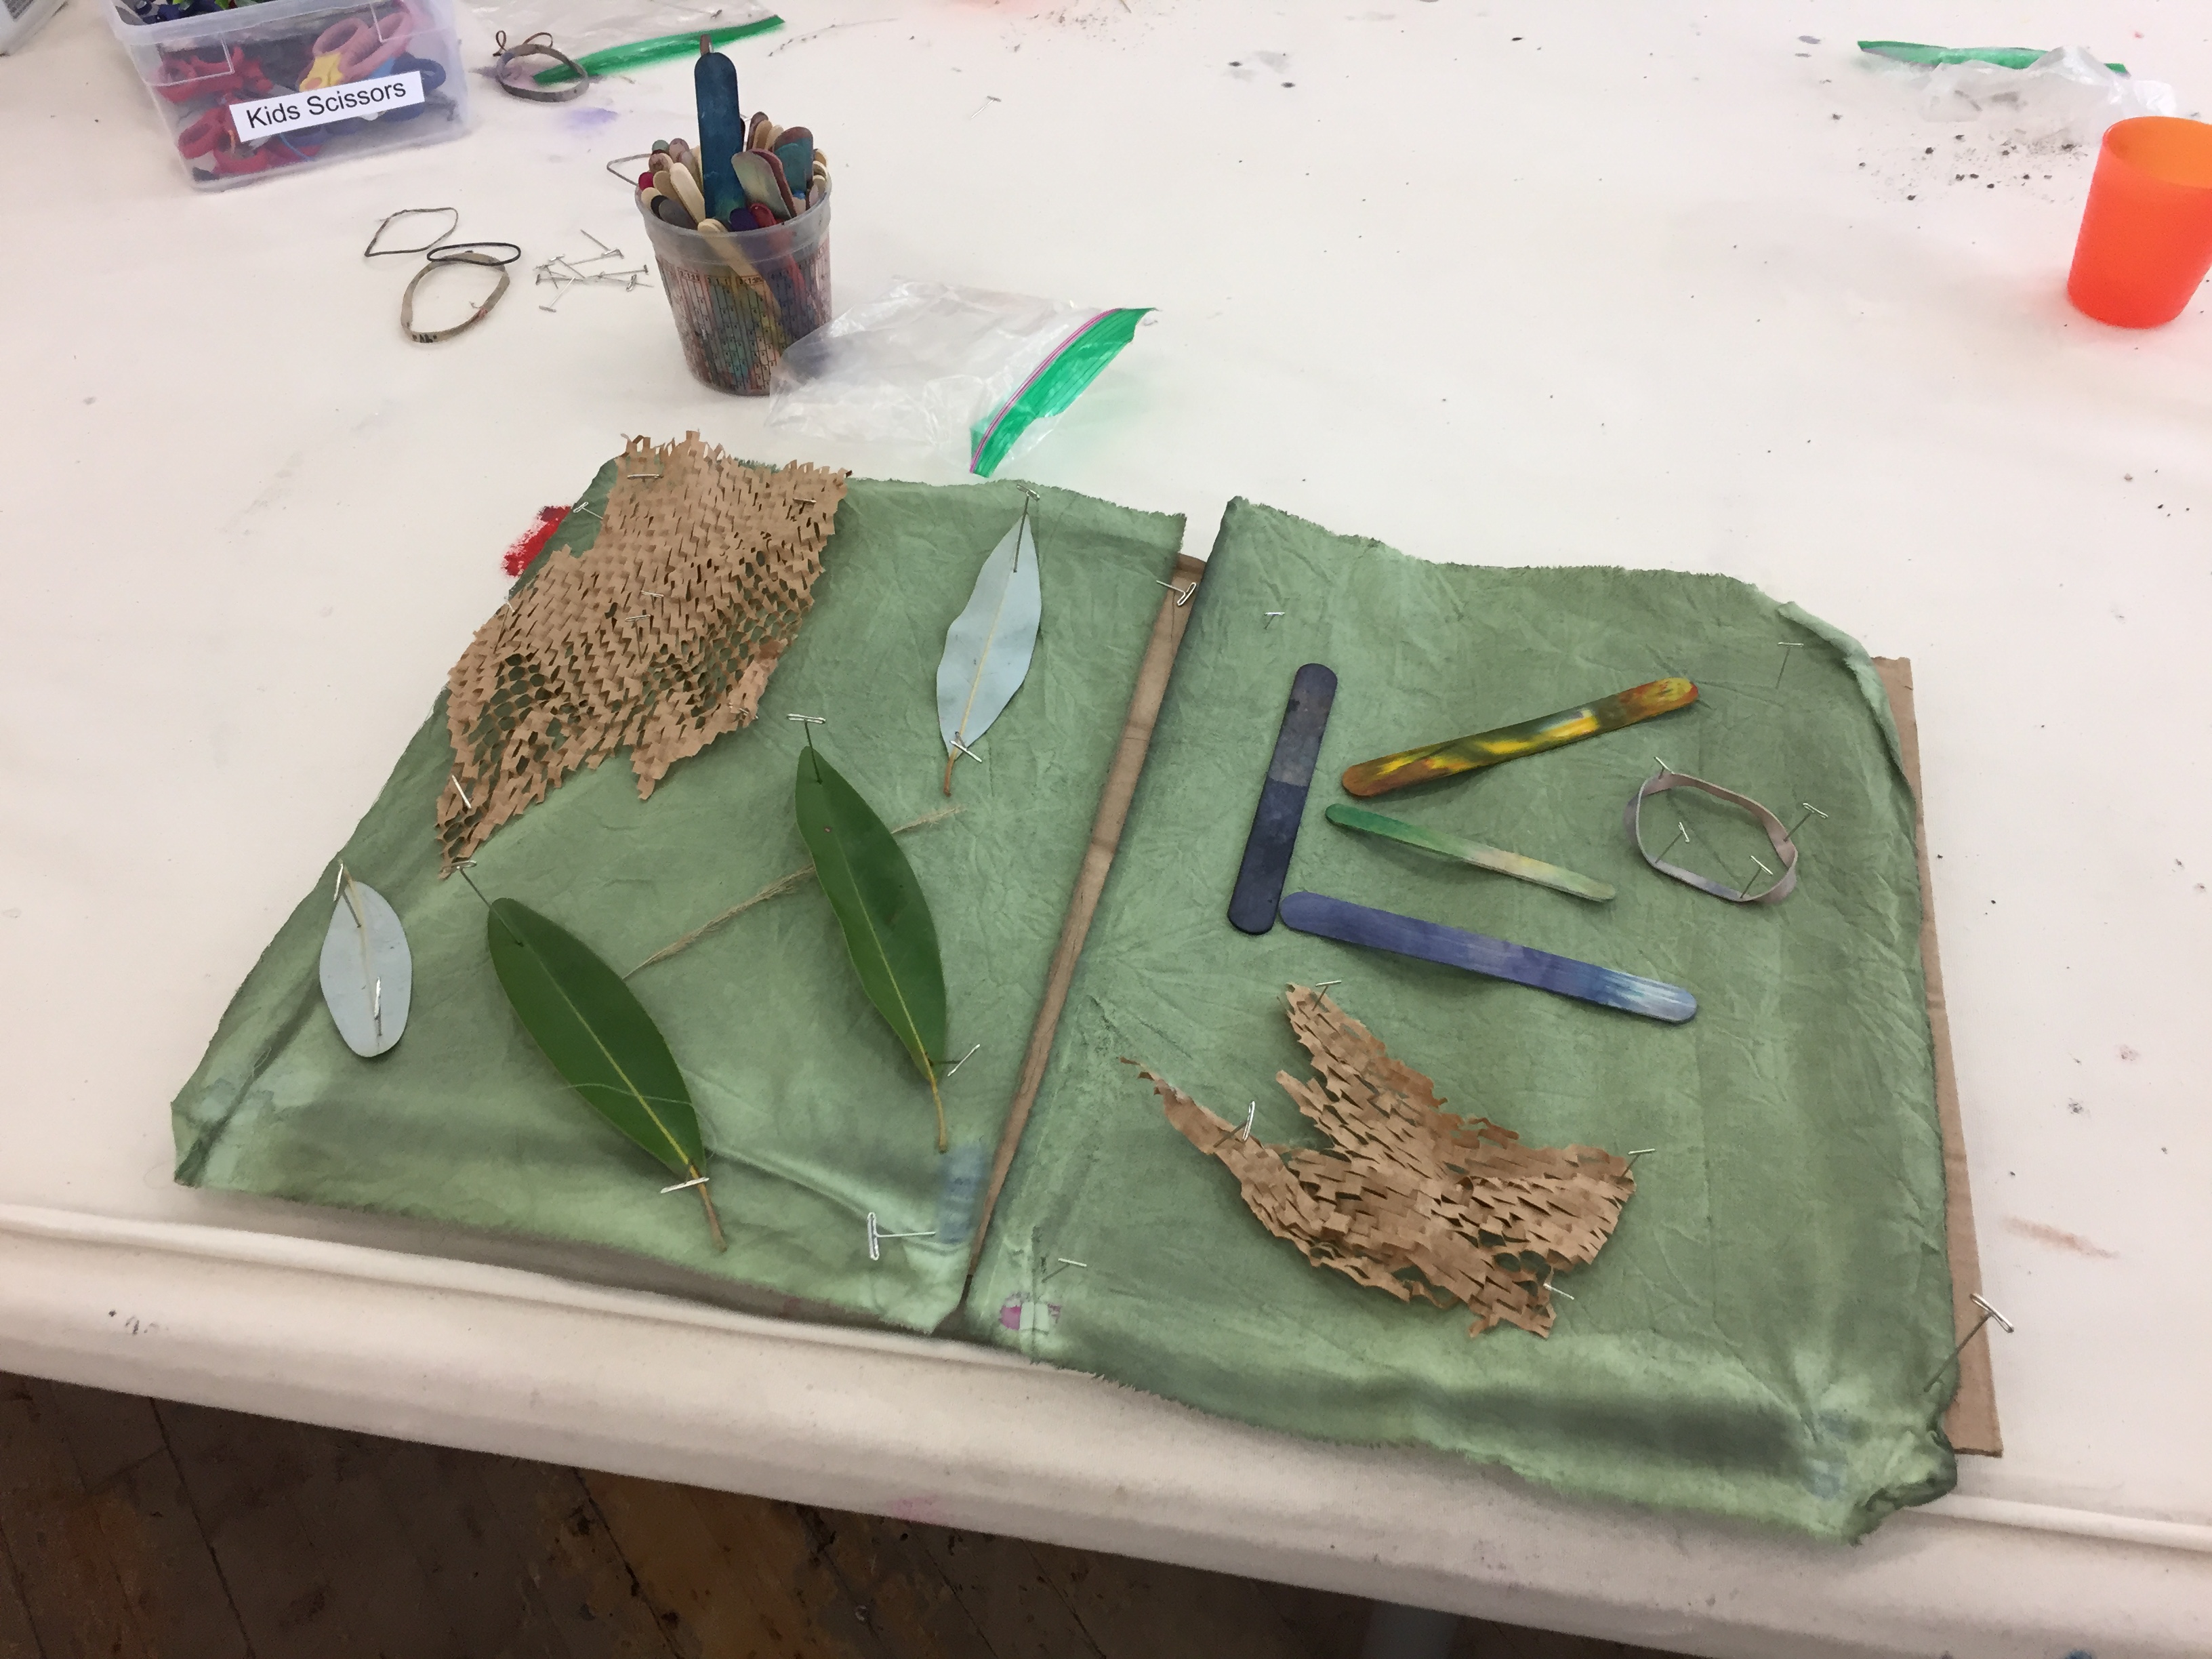
We laid out the completed compositions to be exposed to the light. You can do this indoors or outdoors, though outside on a sunny day is the fastest method.

Next we washed out the cyanotypes, and the chemicals developed into beautiful blues when they were exposed to the light.
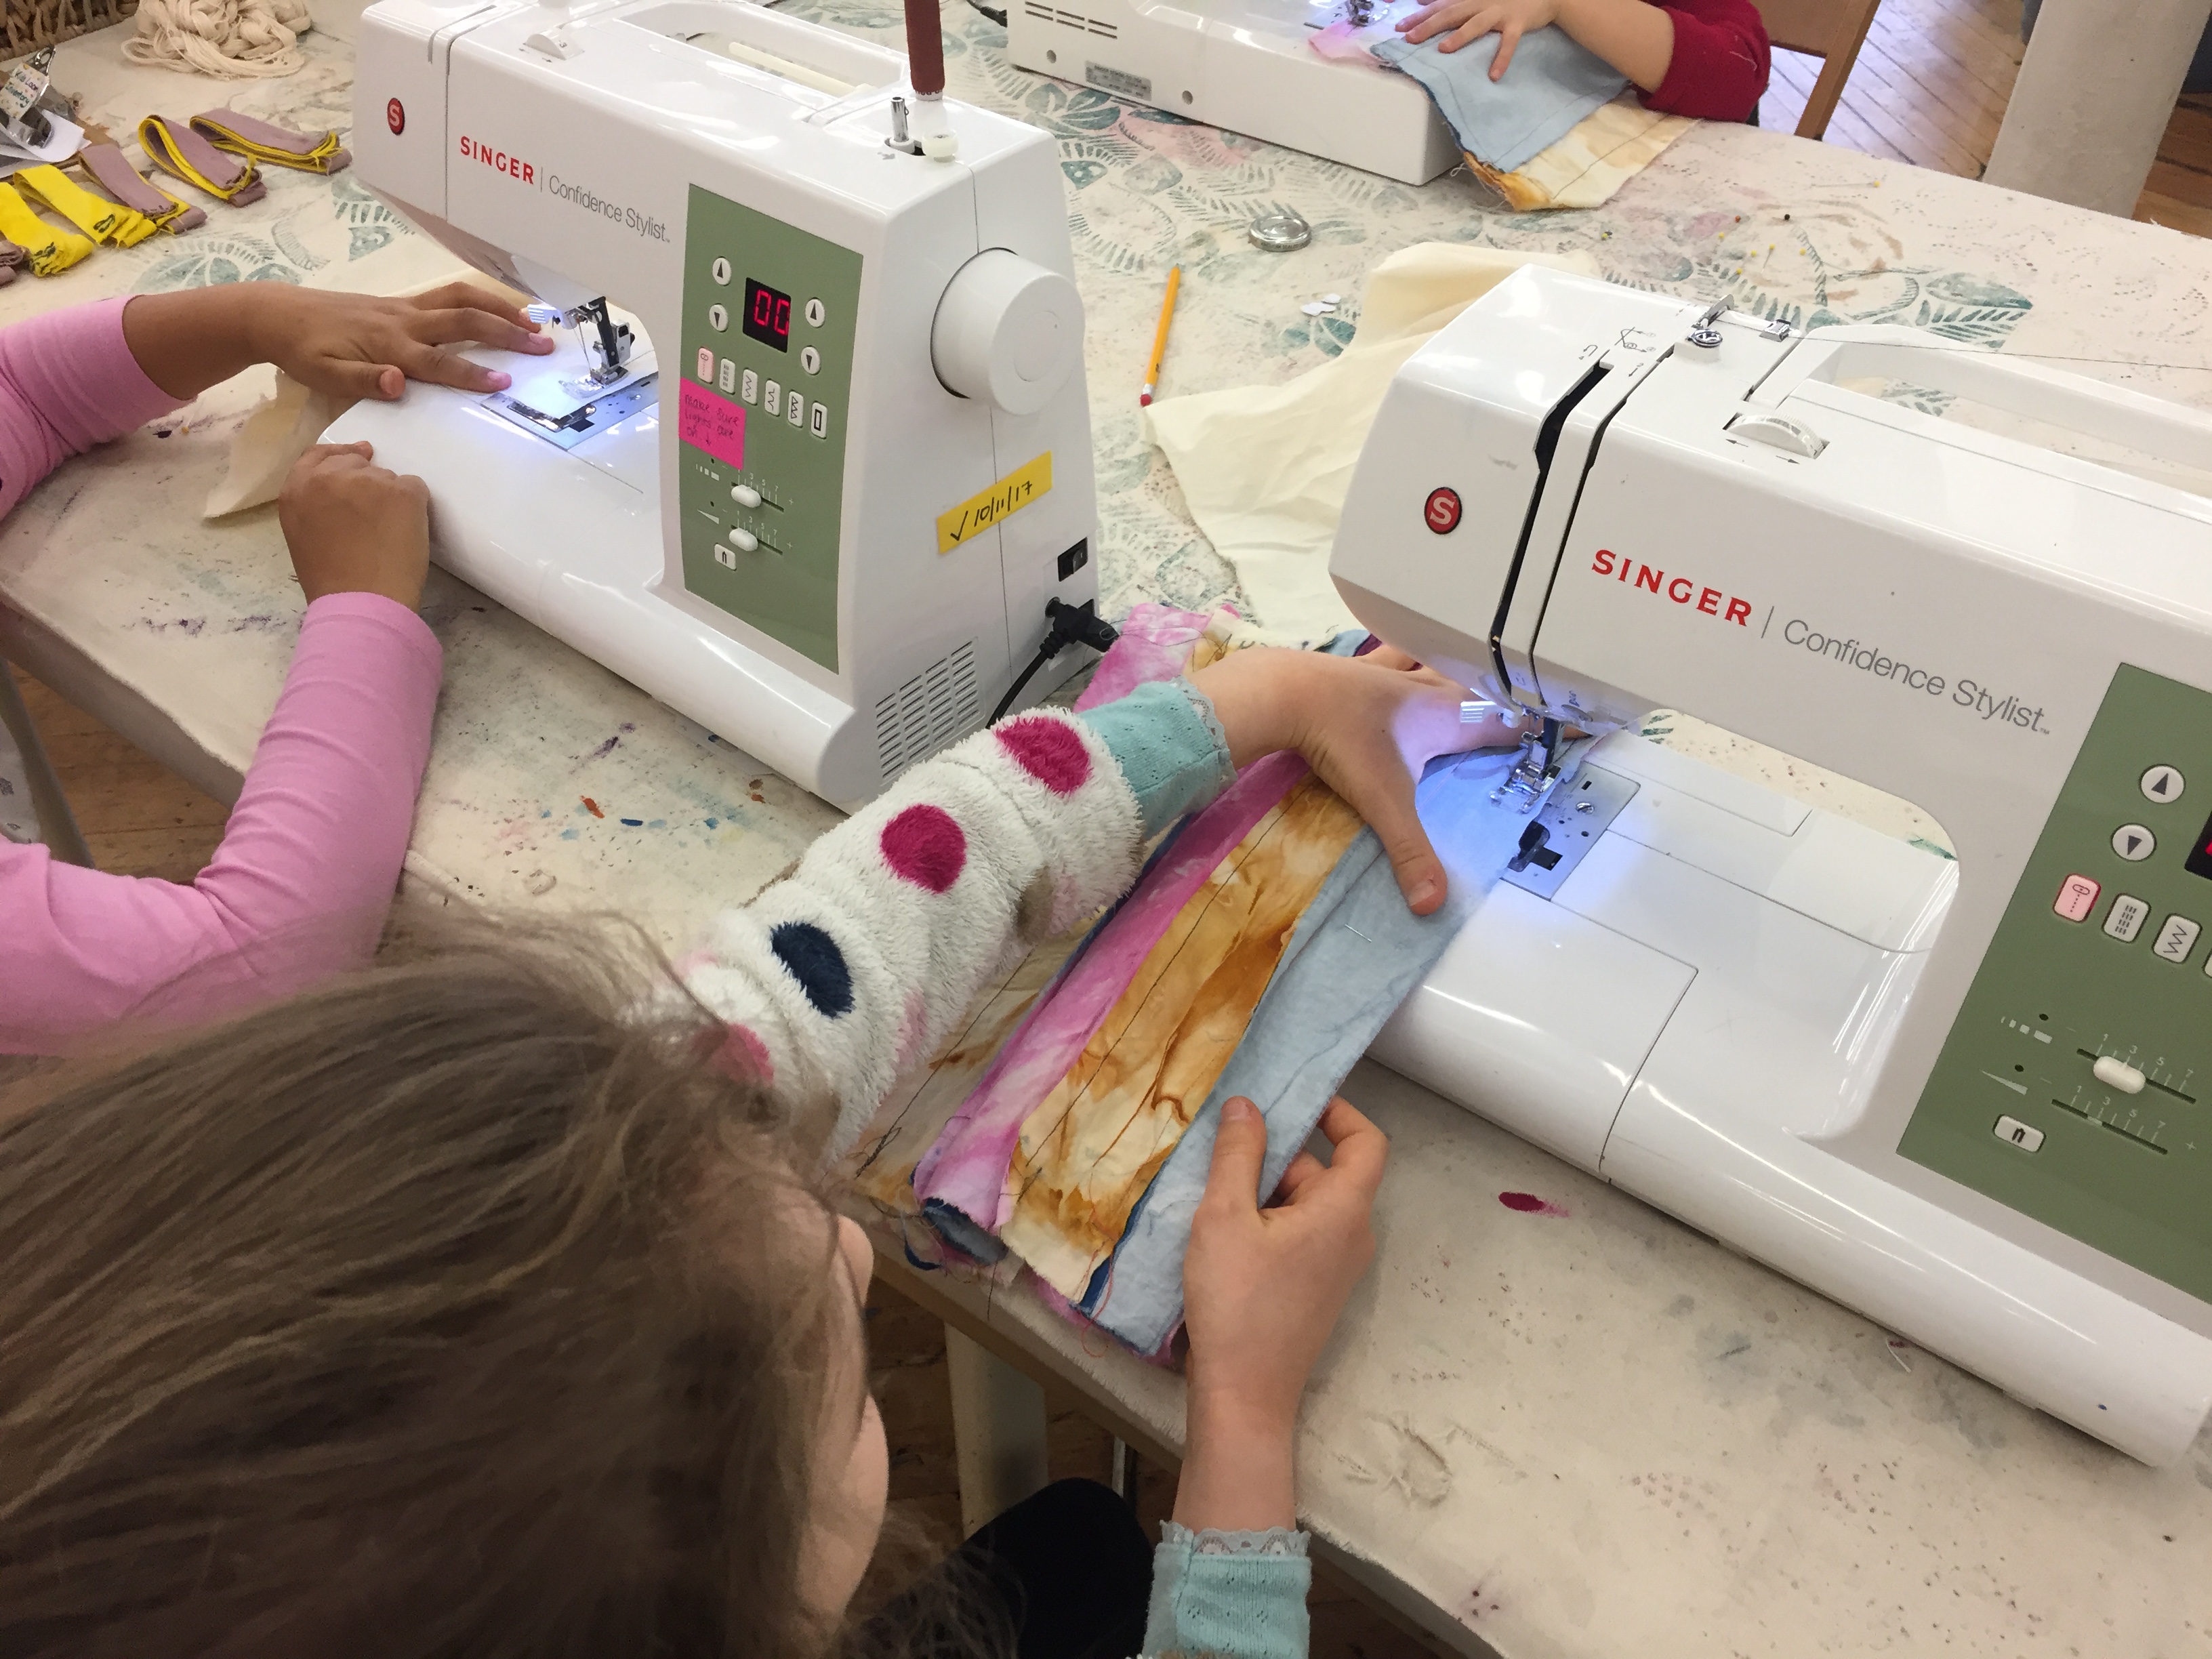
Now that we had all our elements dyed, we started work on our bags! We cut down our various fabrics into strips and sewed them together in a patchwork fashion on the sewing machine. For some, this was their first time on a sewing machine, while others were already pros. After weeks of dyeing, it was exciting to see the bags finally take form!
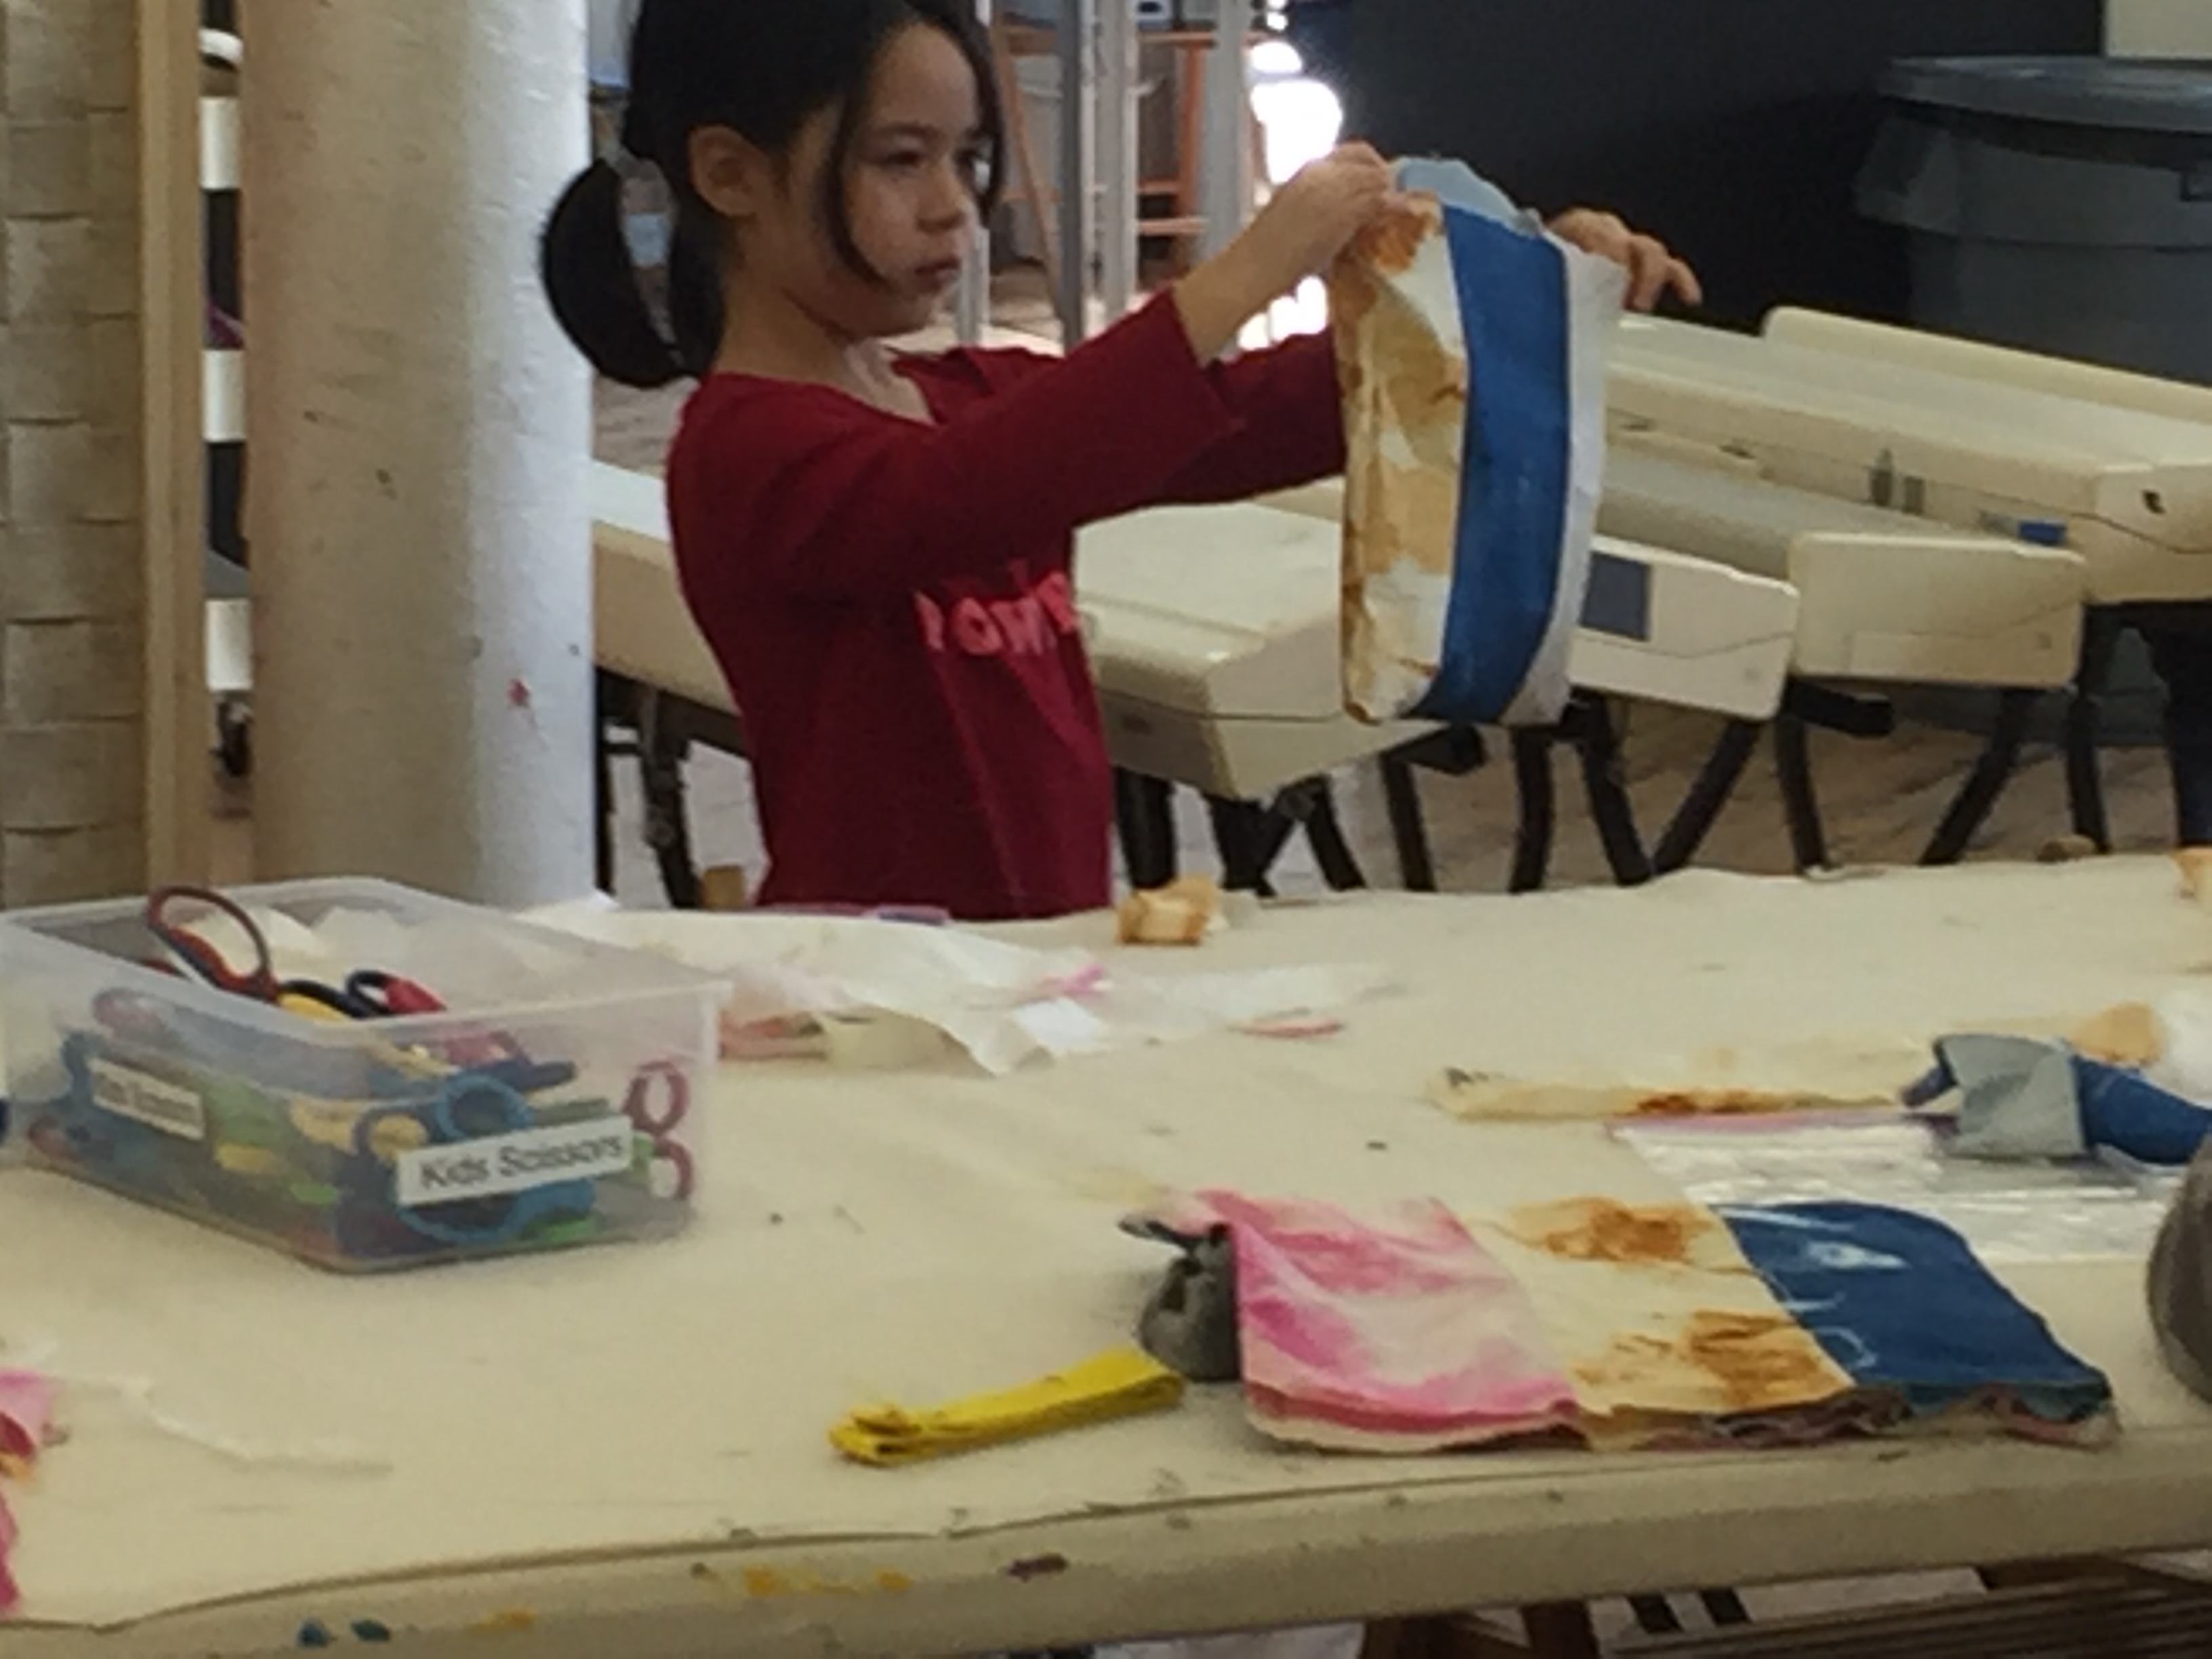

(It’s important to evaluate the composition so that you’re happy with how your work will turn out!)
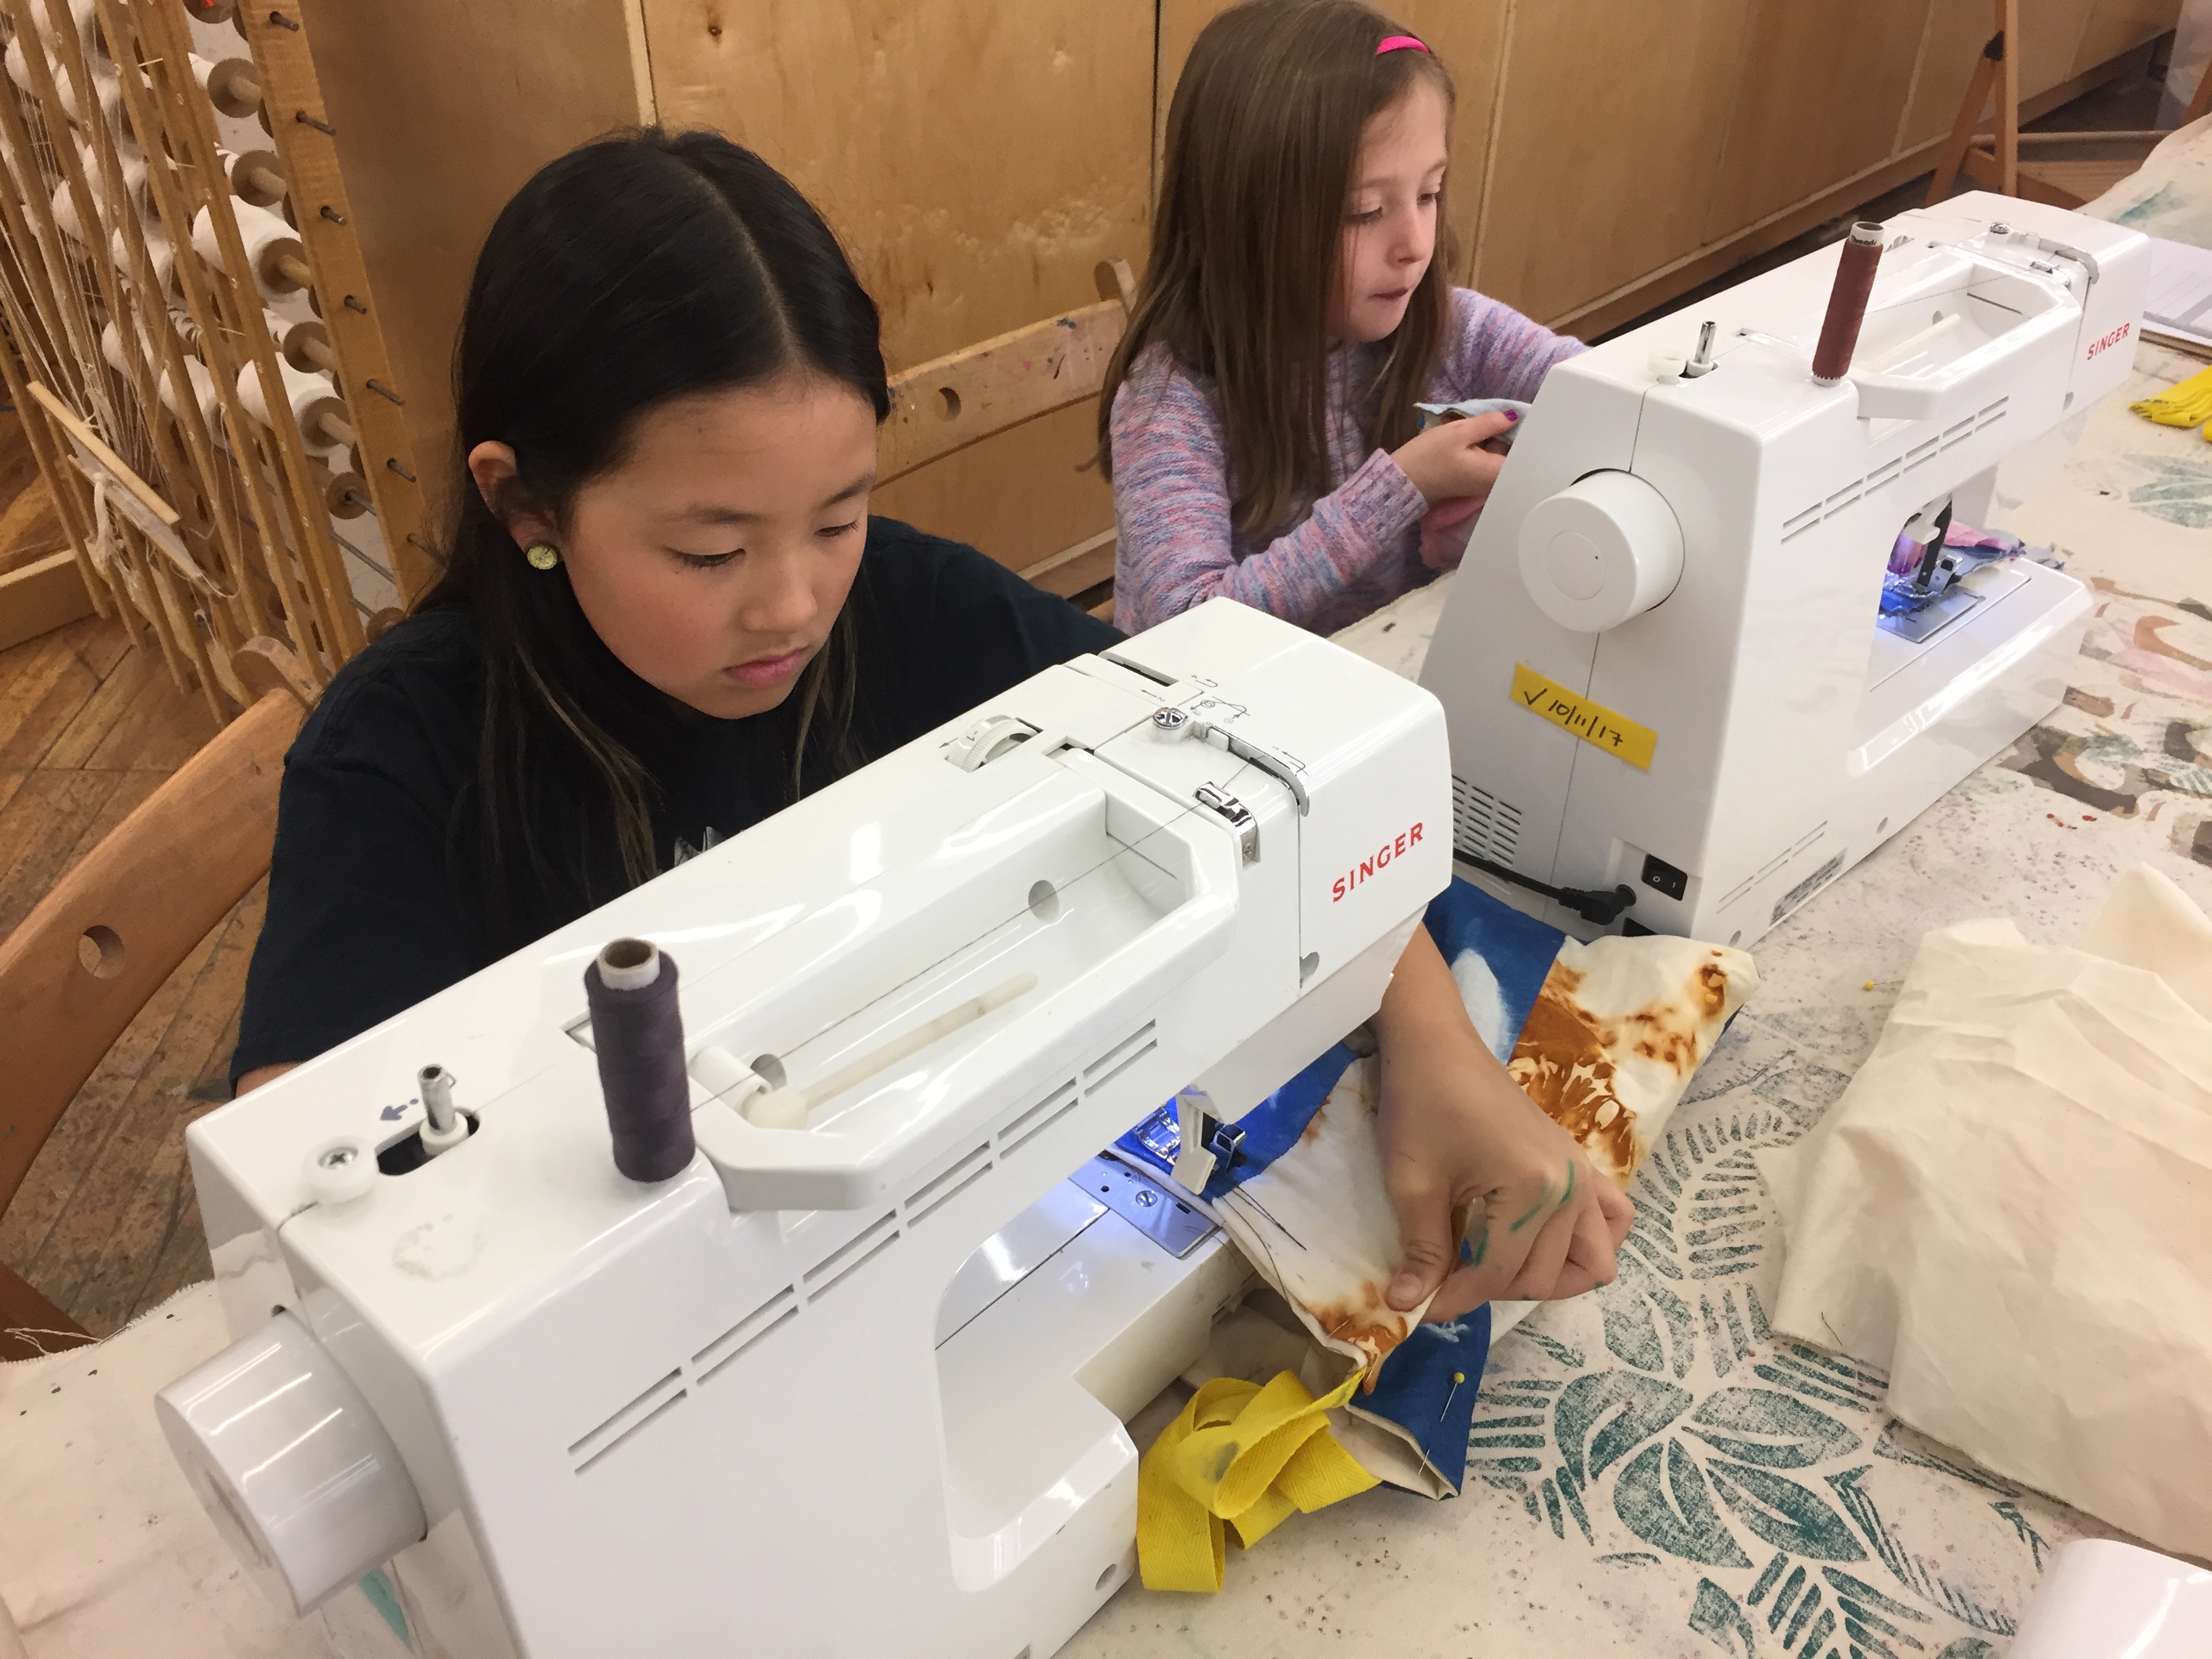
Once the outside of the bag is pieced together, for a nice interior we sewed in a lining and some straps for the bag, which we natural dyed with either turmeric or hibiscus!
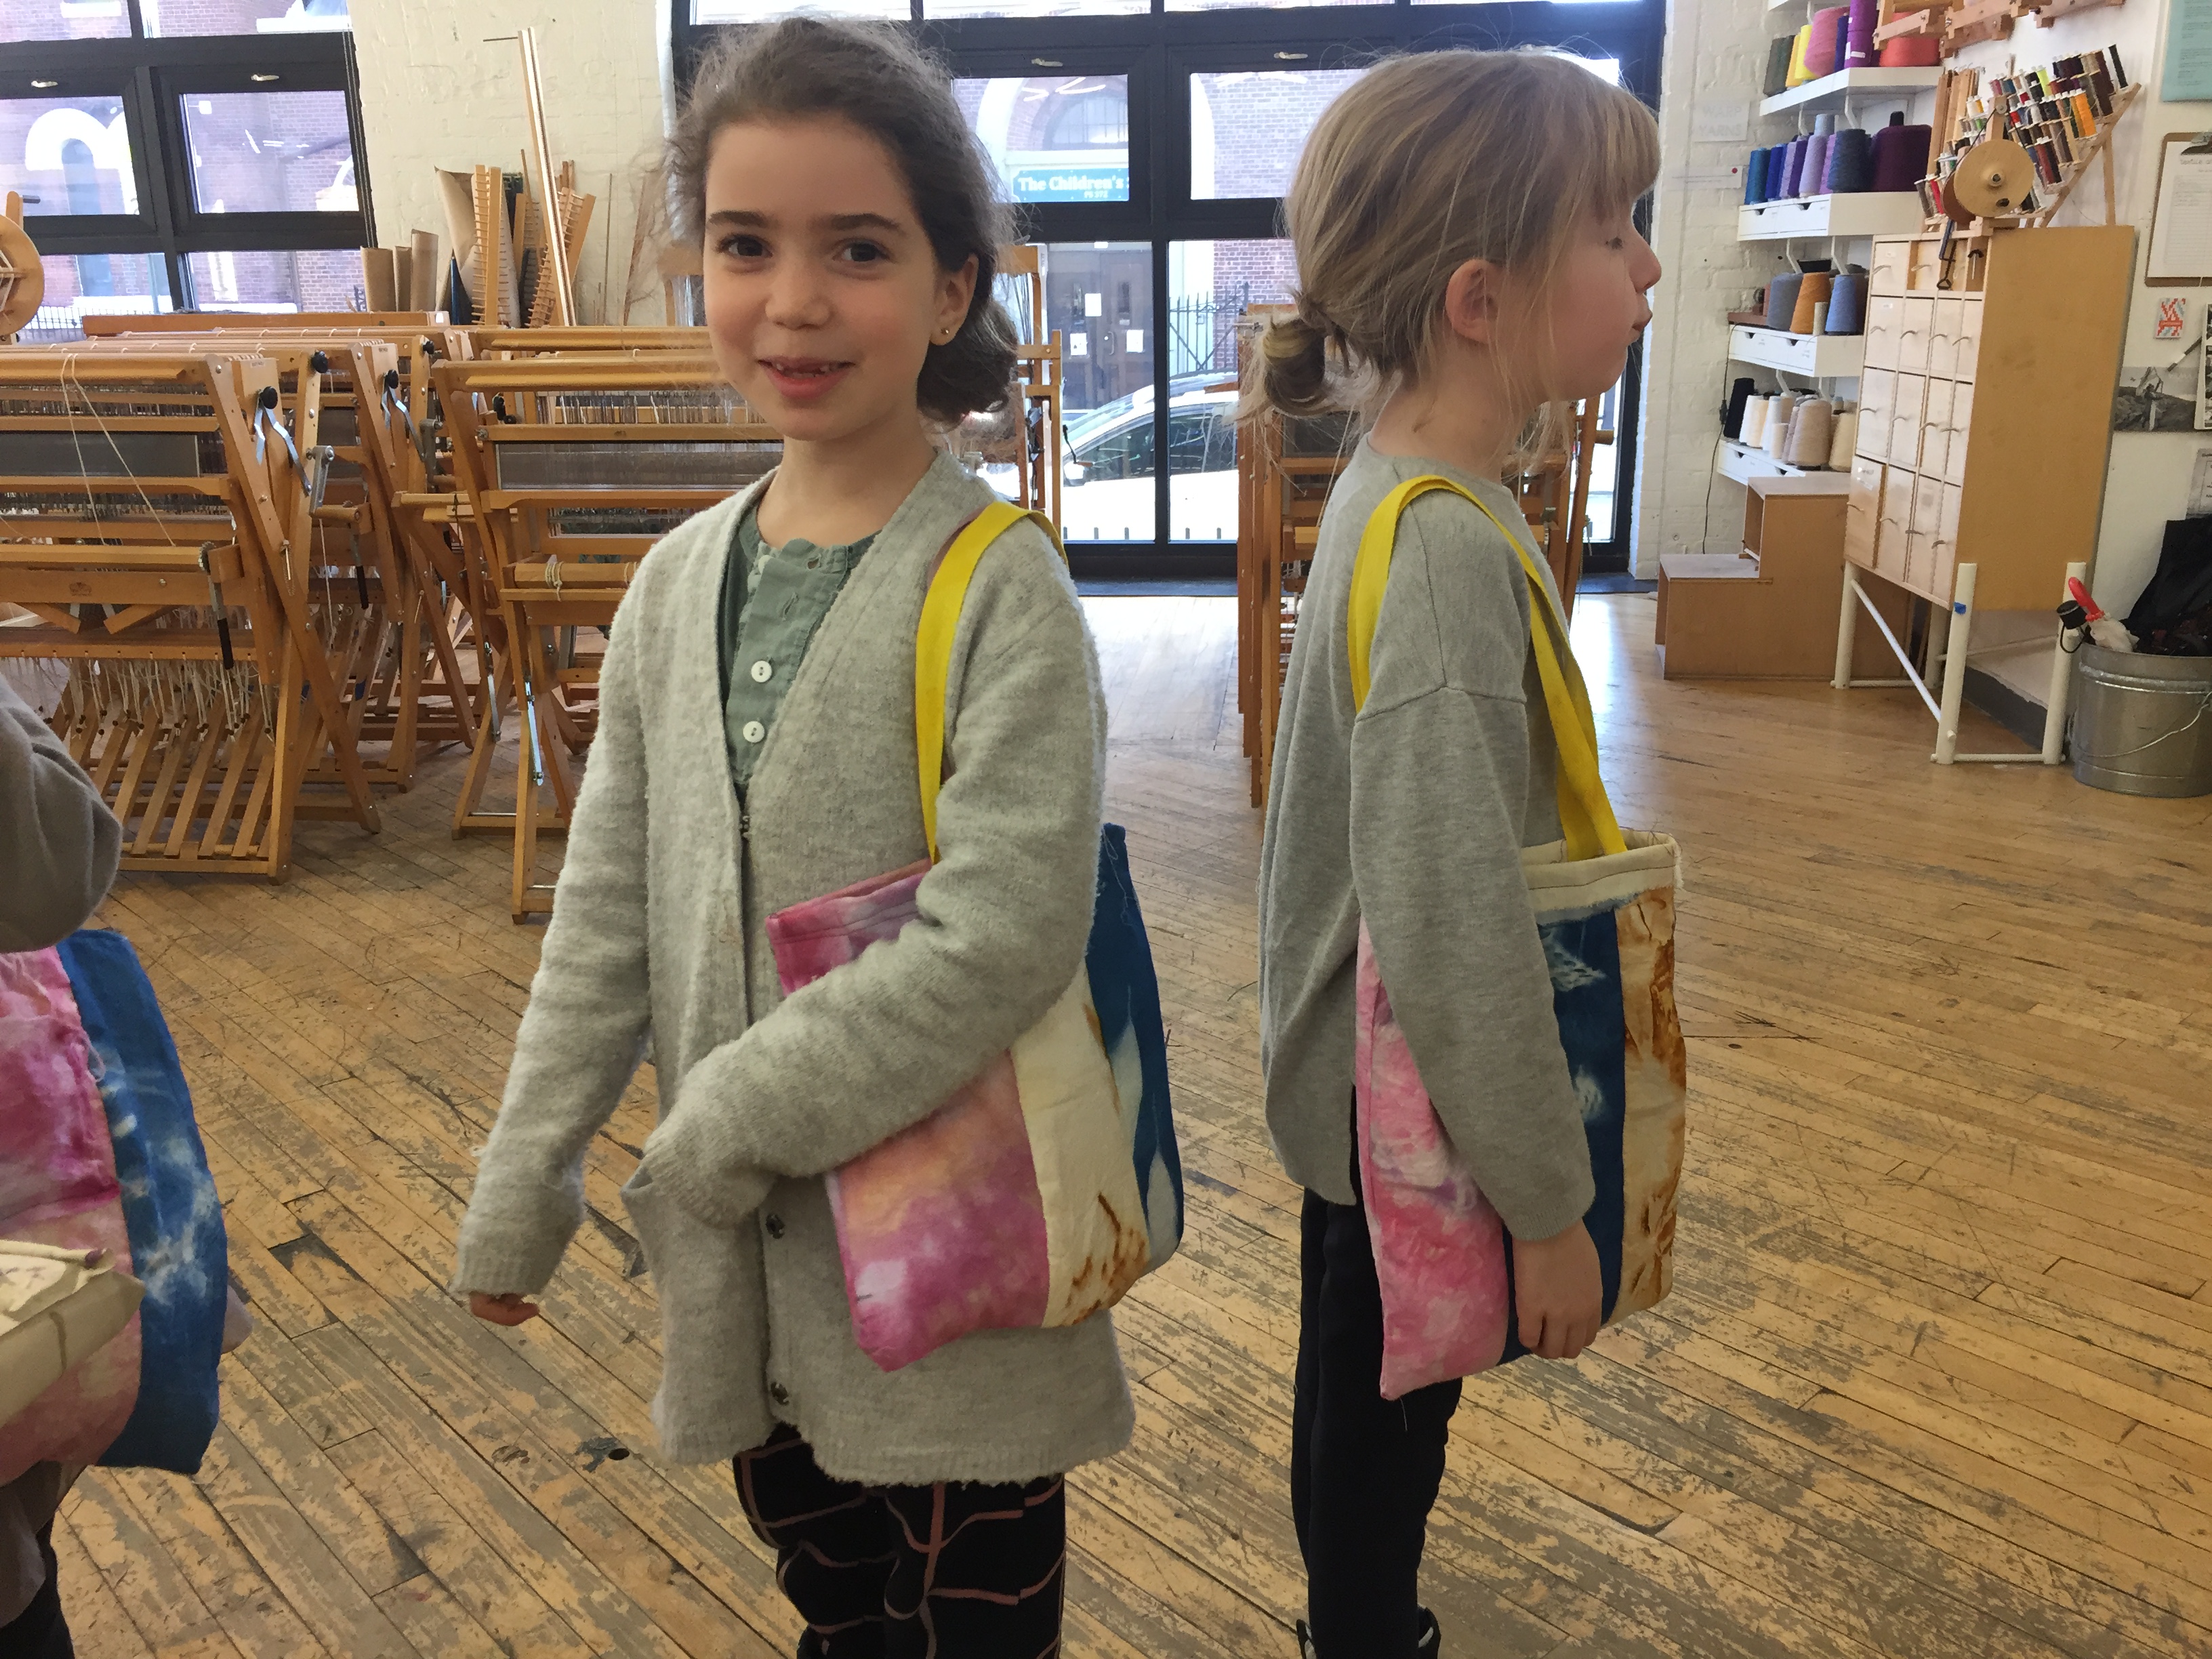
Very fashionable and distinguished! After five weeks of dyeing and sewing, it sure felt good to have a completed bag to take home.
Attention parents! We are now enrolling for Cycle 4 of TAC Afterschool in Brooklyn and Manhattan. Learn more + join the fun this spring.