The frigid, dark days of winter are long gone at Textile Arts Center, and if you're like us, you've got a hefty case of spring fever! If you are unable to take a macramé class at TAC but want to green up your space for spring, here's a simple macramé plant hanger you can make in 30 minutes or less!
Adapted from the Textiles for Teens lesson by Callen Zimmerman
Macramé is a method of using string to create a pattern of interlaced knots. Its origins are in 13th century Arabic rugs, its name referencing the Arabic word for 'fringe'. Its system of knots creates beautifully complex patterns that conjure the nostalgia of 1970s home decor and craft kits. Macramé uses a variety of knots and patterns that range in complexity, but this quick-and-easy tutorial utilizes the most basic form of the technique.
What you'll need
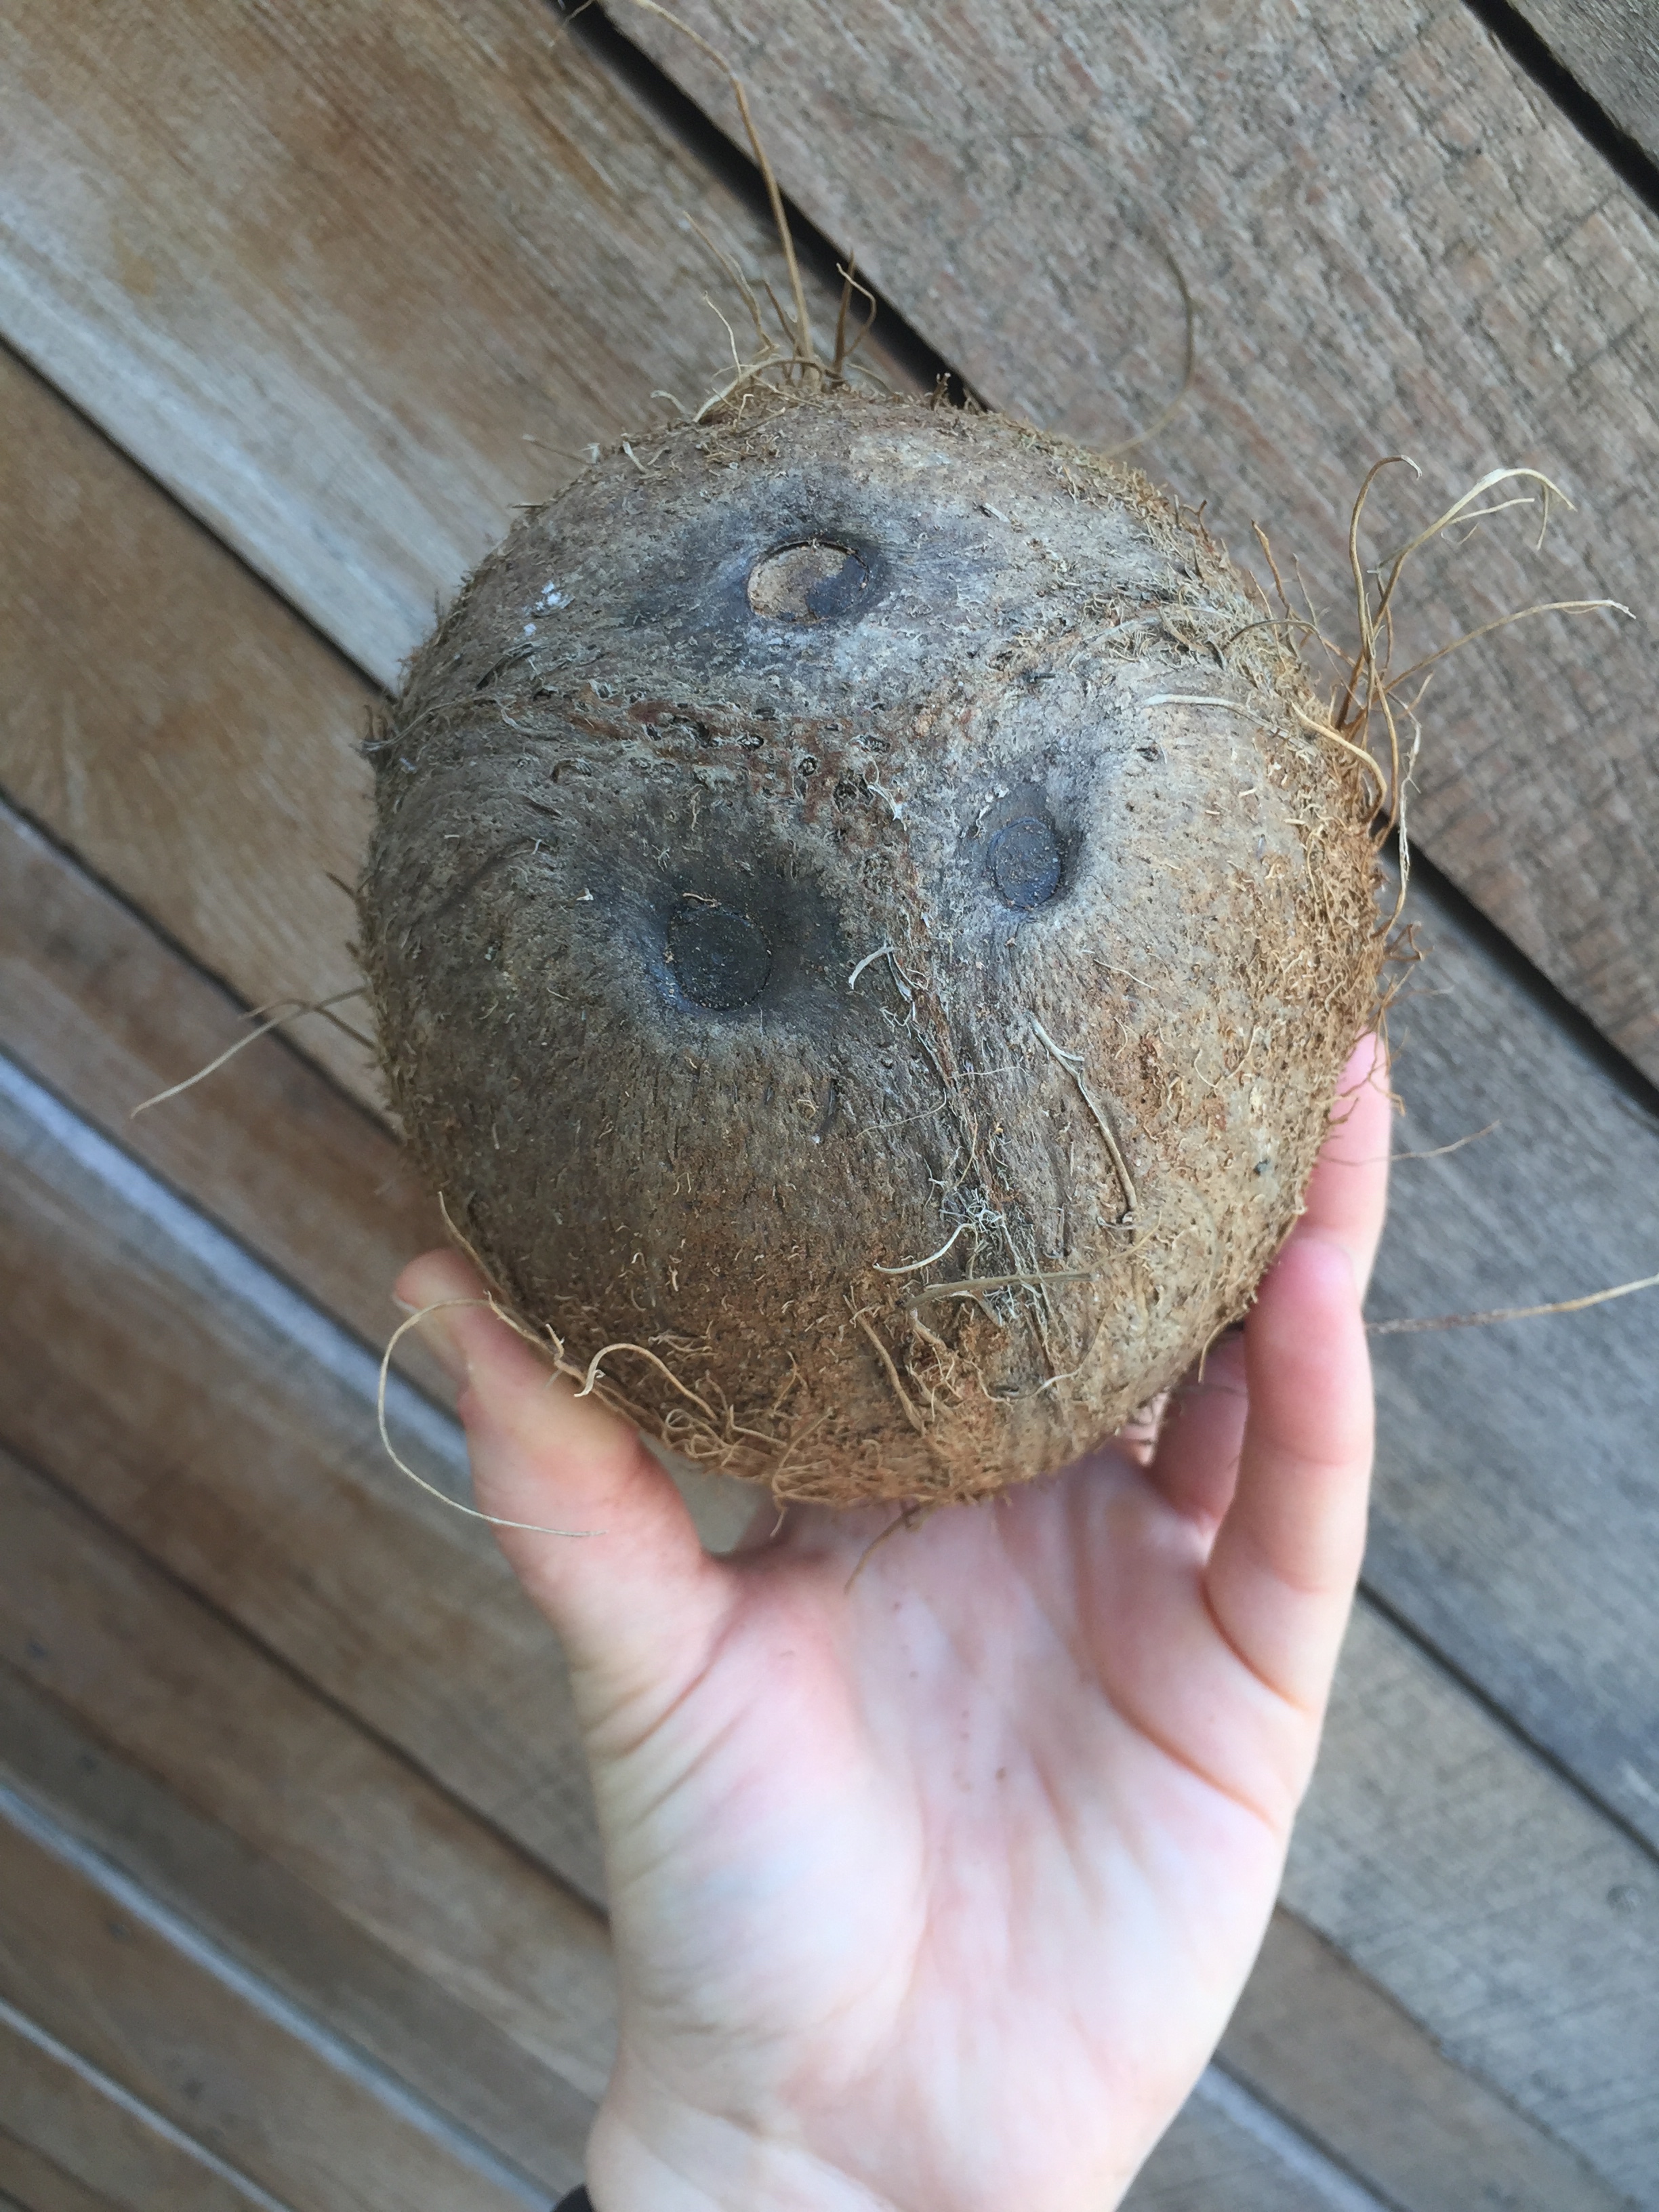
STEP 1: OPENING THE COCONUT

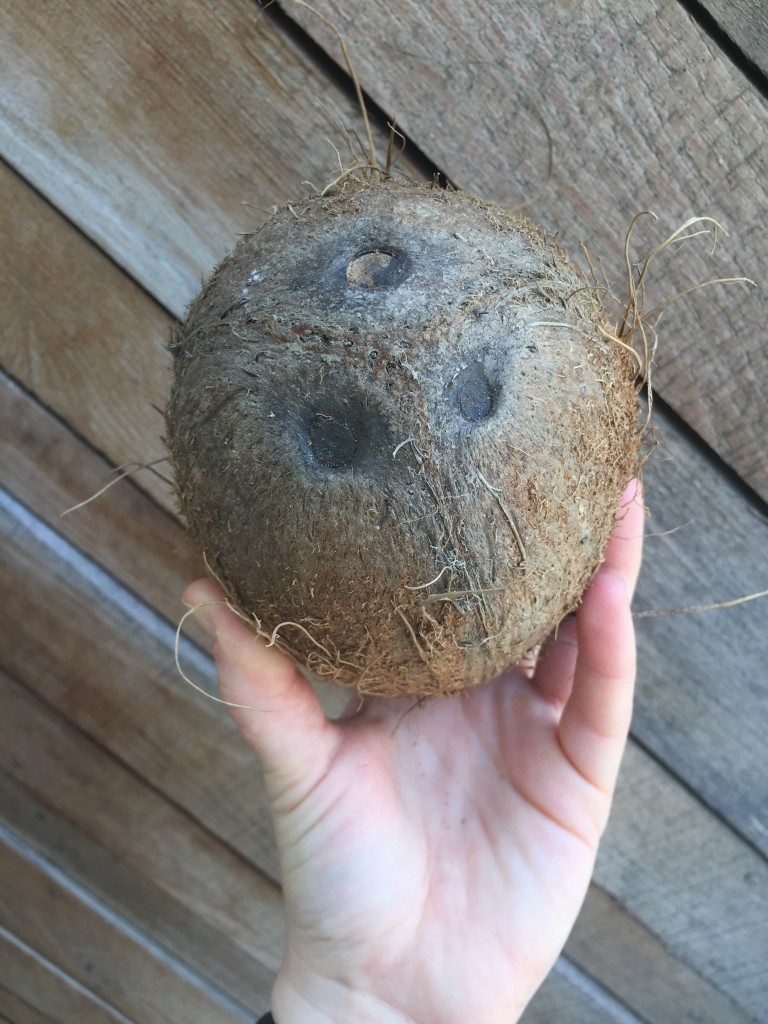
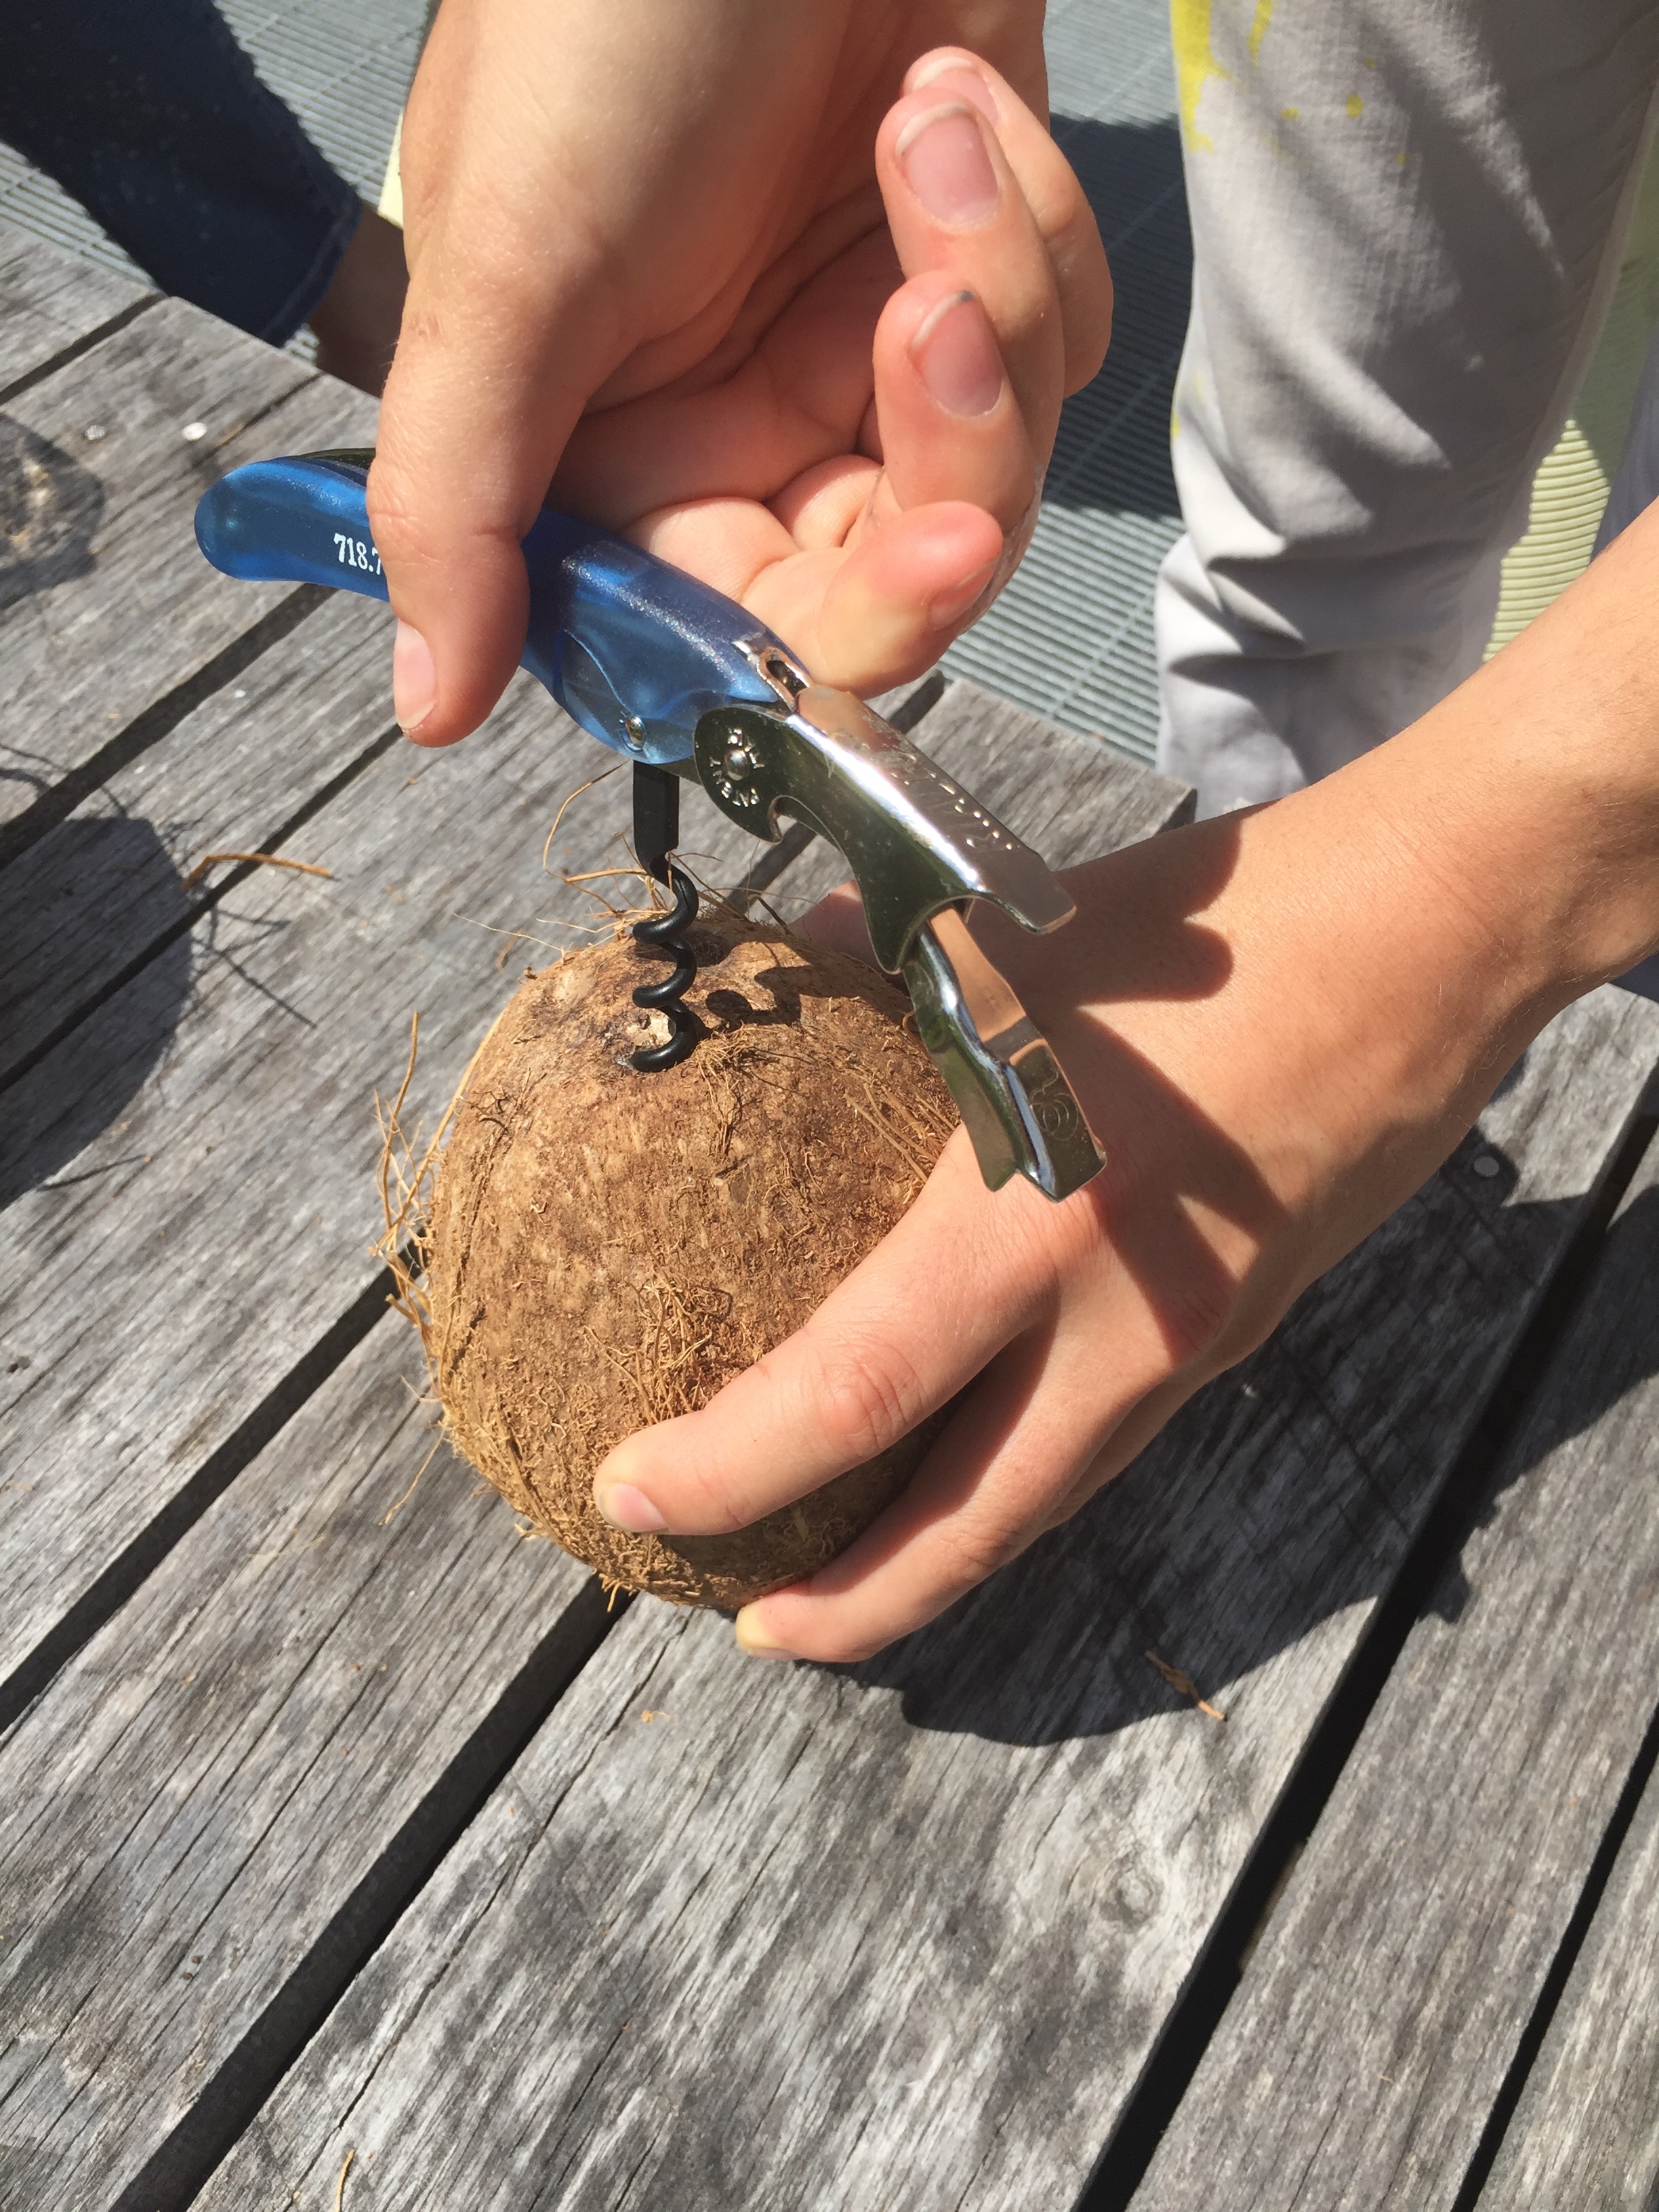
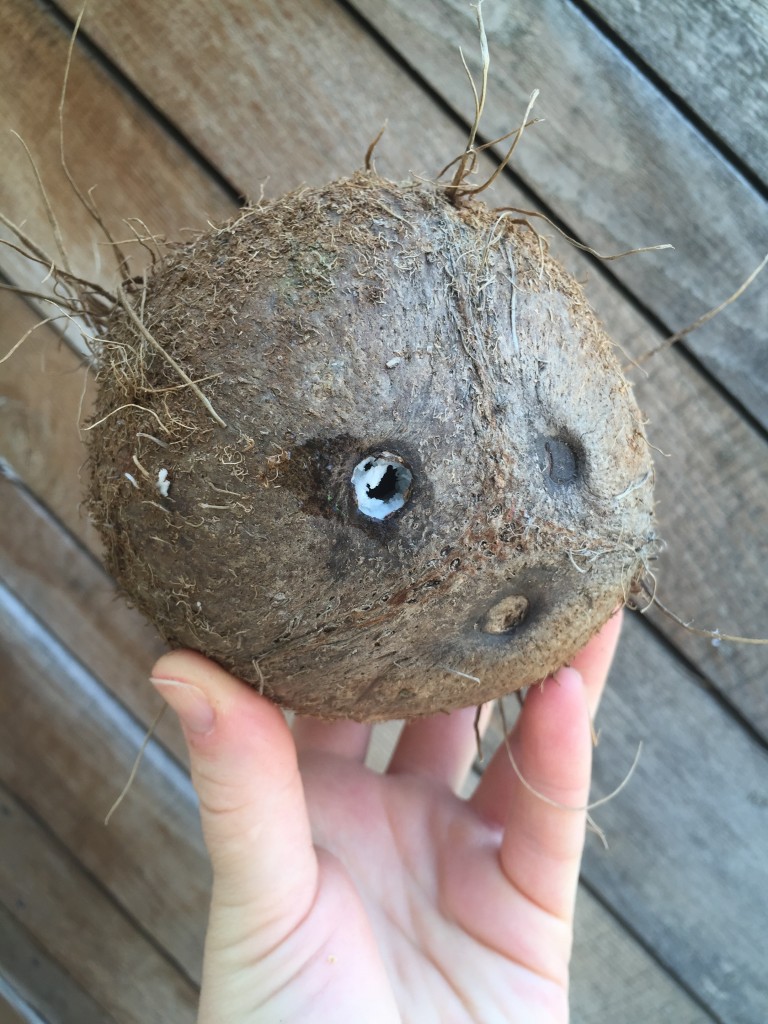
Locate the end of the coconut where you see three dots. Using the wine bottle opener, drill through the hole that is the softest. Drain the ultra-nutritious water that would otherwise cost $5 at the market--drink it straight now, or save it to add to a smoothie later!

Next, hold the coconut in your palm with the fibers running side to side in your hand. Use the hammer to forcefully tap the exact middle of the coconut once. Spin the coconut along this side to side axis, hitting only once in between turns. (This step might take a handful of hits!)
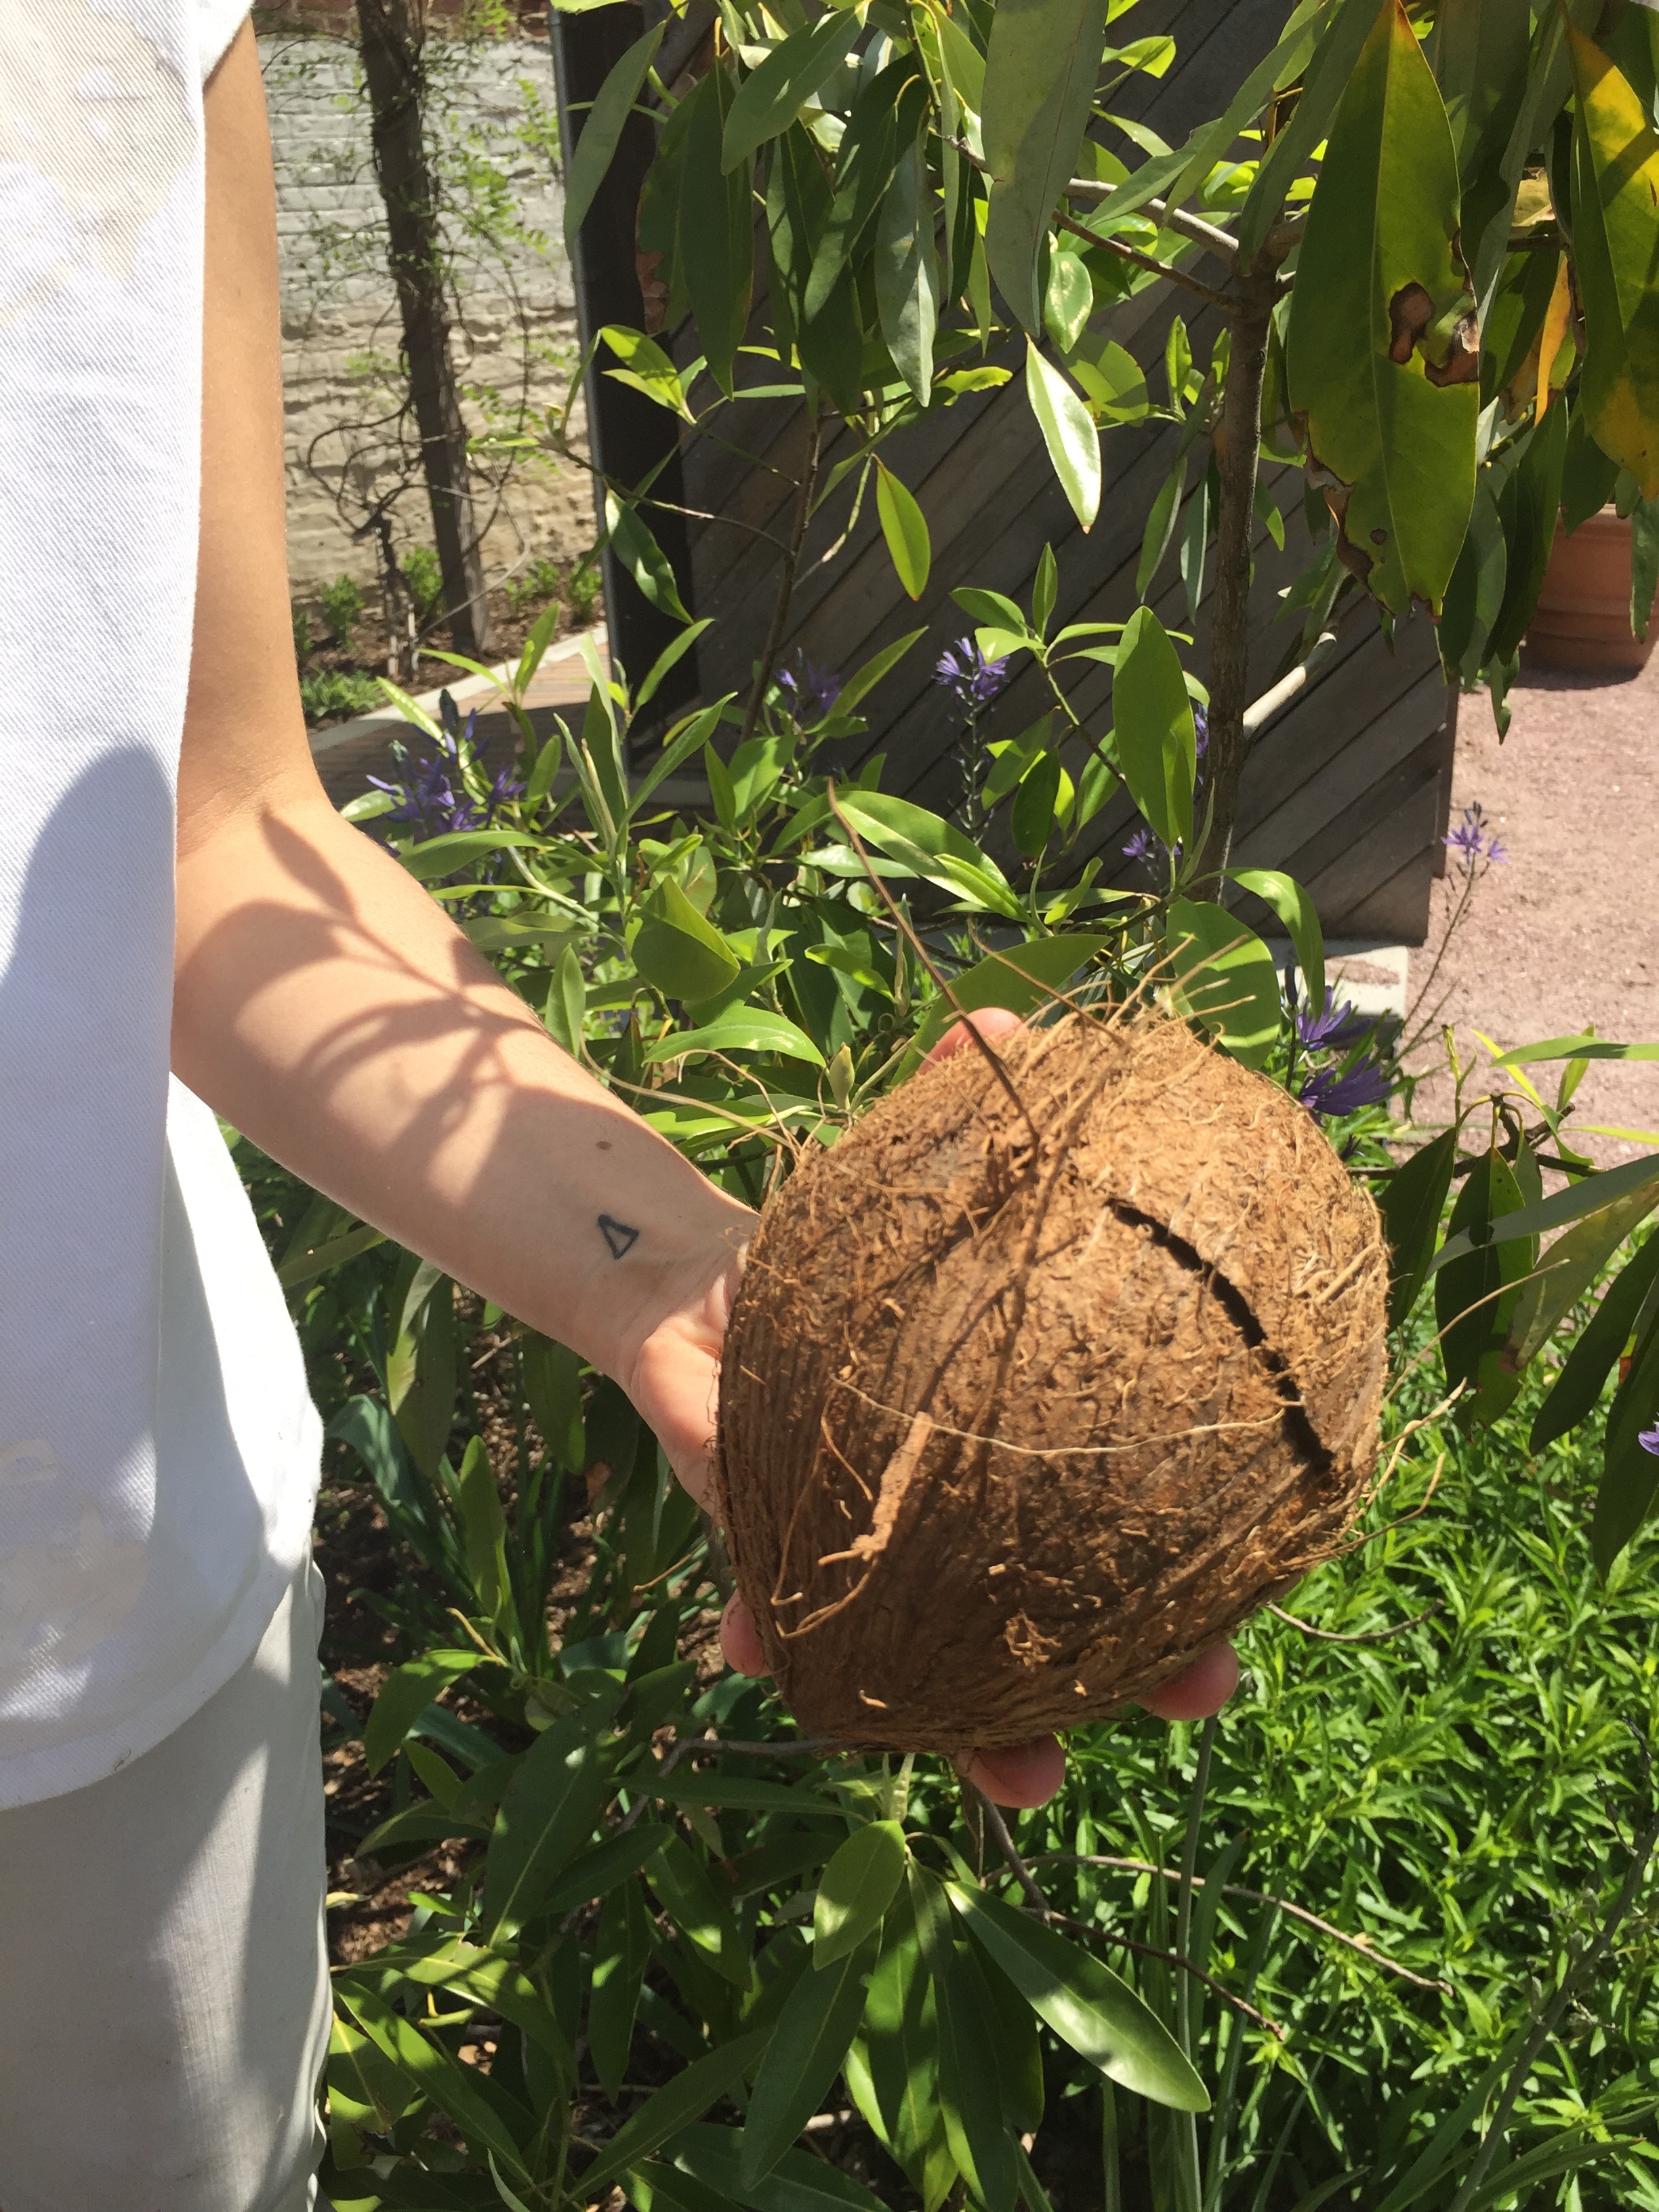
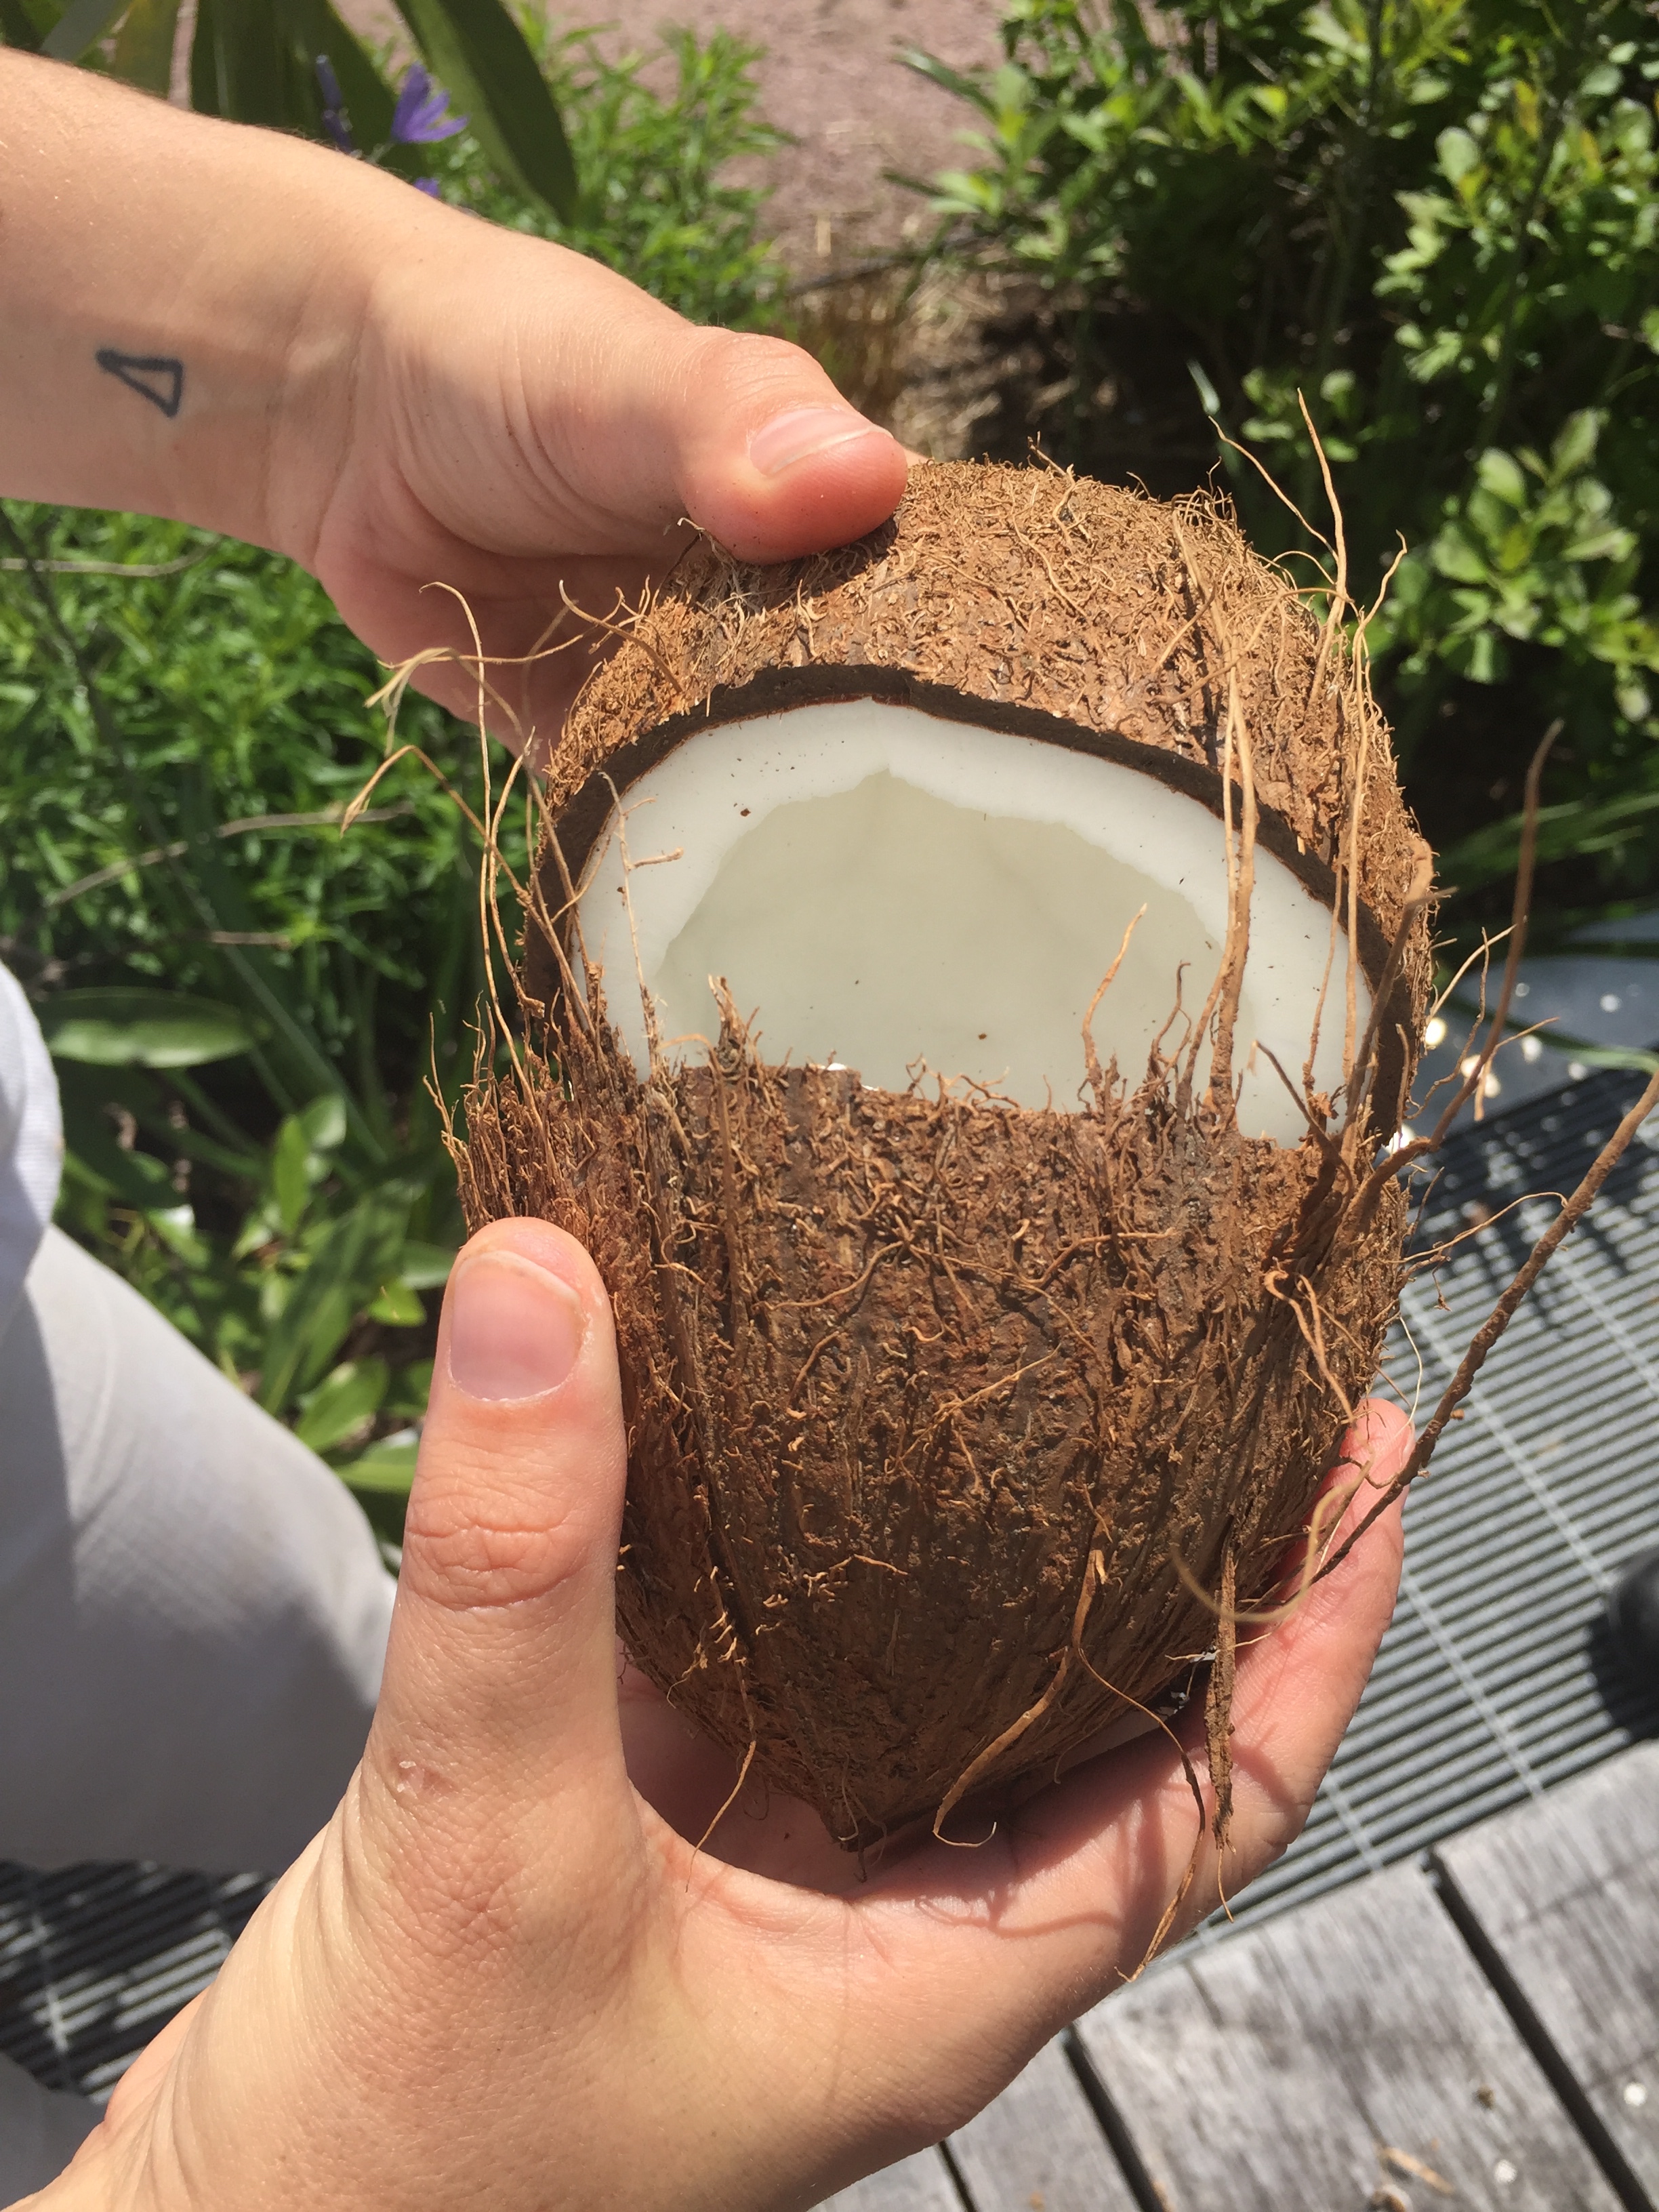
Keep turning and tapping until the coconut splits in half perpendicular to the direction of the fibers. One half should have the hole and one should be solid--save both parts!
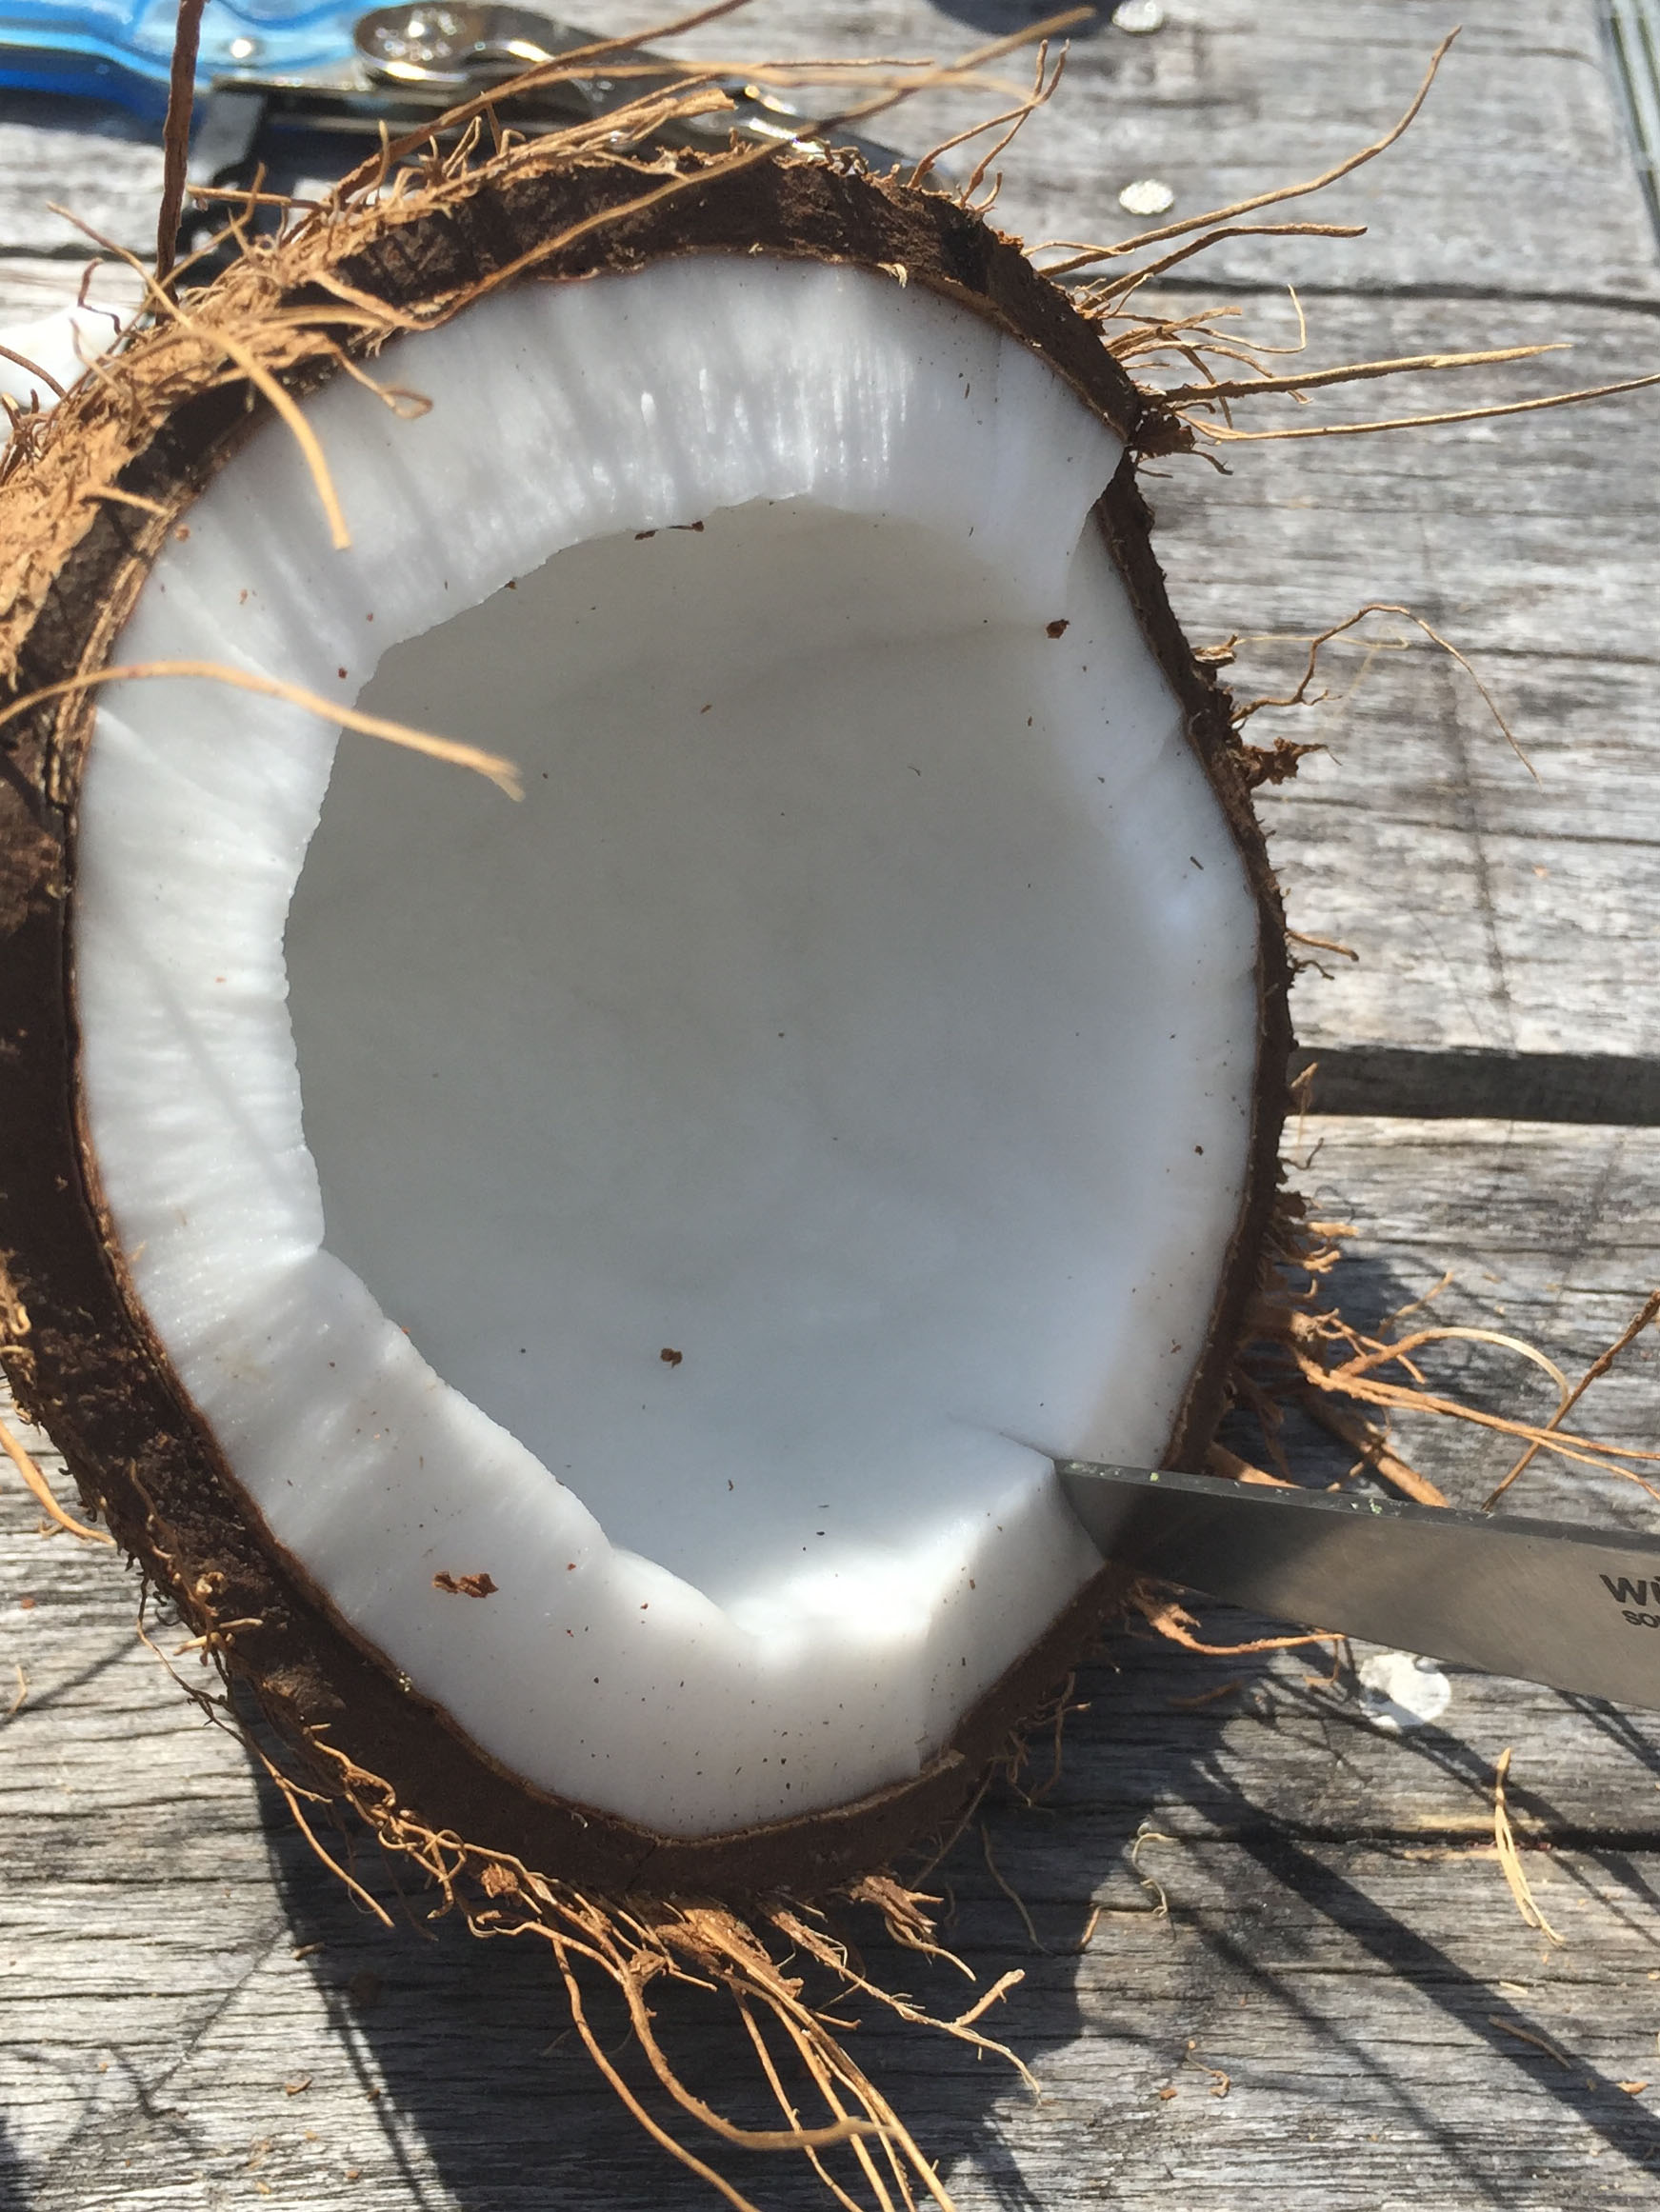

How to remove the coconut flesh: Using a kitchen knife, make a 1 cm slit through the edge of the flesh. Moving counter-clockwise, make another slit 1 cm over. Twist the knife clockwise while it is still in the flesh and the piece should slide out. Move 1 cm over and repeat. Keep moving around and around, loosening piece by piece, until the flesh is removed on both halves. Save the flesh for making coconut ice cream or coconut chutney!
STEP 2: THE MACRAMÉ HANGER
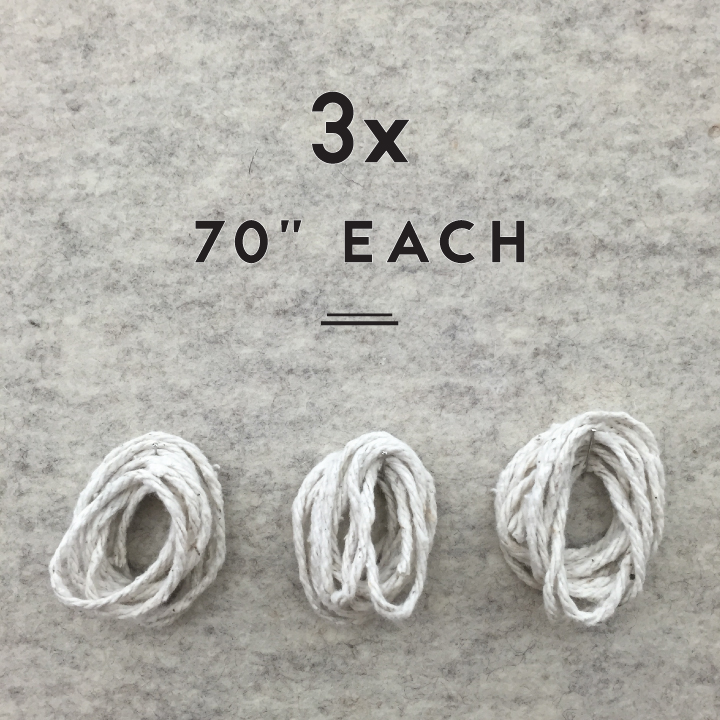
Measure and cut 3 strings that measure 70" each.
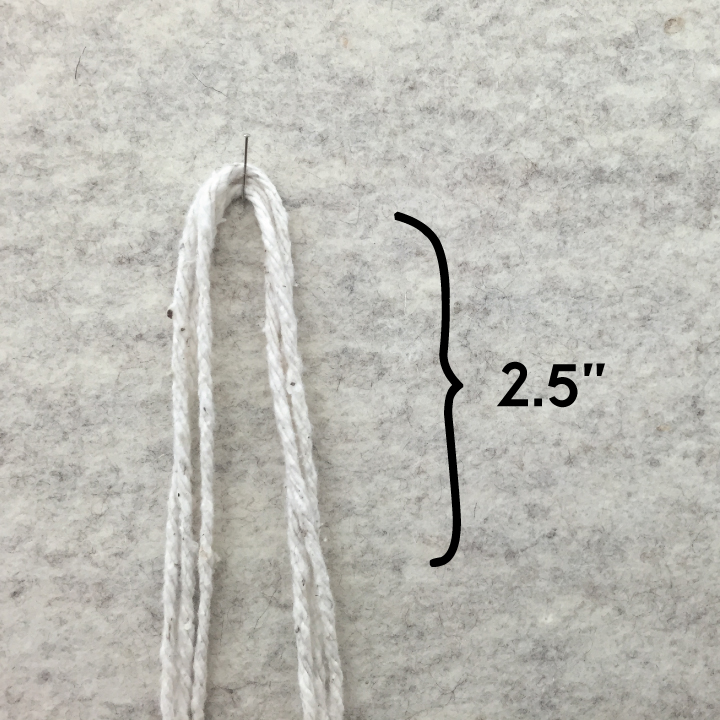
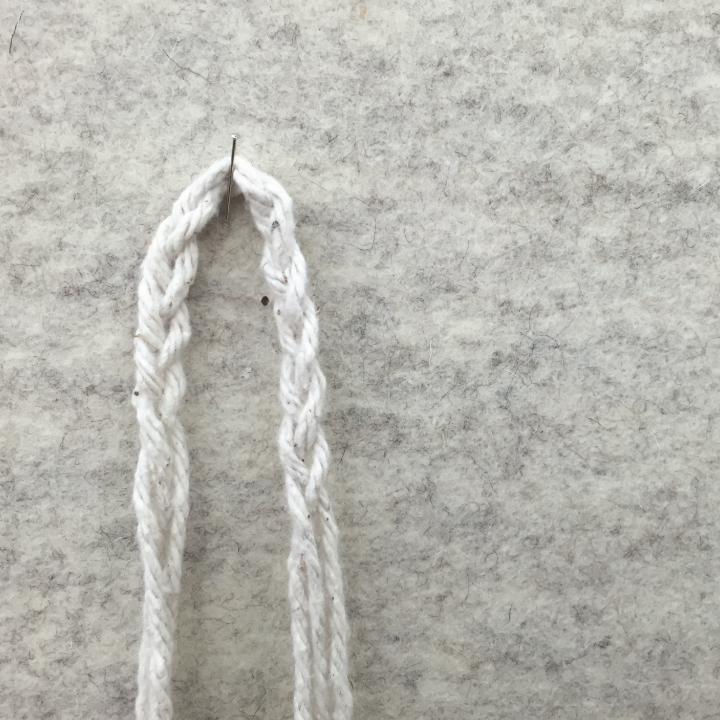
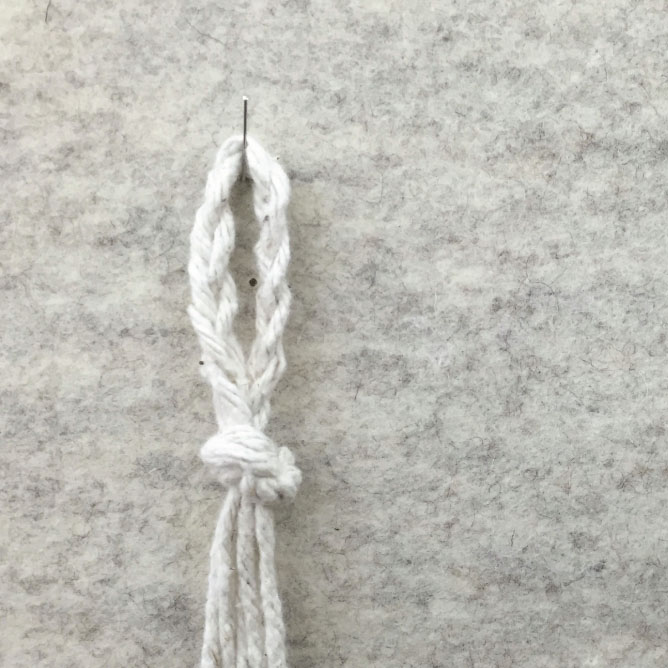
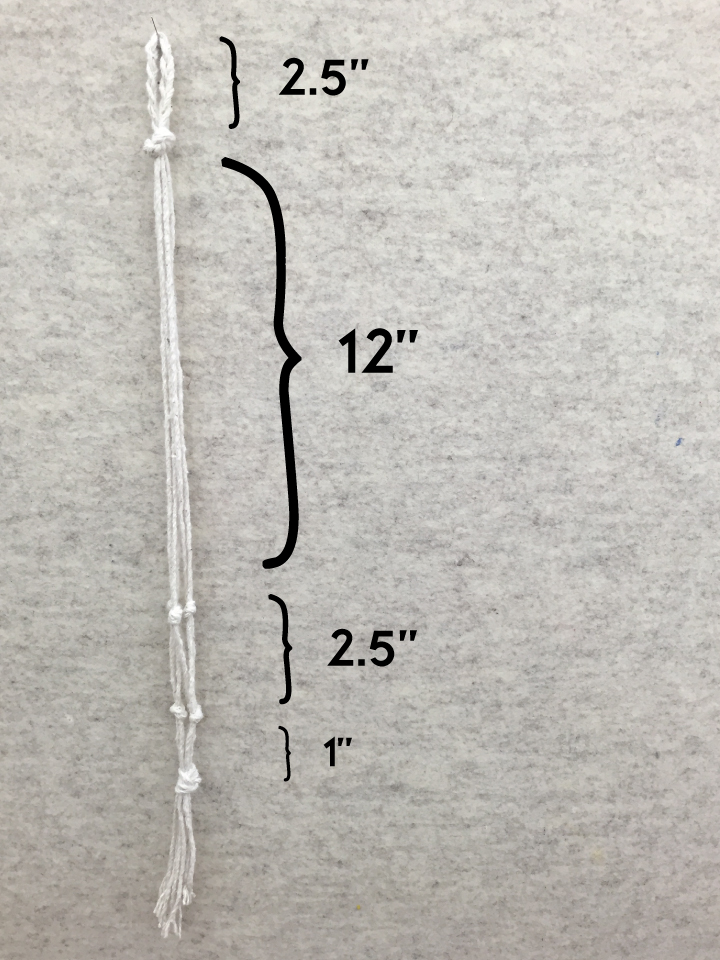
Fold in half and locate the middle 5". Pin or tape your string to a wall or table. Braid only the middle 5" of the string, leaving the ends hanging loose. Re-fold in half and tie a big overhand knot with all of the strings to create a small loop at the top.
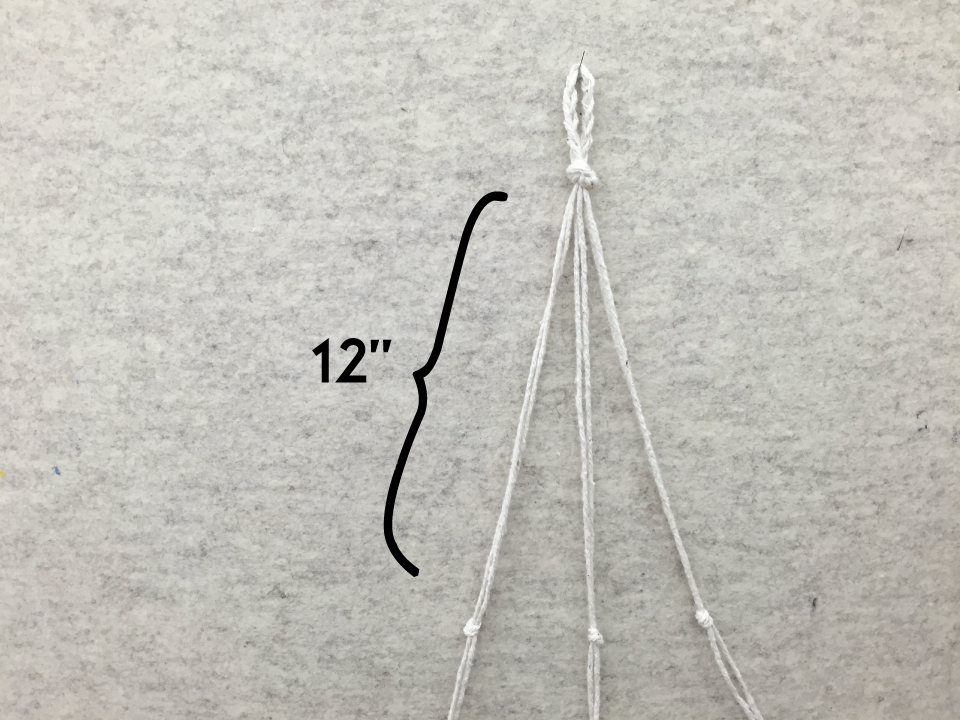
Secure your loop to the w/table and locate 12" from the top knot. Using pairs of strings, tie 3 overhand knots.
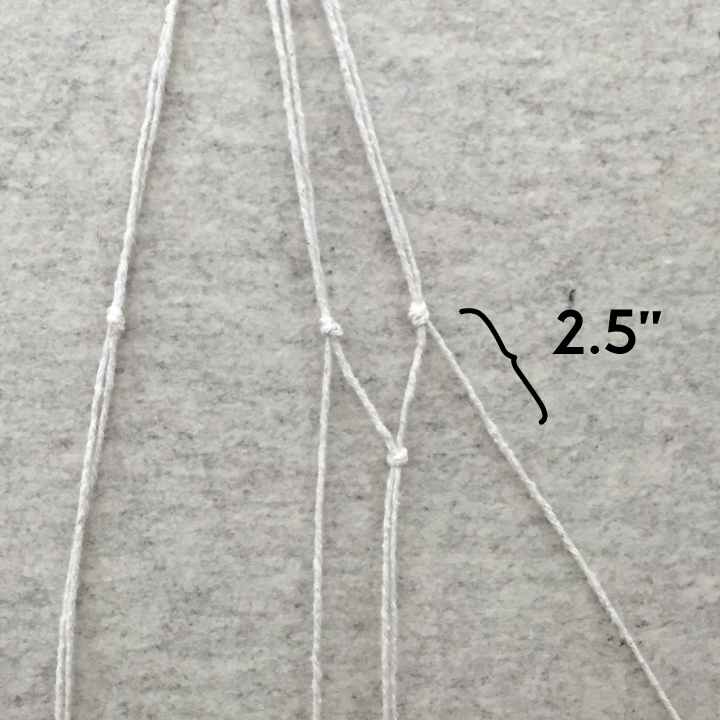
Next, take one string from the right pair and one string from the middle pair, and tie them together in an overhand knot about 2.5" from the previous knot. Do the same thing across until you've tied all 3 bundles of 2 together.
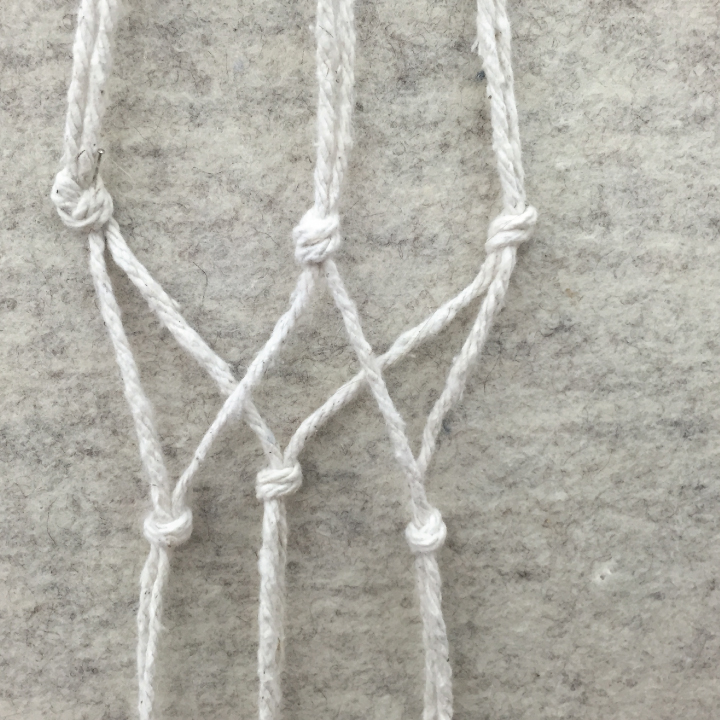
About 1" down from the previous knot, tie one big overhand knot with all of the strings.
Trim your ends and add any extra finishings, like wrapping the strands with another color of string or tying knots in the bottom fringe.
STEP 3: PLANTING & HANGING

From Textiles for Teens at Textile Arts Center, Brooklyn
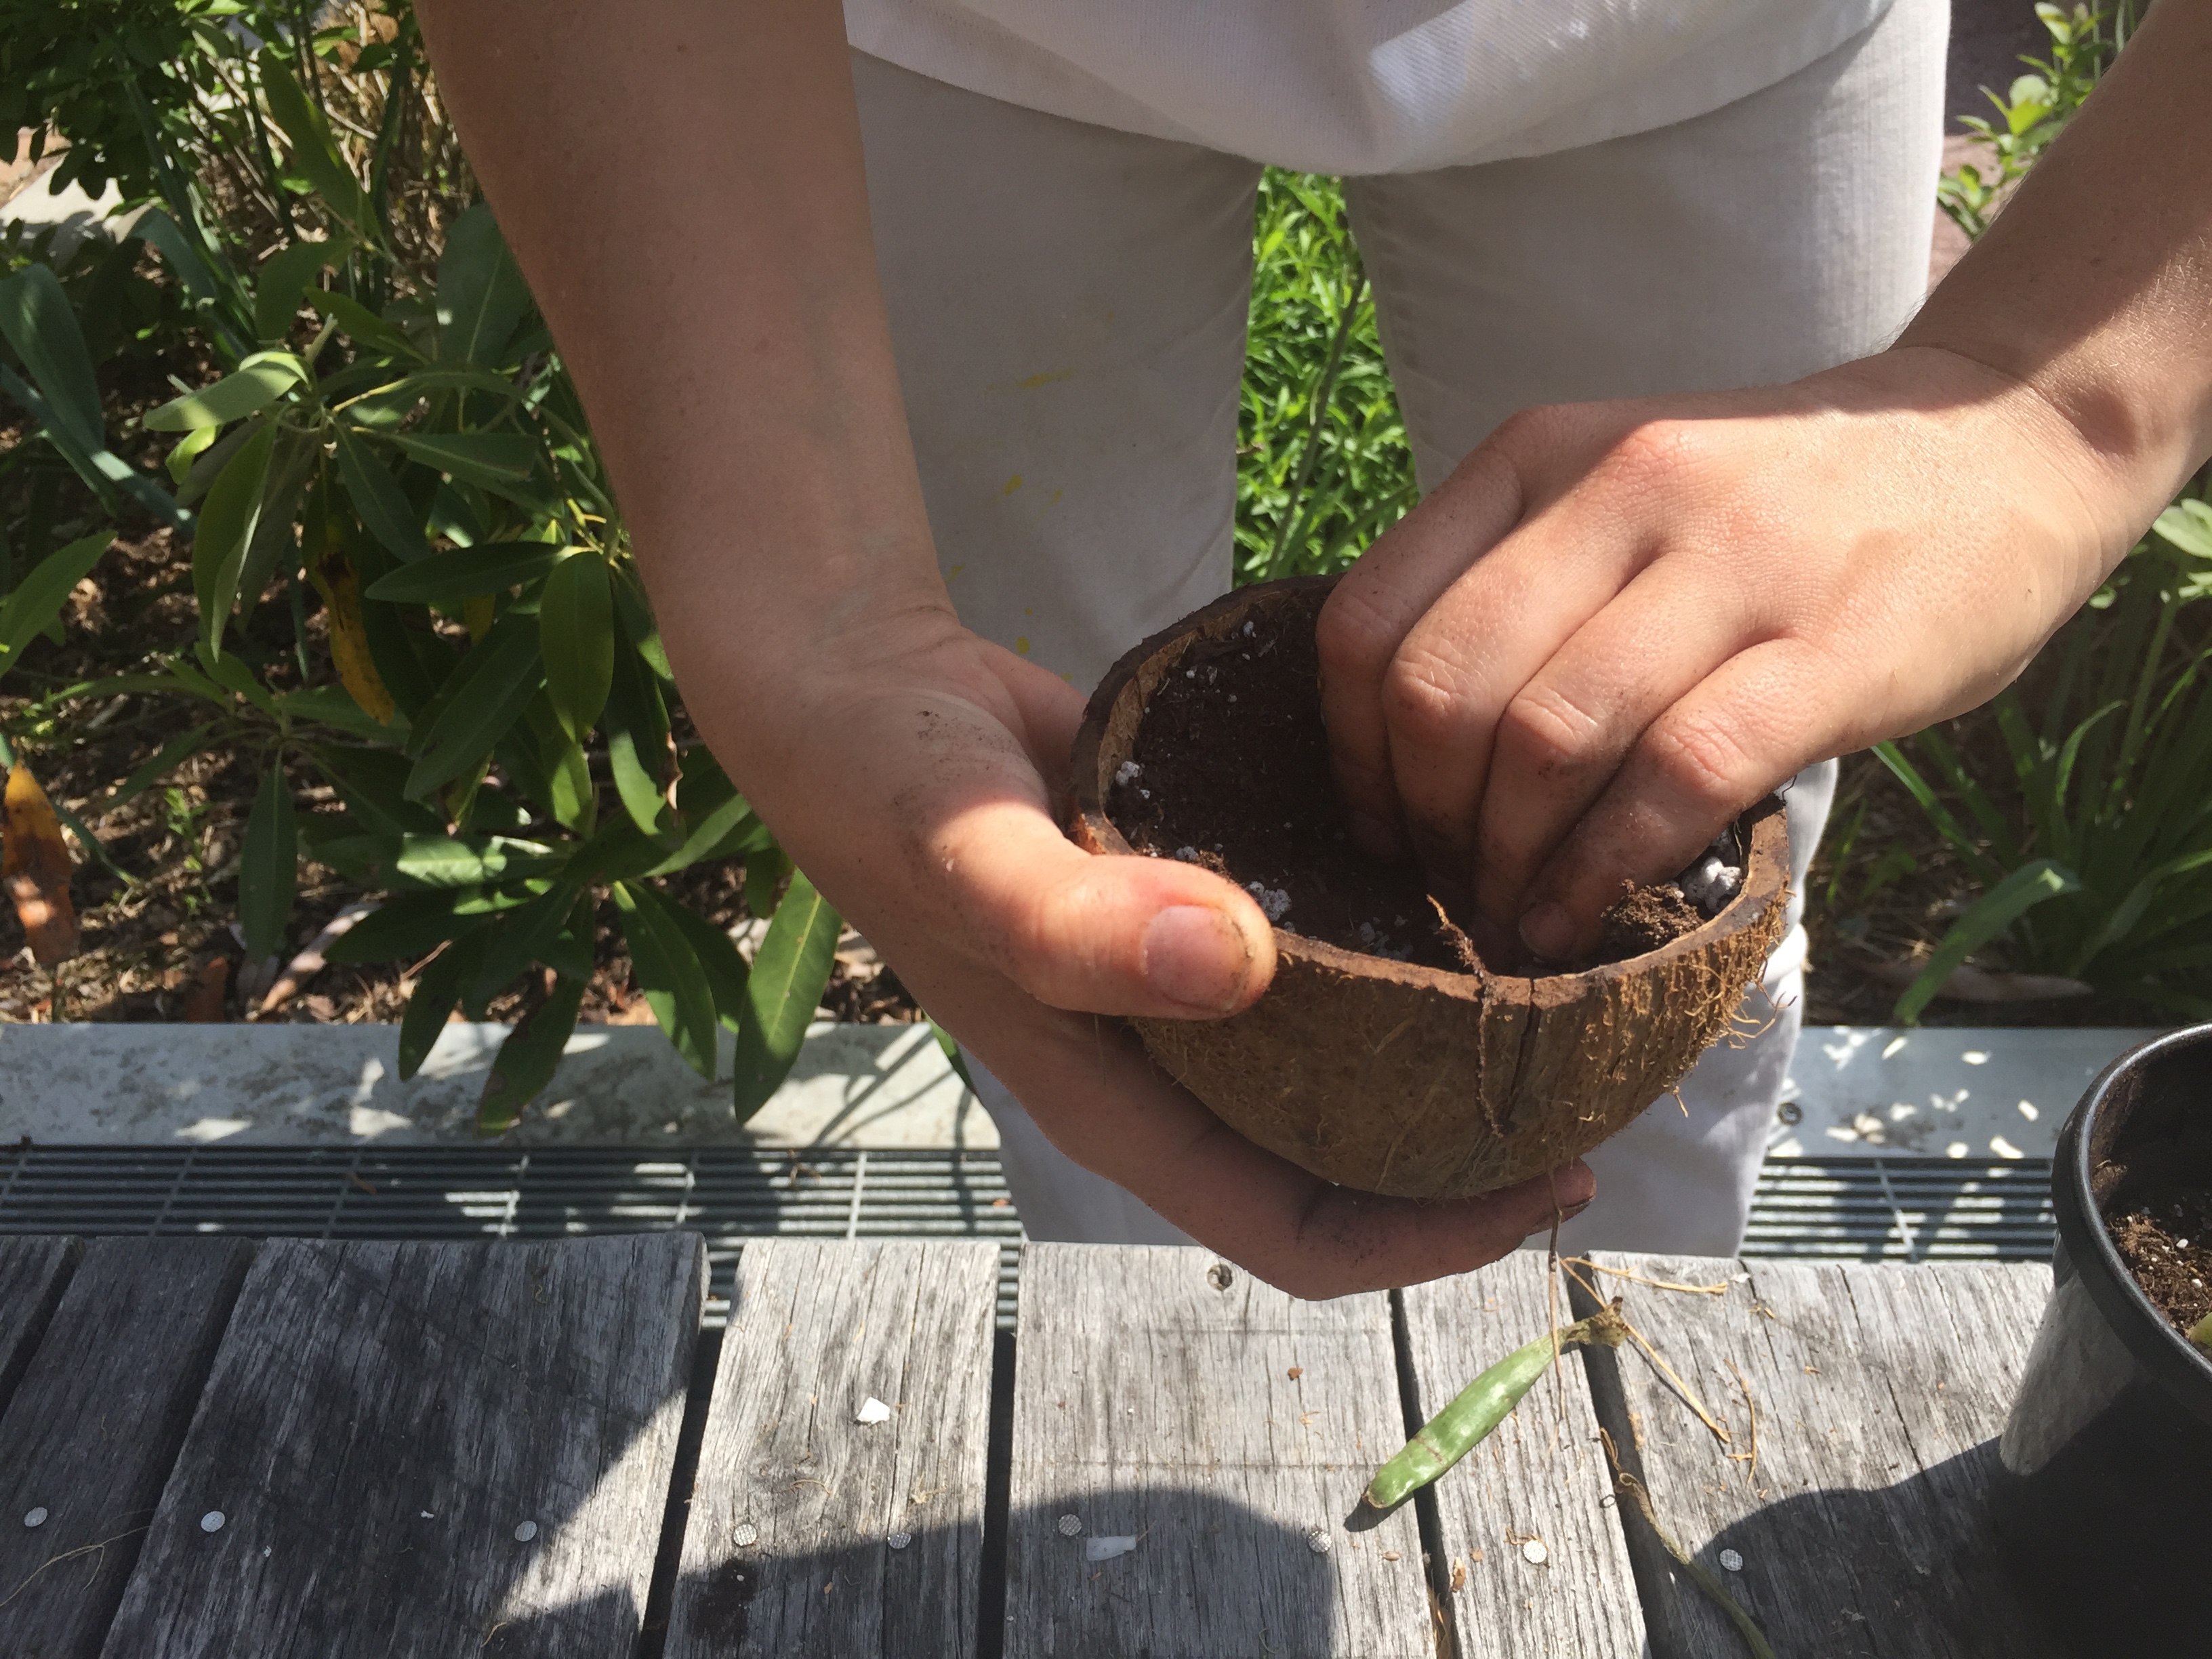
Find the half of the coconut shell that has the hole. Fill it with soil and open up a small crater in the center with your fingers. Gently place the plant into this hole and cover with more dirt. Water the plant at this step.


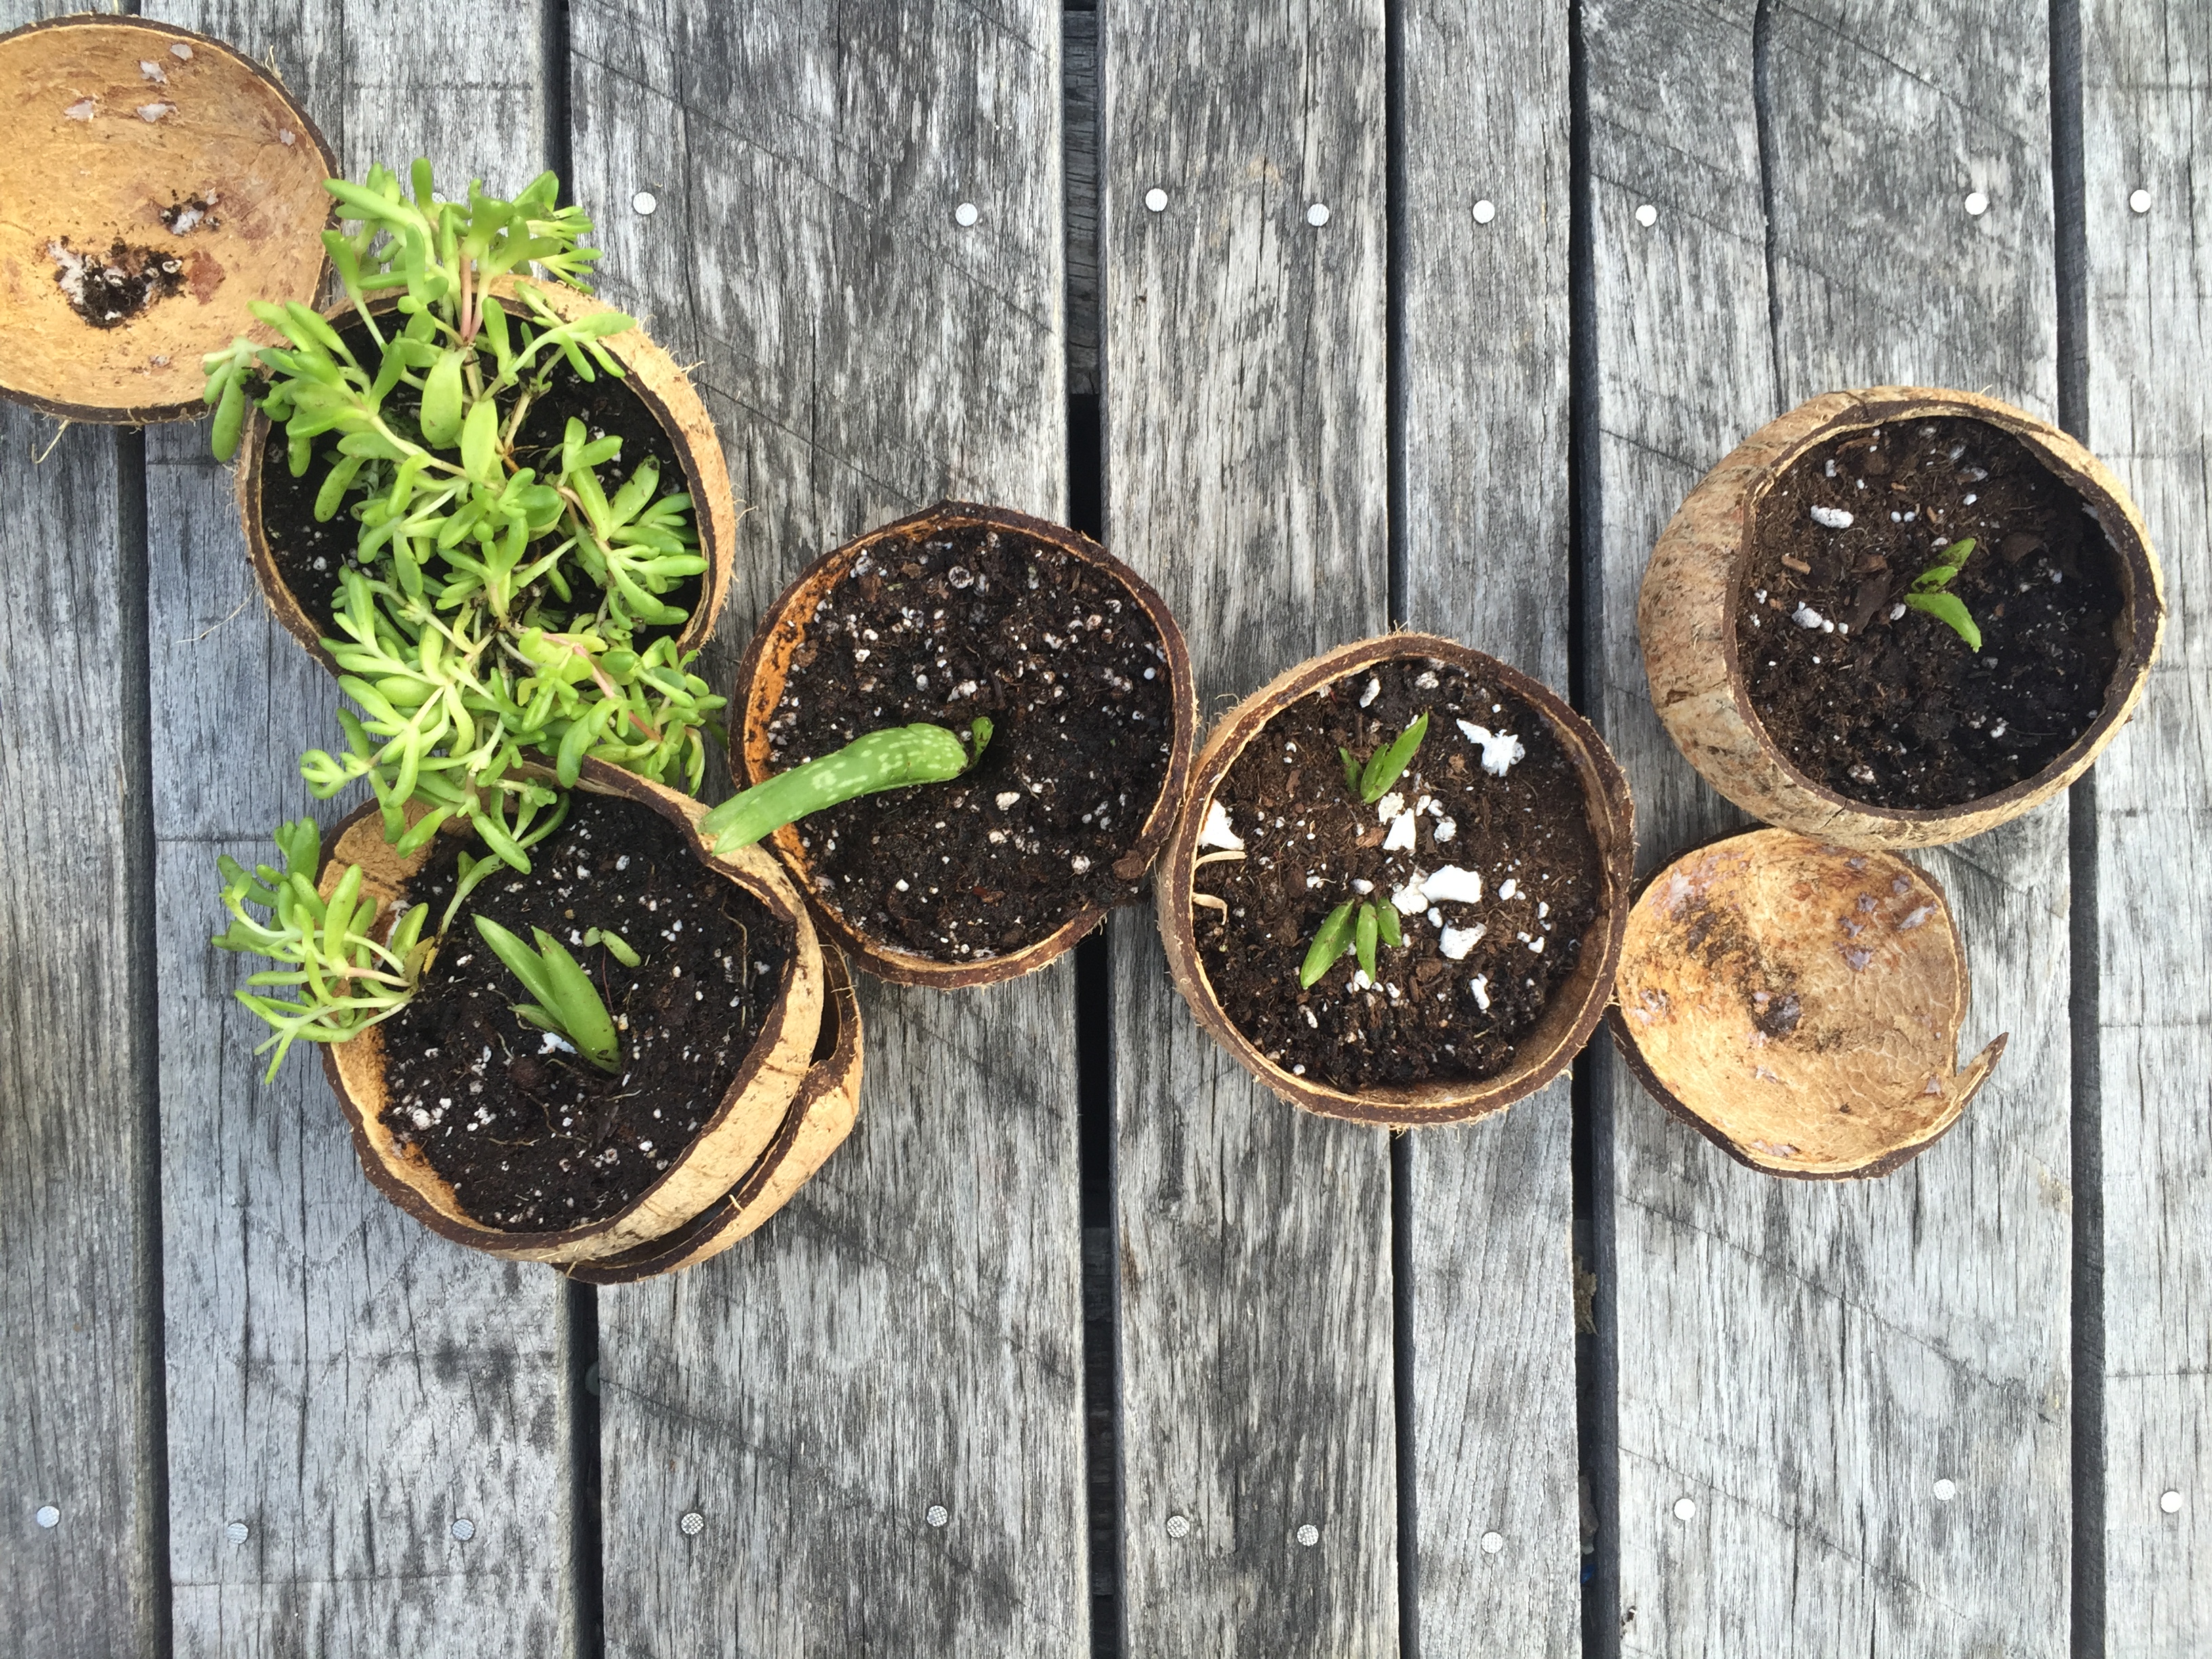
Place the other half of the coconut underneath this one, and slide them into the planter. Adjust the strings and knots around the coconut until it is secure.
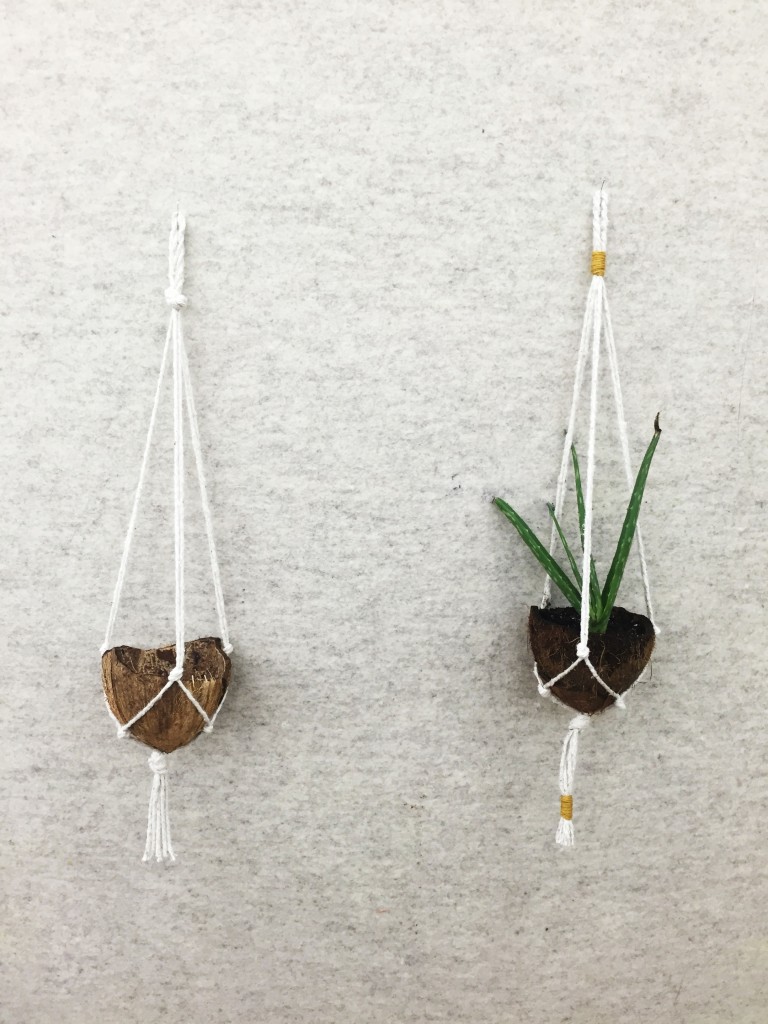
Note: Although the bottom shell acts like a tray, it is recommended to take the planter completely out when you need to water it.
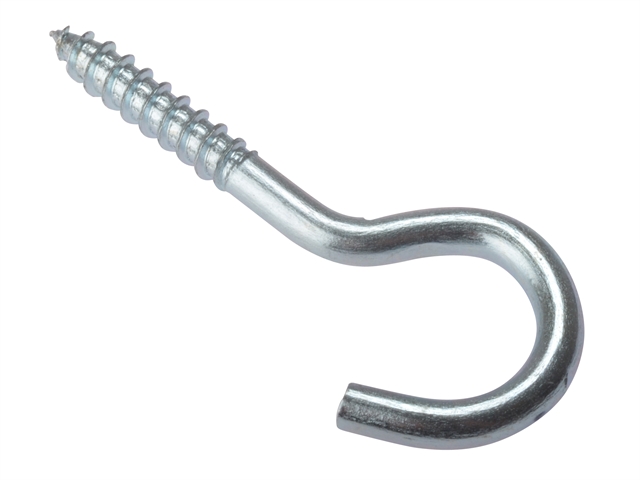
Hang with a screw hook from the ceiling, from a tree outside, or wherever is in need of a bit of spring green!